Strawberry Brownie Cheesecake Recipe
The first bite of this strawberry brownie cheesecake feels almost unfair. You get that deep chocolatey richness from the brownie layer, then this smooth and creamy cheesecake filling melts right into it, and just when you think it cannot get better, the fresh strawberry topping adds a bright fruity finish that ties everything together perfectly. Trust me, you’re going to love this. It tastes like something from a fancy bakery, but the process is surprisingly approachable right at home.
And now that you can already imagine those creamy layers and fudgy bites, let’s dive into what makes this dessert such a total game changer for celebrations, weekends, or honestly just because you deserve something amazing.
Why This Dessert Always Steals the Spotlight
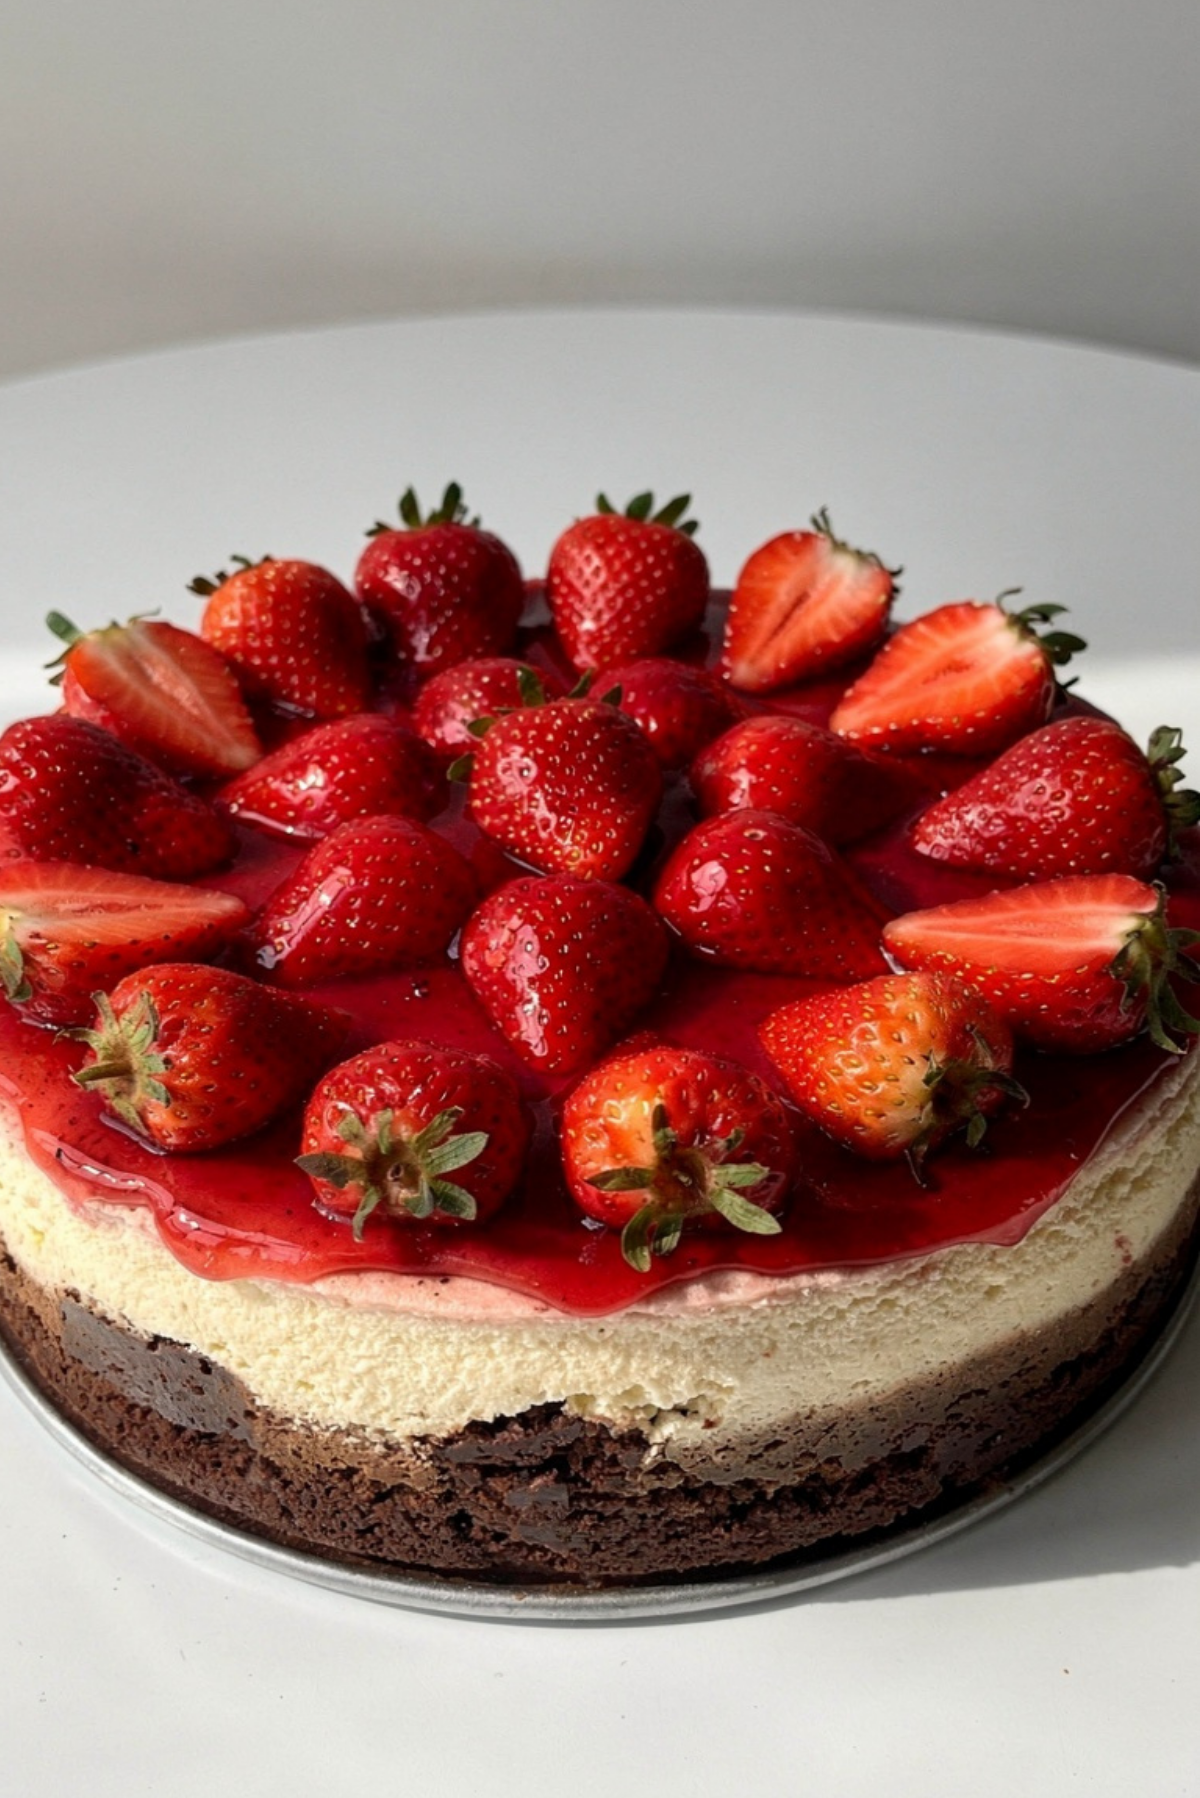
There’s something about combining brownies, cheesecake, and strawberries that instantly makes people stop talking at the table for a second. The textures alone are enough to make this unforgettable. The brownie base stays dense and fudgy, the cheesecake layer turns silky and creamy after baking, and the strawberries bring freshness that keeps every bite balanced.
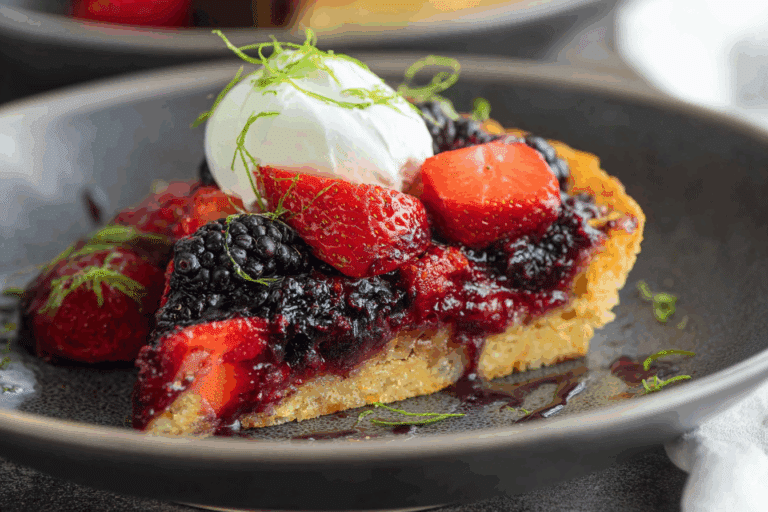
What makes it even better is how beautiful it looks once sliced. Those neat layers with glossy strawberries on top feel bakery worthy without requiring professional baking skills. Let me tell you, it’s worth every bite.
And while the flavor is reason enough to make it, the story behind cheesecake desserts makes it even more interesting.
A Sweet Blend of Classic Cheesecake and Brownie Tradition
Cheesecake itself dates back centuries, with versions appearing in ancient Greece before evolving into the creamy dessert we know today. Brownies, on the other hand, became popular in the United States during the late nineteenth century when bakers wanted something between a cake and a cookie.
Eventually, dessert lovers started combining the best parts of multiple desserts into one over the top creation, and that’s exactly how layered brownie cheesecakes became so beloved. Adding strawberries gives this version a fresh and slightly nostalgic feel, almost like a chocolate dipped strawberry transformed into a rich baked dessert.
And honestly, once you taste how all those layers work together, it makes perfect sense why this combination became such a favorite.
Reasons Bakers Keep Coming Back to This Recipe
This cheesecake is more than just pretty slices and creamy layers. It’s one of those reliable desserts that works for almost every occasion.
Versatile: It fits birthdays, holidays, dinner parties, or even cozy weekends at home. You can dress it up or keep it simple.
Budget-Friendly: Most ingredients are pantry staples or easy to find at any grocery store, which makes it surprisingly affordable for such an impressive dessert.
Quick and Easy: While it looks elaborate, the process is very manageable when broken into simple steps.
Customizable: You can swap toppings, add chocolate chips, or even drizzle caramel over the top for a different twist.
Crowd-Pleasing: Chocolate, cheesecake, and strawberries are basically impossible to resist together.
Make-Ahead Friendly: This dessert actually tastes even better after chilling overnight, which makes planning ahead easier.
Great for Leftovers: The texture stays creamy for days, and chilled slices taste incredible straight from the fridge.
And now that you know why this dessert deserves a spot in your kitchen, let’s talk about the little secrets that make it turn out perfectly every time.
Pro Tips for Bakery Style Results at Home
A few small tricks can completely change the final texture and appearance of your cheesecake.
- Use Room Temperature Ingredients: Softened cream cheese blends smoothly and prevents lumps in the filling.
- Do Not Overmix the Batter: Too much air in the cheesecake filling can cause cracks during baking.
- Line the Pan Properly: Parchment paper makes removing clean slices so much easier later.
- Cool Gradually: Letting the cheesecake cool slowly helps maintain that creamy texture without sinking.
- Chill Before Slicing: A few hours in the fridge allows the layers to fully set and makes cutting cleaner.
Now that the technique side feels less intimidating, let’s look at the kitchen tools that make the process smooth and stress free.
Kitchen Essentials That Make Baking Easier
You do not need professional equipment for this dessert, but a few reliable tools definitely help.
Springform Pan: Makes removing the cheesecake clean and easy without damaging the layers.
Mixing Bowls: Helpful for keeping the brownie batter, cheesecake filling, and topping separate and organized.
Electric Mixer: Creates a smooth cheesecake filling with minimal effort.
Rubber Spatula: Perfect for folding ingredients gently and scraping every bit of batter from the bowl.
Measuring Cups and Spoons: Accurate measurements keep the texture balanced.
Sharp Knife: Essential for getting those beautiful clean slices after chilling.
And now for the fun part, the ingredients that create all those irresistible layers.
Everything You’ll Need for This Decadent Dessert
Every ingredient here has a role in creating that rich, creamy, chocolatey balance that makes this dessert unforgettable.
- Unsalted Butter: 1 cup melted, adds richness and moisture to the brownie layer.
- Granulated Sugar: 2 cups, sweetens both the brownie base and cheesecake filling beautifully.
- Brown Sugar: 1/2 cup, deepens the flavor and keeps the brownies fudgy.
- Eggs: 5 large eggs, help bind the layers while creating structure.
- Vanilla Extract: 2 teaspoons, adds warmth and enhances the chocolate and strawberry flavors.
- Unsweetened Cocoa Powder: 3/4 cup, gives the brownie layer its deep chocolate flavor.
- All Purpose Flour: 1 cup, provides structure without making the brownies cakey.
- Salt: 1/2 teaspoon, balances sweetness and intensifies flavor.
- Cream Cheese: 24 ounces softened, creates the smooth and creamy cheesecake layer.
- Sour Cream: 1/2 cup, adds tanginess and keeps the filling silky.
- Fresh Strawberries: 2 cups sliced, bring brightness and freshness to the topping.
- Strawberry Jam: 1/3 cup, creates that glossy finish over the strawberries.
- Semi Sweet Chocolate Chips: 1/2 cup, melt into the brownie layer for extra richness.
And once you gather everything together, there are plenty of ways to adapt the recipe to your preferences.
Simple Ingredient Swaps That Work Beautifully
Baking should feel flexible and fun, so here are a few easy substitutions if needed.
Cream Cheese: Mascarpone can create an even silkier filling.
Sour Cream: Plain Greek yogurt works well for a similar tangy texture.
Fresh Strawberries: Raspberries or cherries also pair wonderfully with chocolate cheesecake.
Semi Sweet Chocolate Chips: Dark chocolate chips add deeper cocoa flavor.
All Purpose Flour: A gluten free baking blend can be used for a gluten free version.
And speaking of ingredients, a couple of them really deserve the spotlight.
The Ingredients That Truly Make This Dessert Shine
Cream Cheese: This is the heart of the cheesecake layer. Full fat cream cheese gives the filling its luxurious texture and rich flavor.
Fresh Strawberries: Their natural sweetness and slight tartness brighten the dessert and balance the dense chocolate brownie base perfectly.
And now comes the moment where your kitchen starts smelling absolutely incredible.
Let’s Bake This Incredible Layered Dessert
Once the ingredients are ready, the process comes together smoothly and feels genuinely satisfying from start to finish.
- Preheat Your Equipment: Preheat your oven to 350 degrees Fahrenheit. Line a 9 inch springform pan with parchment paper and lightly grease the sides.
- Combine Ingredients: In a large bowl, whisk together melted butter, 1 1/2 cups granulated sugar, brown sugar, 3 eggs, and vanilla extract. Stir in cocoa powder, flour, salt, and chocolate chips until combined. In another bowl, beat cream cheese with remaining 1/2 cup granulated sugar until smooth, then mix in 2 eggs and sour cream.
- Prepare Your Cooking Vessel: Spread the brownie batter evenly into the prepared springform pan, making sure the surface is level.
- Assemble the Dish: Carefully pour the cheesecake filling over the brownie layer and smooth the top gently with a spatula.
- Cook to Perfection: Bake for 50 to 55 minutes until the center is mostly set with a slight jiggle remaining.
- Finishing Touches: Cool completely, then refrigerate for at least 4 hours. Before serving, top with sliced strawberries and warm strawberry jam brushed over the fruit.
- Serve and Enjoy: Slice with a warm knife for clean layers and enjoy every creamy, fudgy, strawberry filled bite.
And once chilled and sliced, the textures become even more magical.
The Texture and Flavor Combination That Makes Every Bite Irresistible
The brownie layer stays dense, rich, and slightly chewy, almost like the center of the perfect chocolate brownie. Above it, the cheesecake filling becomes creamy and velvety, creating a soft contrast against the fudgy base.
Then the strawberries add freshness and brightness that cuts through the richness beautifully. The glossy jam coating gives the topping a sweet finish while making the dessert look extra stunning. Every layer has its own personality, yet somehow they work together perfectly.
And if you want to make the process even smoother, these little tricks help a lot.
Helpful Tricks for Foolproof Results
A few smart baking habits can make a huge difference.
- Use a warm knife for slicing: Clean slices instantly look more professional and neat.
- Do not rush chilling time: The cheesecake firms up properly after several hours in the fridge.
- Tap the pan gently before baking: This helps remove large air bubbles from the filling.
- Pat strawberries dry before topping: This prevents extra moisture from pooling on the cheesecake.
Even experienced bakers can run into small issues sometimes, so here are the most common mistakes to avoid.
Common Cheesecake Mistakes and How to Avoid Them
Nobody wants cracks or overbaked cheesecake, but thankfully they’re easy to prevent.
- Overmixing the filling: Too much air can cause cracks while baking.
- Skipping room temperature ingredients: Cold cream cheese creates lumps that are difficult to smooth out.
- Overbaking: The center should still have a slight jiggle when removed from the oven.
- Cutting too early: Warm cheesecake does not slice cleanly and may fall apart.
And now let’s take a quick look at the nutrition details.
Nutrition Information You Should Know
Servings: 12
Calories per serving: 520
Note: These are approximate values.
And since timing always matters in baking, here’s exactly how long to plan for.
Timing Breakdown for Easy Planning
Prep Time: 30 minutes
Cook Time: 55 minutes
Total Time: 1 hour 25 minutes plus chilling time
The good news is that this dessert actually becomes even better when made ahead.
Smart Make Ahead and Storage Ideas
One of the best things about this cheesecake is how well it stores. You can bake it a full day ahead and keep it chilled until serving. In fact, the flavors deepen overnight and the texture becomes even creamier.
Store leftovers covered in the refrigerator for up to 5 days. For longer storage, wrap individual slices tightly and freeze for up to 2 months. Let frozen slices thaw overnight in the refrigerator before serving.
And once it’s chilled and ready, serving options become really fun.
Delicious Ways to Serve This Cheesecake
This dessert shines beautifully on its own, but a few additions can make it even more special.
Serve slices with whipped cream, extra fresh strawberries, or a drizzle of melted chocolate. A hot cup of coffee or espresso pairs perfectly with the rich brownie layer. For summer gatherings, a scoop of vanilla frozen yogurt beside each slice feels especially refreshing.
And if you somehow end up with leftovers, there are creative ways to enjoy them too.
Fun Ideas for Transforming Leftover Slices
Leftover cheesecake can become entirely new desserts with very little effort.
Turn chilled slices into milkshakes by blending them with milk and ice cream. Crumble pieces over vanilla yogurt for an indulgent parfait. You can even freeze small cubes and dip them in melted chocolate for mini cheesecake bites.
And before you start baking your next one, here are a few final tips worth remembering.
Extra Little Details That Make a Big Difference
Keeping ingredients organized before starting helps the process feel much calmer. Measuring everything first prevents mistakes and keeps the layers balanced.
Using high quality cocoa powder also makes a noticeable difference in flavor. And honestly, fresh strawberries always taste better here than frozen ones because they keep the topping vibrant and glossy.
Presentation matters too, especially for a dessert this beautiful.
Easy Presentation Tricks for a Stunning Finish
Arrange strawberry slices neatly in overlapping circles for an elegant bakery style appearance. A light dusting of cocoa powder around the edges adds contrast and makes the red strawberries pop visually.
For parties or celebrations, garnish each slice with a small whole strawberry right before serving. It looks gorgeous and instantly makes the dessert feel extra special.
And if you enjoy experimenting in the kitchen, there are plenty of delicious twists to try.
Fun Variations You Can Experiment With
- Chocolate Covered Strawberry Version: Add melted chocolate drizzle over the strawberry topping for extra richness.
- Berry Mix Cheesecake: Combine strawberries, raspberries, and blueberries for a colorful fruit topping.
- White Chocolate Twist: Stir melted white chocolate into the cheesecake filling for extra sweetness.
- Espresso Brownie Base: Add a teaspoon of instant espresso powder to the brownie batter for deeper chocolate flavor.
- Mini Cheesecake Bars: Bake the recipe in a square pan and cut into smaller portable bars.
FAQ’s
Q1: Can I use frozen strawberries?
Frozen strawberries can work, but fresh strawberries give better texture and appearance.
Q2: How do I know when the cheesecake is done baking?
The center should still jiggle slightly while the edges look set.
Q3: Can I make this without a springform pan?
Yes, but removing slices will be harder. Lining the pan with parchment helps.
Q4: Why did my cheesecake crack?
Usually from overmixing or overbaking the filling.
Q5: Can I freeze the whole cheesecake?
Yes, wrap it tightly and freeze for up to 2 months.
Q6: Do I need a water bath?
No, this recipe works beautifully without one.
Q7: Can I use boxed brownie mix?
Yes, although homemade brownie batter gives richer flavor.
Q8: How long should I chill it before slicing?
At least 4 hours, though overnight is even better.
Q9: Can I add chocolate ganache on top?
Absolutely, it pairs wonderfully with the strawberries.
Q10: What’s the best way to get clean slices?
Use a sharp knife dipped in warm water and wipe it clean between cuts.
Conclusion
This strawberry brownie cheesecake is the kind of dessert people remember long after the plates are empty. Between the fudgy brownie base, creamy cheesecake center, and fresh strawberry topping, every bite feels rich, balanced, and completely satisfying. It’s comforting, beautiful, and honestly easier than it looks. Trust me, once you make it, this one’s going to become a regular favorite in your kitchen.
Print
Strawberry Brownie Cheesecake Recipe
- Prep Time: 30 minutes
- Cook Time: 55 minutes
- Total Time: 1 hour 25 minutes
- Yield: 12 servings 1x
- Category: Dessert
- Method: Baking
- Cuisine: American
- Diet: Vegetarian
Description
A rich and creamy strawberry brownie cheesecake with a fudgy brownie base, silky cheesecake filling, and fresh strawberry topping finished with glossy strawberry jam.
Ingredients
- 1 cup unsalted butter, melted
- 2 cups granulated sugar
- 1/2 cup brown sugar
- 5 large eggs
- 2 teaspoons vanilla extract
- 3/4 cup unsweetened cocoa powder
- 1 cup all purpose flour
- 1/2 teaspoon salt
- 24 ounces cream cheese, softened
- 1/2 cup sour cream
- 2 cups fresh strawberries, sliced
- 1/3 cup strawberry jam
- 1/2 cup semi sweet chocolate chips
Instructions
- Preheat oven to 350 degrees Fahrenheit. Line a 9 inch springform pan with parchment paper and lightly grease the sides.
- In a large bowl, whisk together melted butter, 1 1/2 cups granulated sugar, brown sugar, 3 eggs, and vanilla extract.
- Stir in cocoa powder, flour, salt, and chocolate chips until combined.
- In another bowl, beat cream cheese with remaining 1/2 cup granulated sugar until smooth. Mix in 2 eggs and sour cream.
- Spread brownie batter evenly into the prepared pan.
- Pour cheesecake filling over brownie layer and smooth the top.
- Bake for 50 to 55 minutes until center is mostly set with a slight jiggle.
- Cool completely, then refrigerate for at least 4 hours.
- Top with sliced strawberries and warm strawberry jam before serving.
- Slice and serve chilled.
Notes
- Use room temperature cream cheese for the smoothest filling.
- Chill overnight for even cleaner slices and richer flavor.
- Pat strawberries dry before adding them on top to avoid excess moisture.
- Use a warm knife for neat slices.
Nutrition
- Serving Size: 1 slice
- Calories: 520
- Sugar: 38g
- Sodium: 260mg
- Fat: 32g
- Saturated Fat: 18g
- Unsaturated Fat: 11g
- Trans Fat: 0g
- Carbohydrates: 52g
- Fiber: 3g
- Protein: 8g
- Cholesterol: 135mg
Keywords: strawberry brownie cheesecake, brownie cheesecake, strawberry cheesecake dessert, chocolate strawberry cheesecake, layered cheesecake