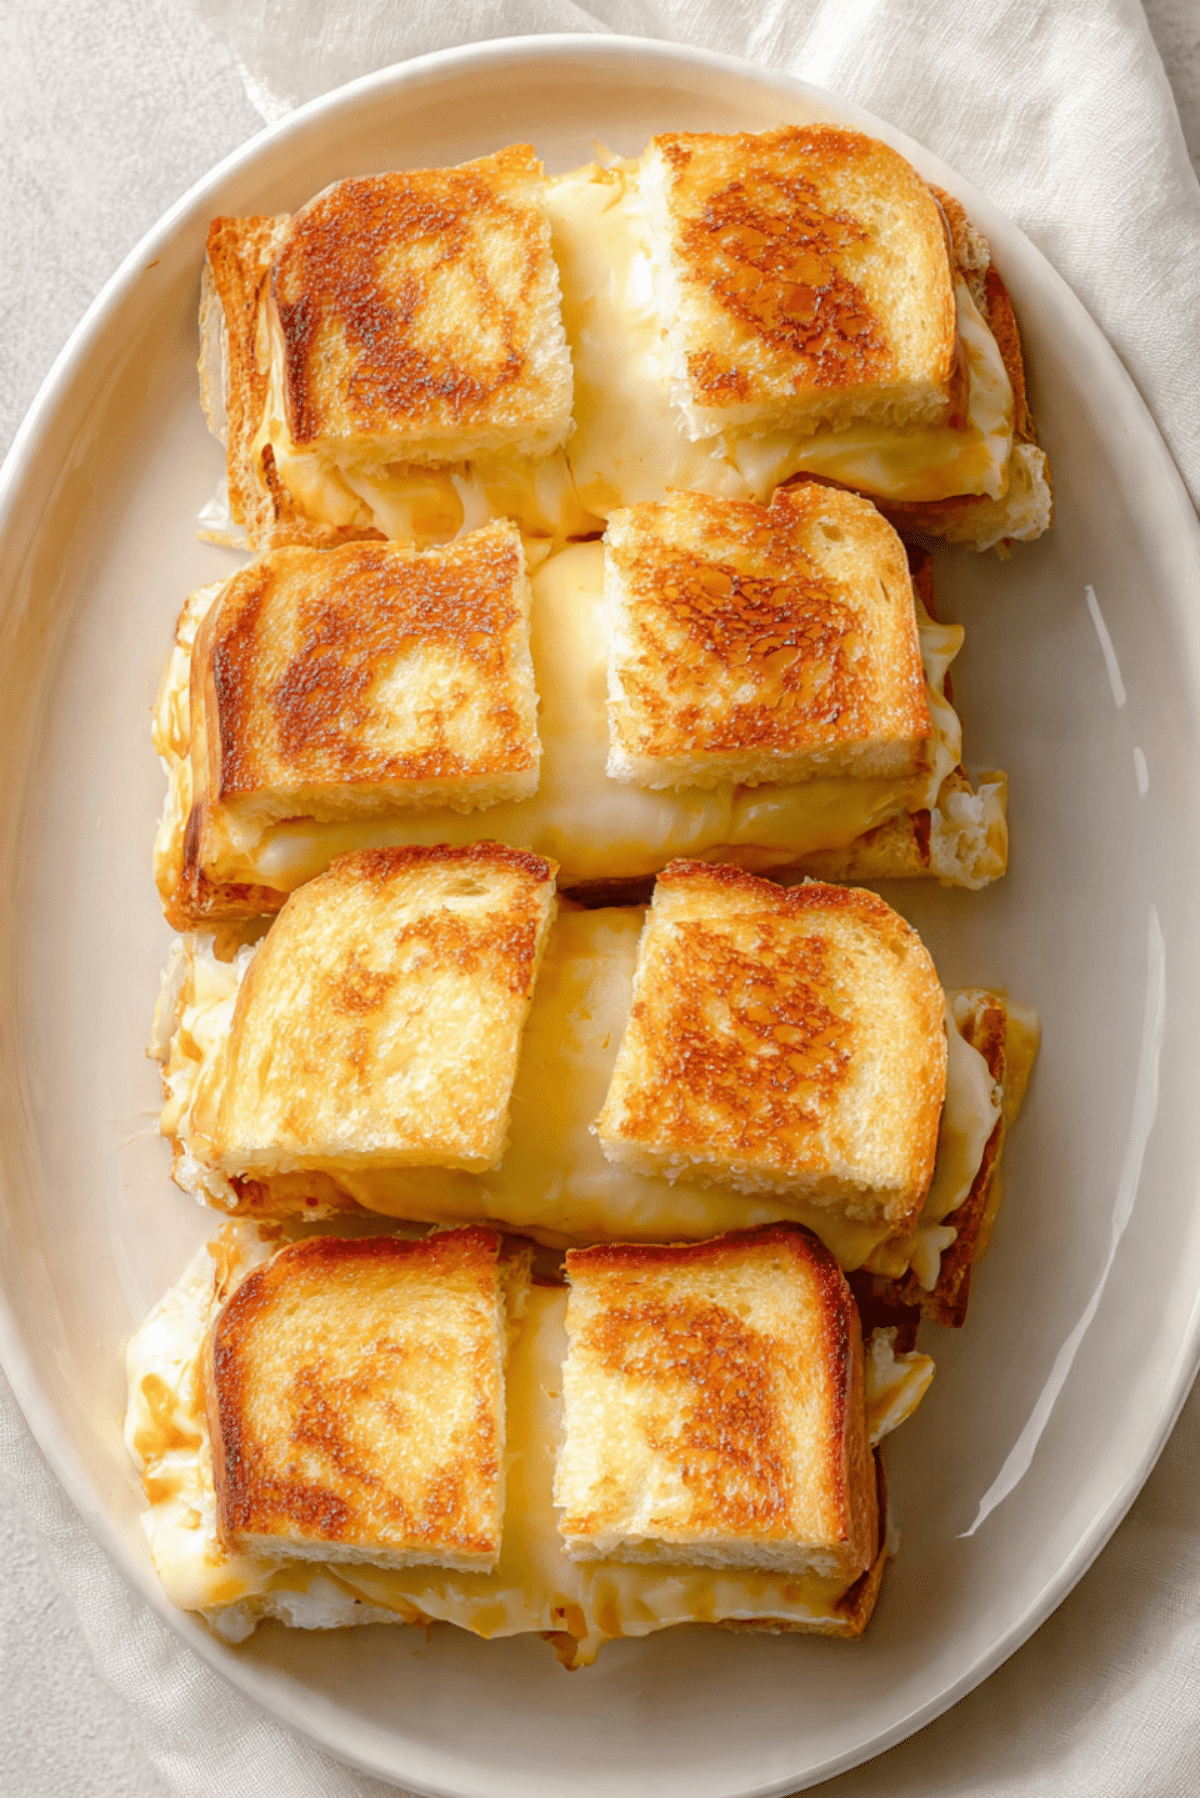
Hawaiian Roll Grilled Cheese Recipe
There is something almost magical about the moment butter hits a warm pan and that soft bread begins to sizzle. Now imagine that same moment, but with sweet, pillowy Hawaiian rolls hugging gooey melted cheese inside. Trust me, you’re going to love this. It is cozy, a little indulgent, and honestly hard to stop eating once you take that first bite.
What Makes This Comfort Food So Irresistible
It starts with the contrast. The outside turns golden and lightly crisp, while the inside stays soft and slightly sweet. Then comes the cheese, melted just enough to stretch with every bite. The balance between sweet bread and savory filling is what makes this one a total game-changer. It feels simple, but every bite is layered with flavor and texture that just works.
A Little Backstory Behind These Sweet Rolls
Hawaiian rolls have a rich history that traces back to Portuguese sweet bread traditions brought to Hawaii. Over time, they evolved into the soft, slightly sweet rolls we know today. They became a staple for sliders and quick sandwiches, and now they have found their way into this warm, melty comfort dish. It is a fun twist that blends classic grilled cheese with a touch of island sweetness.
Why You Will Keep Coming Back To This Dish
This is one of those recipes that fits into almost any moment, and now let’s break down exactly why it works so well:
Versatile: You can keep it classic with just cheese or layer in extras like tomatoes or herbs for a different twist each time.
Budget-Friendly: With just a few simple ingredients, you can create something that feels rich and satisfying without spending much.
Quick and Easy: From start to finish, you are looking at less than 20 minutes, which makes it perfect for busy days.
Customizable: Switch cheeses, add spreads, or even mix in spices to match your mood.
Crowd-Pleasing: Everyone loves melted cheese and toasted bread, it is that simple.
Make-Ahead Friendly: You can prep the rolls and cheese ahead, then just assemble and cook when ready.
Great for Leftovers: If you have extras, they reheat surprisingly well and stay delicious.
Pro Tips That Make All the Difference
Before we head into the kitchen, let me share a few small tricks that can take this from good to unforgettable:
- Use room temperature butter so it spreads evenly without tearing the bread
- Cook on medium heat so the bread toasts slowly while the cheese melts perfectly
- Press lightly with a spatula to help everything fuse together
- Let it rest for a minute after cooking so the cheese settles slightly
Tools You Will Need For a Smooth Cooking Experience
Getting everything ready makes the process feel effortless:
Non-stick skillet: Helps achieve that perfect golden crust without sticking
Spatula: Essential for flipping without breaking the rolls
Butter knife: For evenly spreading butter
Cutting board: Keeps everything organized while assembling
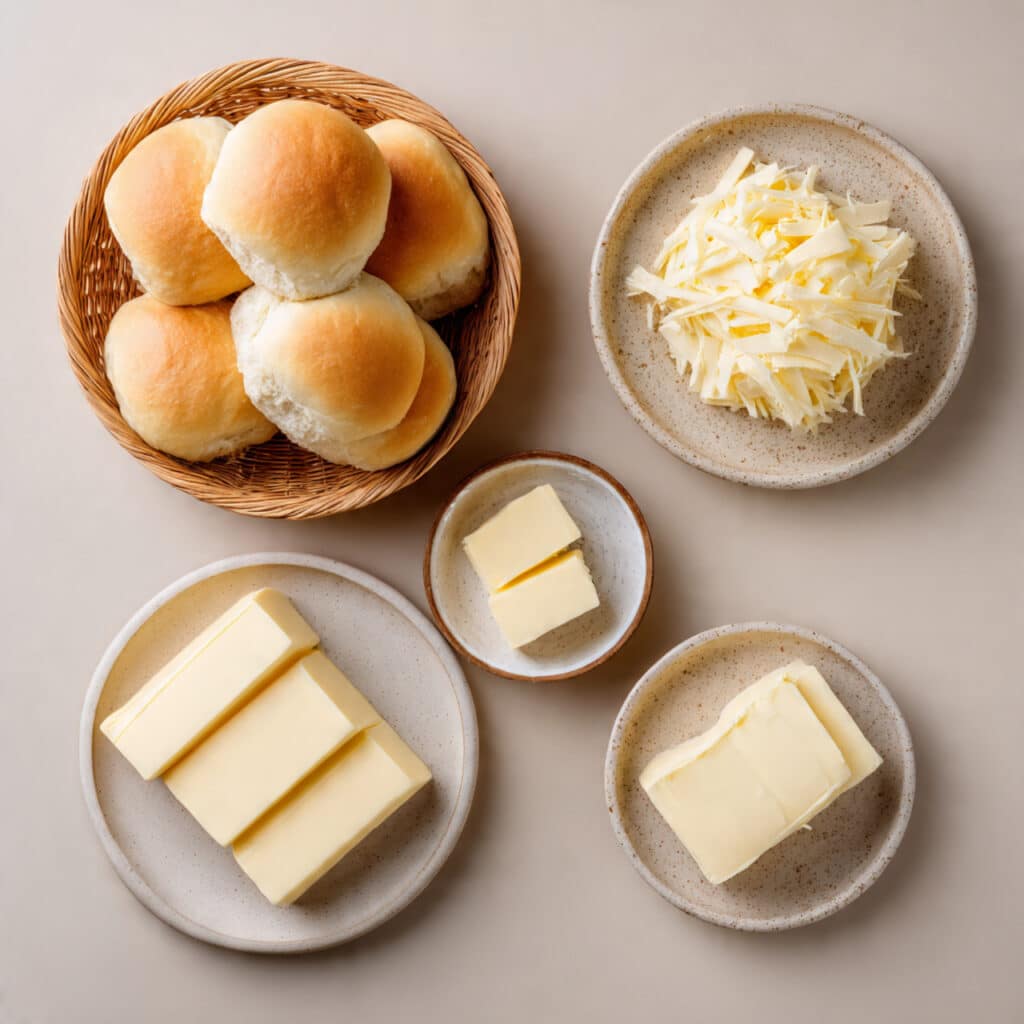
Ingredients You Will Need For This Cozy Dish
Now let’s gather everything, and you will notice how simple yet perfectly balanced these ingredients are:
- Hawaiian Rolls: 12 rolls, soft and slightly sweet, they bring that signature flavor
- Cheddar Cheese Slices: 6 slices, rich and melty for that classic taste
- Mozzarella Cheese: 1 cup shredded, adds stretch and creaminess
- Butter: 3 tablespoons, softened, for that golden crisp exterior
Easy Swaps If You Want to Get Creative
And if you feel like experimenting a bit, here are a few simple swaps:
Cheddar Cheese: Try gouda or Swiss for a different flavor profile
Mozzarella: Use provolone for a slightly sharper melt
Butter: Olive oil works if you want a lighter touch
Hawaiian Rolls: Brioche buns can give a similar soft sweetness
Spotlight On the Stars of the Dish
Let’s take a closer look at what really makes this shine:
Hawaiian Rolls: Their soft texture and hint of sweetness create the perfect contrast to the savory cheese
Cheddar Cheese: It brings depth and that familiar comforting flavor that ties everything together
Let’s Get Cooking Step by Step
Now comes the fun part, and I will walk you through it so it feels easy and natural:
- Preheat Your Equipment: Heat a non-stick skillet over medium heat so it is ready for even cooking
- Combine Ingredients: Mix the shredded mozzarella with torn cheddar slices for a balanced filling
- Prepare Your Cooking Vessel: Lightly butter one side of each roll half
- Assemble the Dish: Place cheese between the rolls, keeping the buttered sides facing outward
- Cook to Perfection: Place in the skillet and cook until golden, then flip and repeat until both sides are crisp and the cheese is melted
- Finishing Touches: Remove from heat and let rest briefly to settle the filling
- Serve and Enjoy: Slice and serve warm while the cheese is still perfectly gooey
The Magic of Texture and Flavor
As you bite in, you get that crisp outer layer followed by the soft interior. Then the cheese stretches and melts across your palate, blending savory richness with a subtle sweetness from the rolls. It is simple, but the balance makes every bite feel satisfying.
Helpful Tips to Keep Things Perfect
- Keep heat moderate to avoid burning the bread before the cheese melts
- Use a lid briefly to help trap heat and melt cheese faster
- Slice evenly for consistent cooking
What to Watch Out For While Cooking
- Cooking on high heat, lower it to avoid burning
- Overfilling with cheese, it can spill out too much
- Skipping the rest time, which helps everything set properly
Nutrition Snapshot
Servings: 6
Calories per serving: 320
Note: These are approximate values.
Timing Breakdown
Prep Time: 10 minutes
Cook Time: 10 minutes
Total Time: 20 minutes
Make Ahead and Storage Tips
If you want to prepare ahead, assemble the rolls and store them covered in the fridge. When ready, cook fresh for the best texture. Leftovers can be refrigerated and reheated in a skillet to bring back that crispiness. Freezing is possible, but fresh always tastes best.
Serving Ideas to Make It Special
Serve these with a warm bowl of tomato soup or a fresh green salad. You can even cut them into smaller sliders for gatherings, which always disappear quickly.
Fun Ways to Use Leftovers
Turn leftovers into crouton-style bites for soups or chop them into small pieces and toss into a savory breakfast scramble.
Extra Tips for Even Better Results
A light sprinkle of garlic powder on the buttered side adds a subtle kick. Fresh herbs like parsley can brighten things up just before serving.
Make It Look as Good as It Tastes
Serve on a simple white plate, cut diagonally so the melted cheese shows. That visual stretch is always a winner and makes it instantly more appetizing.
Variations You Can Try Next
Try adding thin tomato slices for freshness, or a layer of caramelized onions for sweetness. A spicy version with a touch of chili flakes can also be incredible.
FAQ’s
Q1: Can I use different bread?
Yes, but the sweetness of these rolls gives a unique flavor.
Q2: What cheese melts best?
Mozzarella and cheddar together create the perfect balance.
Q3: Can I make it in the oven?
Yes, bake at 180°C until golden and melted.
Q4: How do I keep it from burning?
Cook on medium heat and watch closely.
Q5: Can I add vegetables?
Absolutely, tomatoes or spinach work well.
Q6: Is it freezer friendly?
It can be frozen, but texture is best fresh.
Q7: Can I make it dairy free?
Use plant-based butter and cheese alternatives.
Q8: How do I reheat it?
Use a skillet for best texture.
Q9: Can I make it ahead?
Yes, assemble ahead and cook fresh.
Q10: What pairs well with it?
Soup, salad, or even fries make great sides.
Conclusion
This one is all about comfort, simplicity, and flavor that just makes you smile. It is quick enough for busy days and satisfying enough to feel special. Let me tell you, it is worth every bite, and once you try it, it might just become a regular in your kitchen.
Print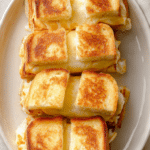
Hawaiian Roll Grilled Cheese Recipe
- Prep Time: 10 minutes
- Cook Time: 10 minutes
- Total Time: 20 minutes
- Yield: 6 servings 1x
- Category: Main Course
- Method: Stovetop
- Cuisine: American
- Diet: Vegetarian
Description
Golden, buttery Hawaiian rolls filled with perfectly melted cheddar and mozzarella cheese, creating a sweet and savory grilled sandwich that is crisp on the outside and irresistibly gooey inside.
Ingredients
- 12 Hawaiian rolls
- 6 cheddar cheese slices
- 1 cup shredded mozzarella cheese
- 3 tablespoons butter, softened
Instructions
- Preheat a non-stick skillet over medium heat.
- Combine shredded mozzarella with torn cheddar slices in a bowl.
- Slice Hawaiian rolls in half and spread butter evenly on the outer sides.
- Assemble sandwiches by placing cheese mixture between the rolls, keeping buttered sides facing outward.
- Place sandwiches in the skillet and cook until golden brown on one side.
- Flip carefully and cook the other side until crispy and cheese is fully melted.
- Remove from heat, let rest briefly, then slice and serve warm.
Notes
- Use medium heat to avoid burning the bread before the cheese melts.
- Cover the pan briefly to help the cheese melt faster.
- Let the sandwiches rest for a minute before slicing for better texture.
Nutrition
- Serving Size: 1 serving
- Calories: 320
- Sugar: 6g
- Sodium: 520mg
- Fat: 18g
- Saturated Fat: 10g
- Unsaturated Fat: 6g
- Trans Fat: 0g
- Carbohydrates: 26g
- Fiber: 1g
- Protein: 12g
- Cholesterol: 45mg
Keywords: hawaiian roll grilled cheese, sweet roll sandwich, cheesy sliders, easy comfort food, quick grilled cheese