Homemade Cottage Cheese with Lemon Juice
There is something quietly satisfying about watching warm milk turn into tender little curds right in your own kitchen. Homemade Cottage Cheese with Lemon Juice feels simple, almost old-fashioned, but the result is fresh, creamy, and honestly a little magical. Trust me, you’re going to love this.
Why This Fresh Cheese Feels So Special
This recipe is all about comfort and control. You get soft curds, a clean dairy flavor, and that gentle lemon brightness without needing anything fancy. The texture is tender, lightly creamy, and much fresher than most store-bought tubs.
A Little Kitchen History in Every Spoonful
Cottage cheese has been made in home kitchens for generations because it needs only milk, acid, heat, and patience. Long before modern packaged dairy, cooks used leftover milk and natural souring to create fresh curds. Lemon juice gives the same cozy idea a bright and reliable twist.
Why This Recipe Works So Well
Once you see how simple the method is, this one’s a total game-changer. It is practical, gentle, and perfect for everyday meals.
Versatile: Serve it sweet with fruit and honey or savory with herbs, pepper, and toast.
Budget-Friendly: A gallon of milk turns into a generous batch of fresh cheese without expensive equipment.
Quick and Easy: The curds form fast, and most of the time is just heating, resting, and draining.
Customizable: Make it drier, creamier, saltier, or brighter depending on how you like it.
Crowd-Pleasing: The flavor is mild, fresh, and easy to pair with breakfast, snacks, or light lunches.
Make-Ahead Friendly: It chills beautifully and tastes even better once the curds settle.
Great for Leftovers: Stir it into eggs, spread it on toast, or tuck it into wraps.
Chef Tips for Soft, Tender Curds
A few small moves make a big difference here.
- Heat the milk gently so the bottom does not scorch.
- Use fresh lemon juice for the cleanest flavor.
- Let the curds rest before draining so they firm up naturally.
- Drain less for creamy curds and longer for a drier texture.
- Stir gently after draining so the curds stay soft.
Tools You’ll Need Before You Begin
Keep the setup simple and close by, because once the milk curdles, things move quickly.
Large pot: Helps heat the milk evenly.
Thermometer: Makes it easier to reach the right temperature.
Wooden spoon: Gentle enough for stirring milk and curds.
Fine mesh strainer: Holds the curds while the whey drains.
Cheesecloth: Keeps the curds tender and prevents tiny pieces from slipping through.
Mixing bowl: Catches the whey while draining.
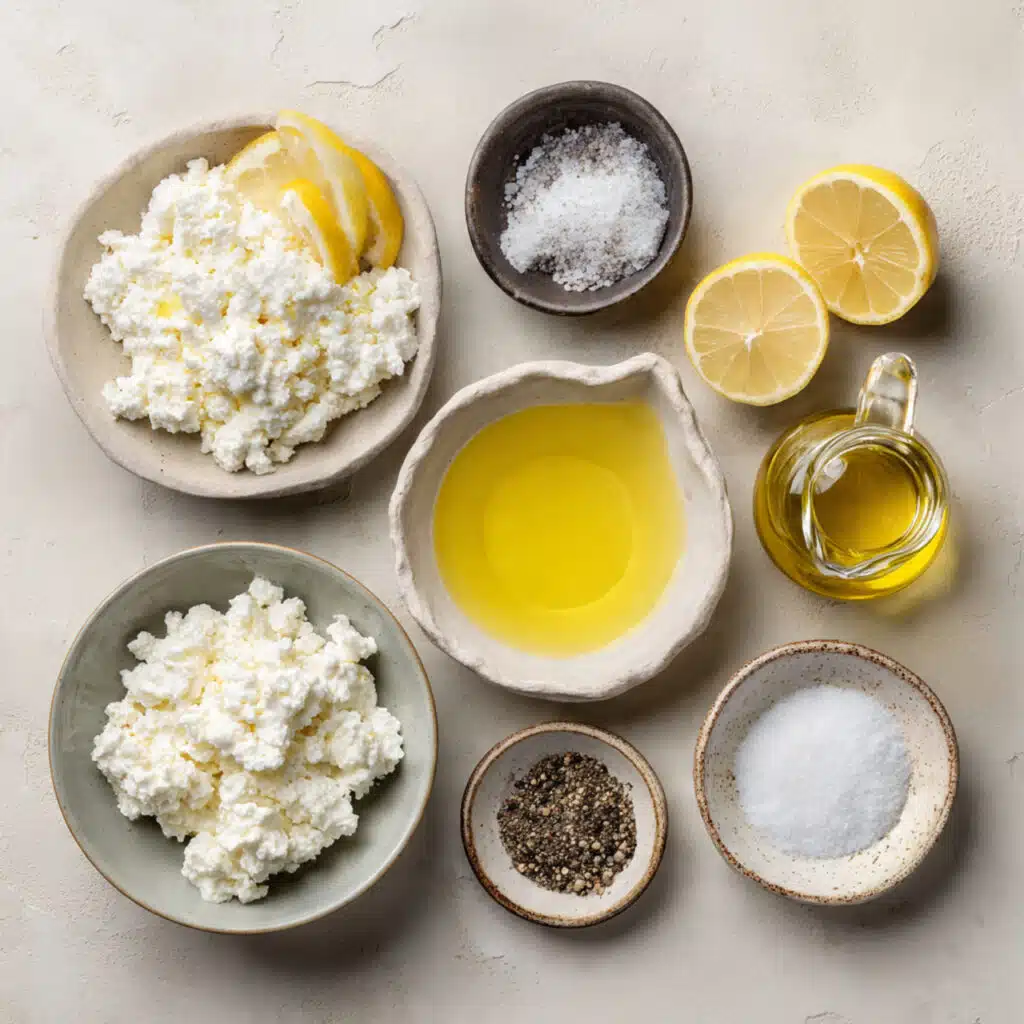
Ingredients You Will Need for This Fresh Cheese
Each ingredient has a clear job, and together they make a clean, creamy, lemon-kissed cheese.
- Whole milk: 1 gallon, gives the curds richness and body.
- Fresh lemon juice: 1/2 cup, helps separate the milk into curds and whey.
- Fine sea salt: 1 teaspoon, brings out the fresh dairy flavor.
- Heavy cream: 1/4 cup, stirred in after draining for a softer, creamier finish.
Simple Substitutions That Still Work
Now that the main ingredients are clear, here are a few gentle swaps.
Whole milk: Use 2 percent milk for a lighter version, though the curds may be less rich.
Fresh lemon juice: Use white vinegar in the same amount for a sharper, cleaner curd.
Fine sea salt: Use kosher salt, adding a little at a time to taste.
Heavy cream: Use a splash of milk for a lighter finish.
The Ingredients That Make the Magic
Whole Milk: This is where the richness begins. The better the milk tastes, the fresher the cheese will taste.
Lemon Juice: This is the quiet hero. It gives the curds structure and adds a soft brightness without making the cheese taste sour.
Let’s Turn Warm Milk Into Fresh Curds
Here are the steps you’re going to follow, and yes, it really is this simple.
- Preheat Your Equipment: Warm a large pot over low heat for a moment, then pour in 1 gallon whole milk.
- Combine Ingredients: Heat the milk slowly to 190°F, stirring often. Turn off the heat and gently stir in 1/2 cup fresh lemon juice.
- Prepare Your Cooking Vessel: Let the pot sit undisturbed for 10 minutes so the curds can separate from the whey.
- Assemble the Dish: Line a fine mesh strainer with cheesecloth and place it over a large bowl.
- Cook to Perfection: Pour the curds and whey into the lined strainer and drain for 10 to 15 minutes, depending on how creamy or firm you want it.
- Finishing Touches: Transfer the curds to a bowl, then gently stir in 1 teaspoon fine sea salt and 1/4 cup heavy cream.
- Serve and Enjoy: Chill or serve right away. Let me tell you, it’s worth every bite.
How Texture and Flavor Come Together
The warm milk separates into soft white curds and pale whey, creating that classic cottage cheese texture. The lemon juice keeps the flavor clean and lightly bright, while the cream rounds everything out so each spoonful feels soft, cool, and fresh.
Helpful Cooking Tips for Better Results
A little patience here gives you prettier curds and better flavor.
- Do not rush the heat: Slow heating helps prevent scorched milk.
- Use a thermometer: It keeps the curdling process reliable.
- Drain to your preference: Short draining makes creamier cheese, longer draining makes firmer curds.
- Taste before chilling: Salt settles as it rests, so adjust gently.
Mistakes to Avoid for Fresh, Creamy Curds
Even simple recipes have a few sneaky spots, but they are easy to fix.
- Boiling the milk: This can make the texture grainy. Keep it hot, but not violently bubbling.
- Stirring too hard after adding lemon juice: Gentle stirring protects the curds.
- Skipping the rest time: The curds need a few quiet minutes to form.
- Over-draining: If it becomes too dry, stir in a little more cream or milk.
Simple Nutrition Snapshot
Servings: 6
Calories per serving: 190
Note: These are approximate values.
Timing Made Easy
Prep Time: 10 minutes
Cook Time: 25 minutes
Total Time: 35 minutes
Make-Ahead and Storage Tips
This cheese is perfect for making ahead because the flavor becomes rounder after a little chill time. Store it in an airtight container in the refrigerator for up to 4 days. Freezing is not ideal because the curds can turn watery, but you can stir leftovers into cooked dishes. No reheating is needed unless you are adding it to eggs, pancakes, or casseroles.
Fresh Ways to Serve It
Spoon it over toast with cracked pepper, layer it with fruit and honey, or add it to a breakfast bowl with cucumber and tomatoes. It also makes a lovely filling for wraps or a creamy side next to roasted vegetables.
Creative Leftover Transformations
Leftovers can turn into a quick toast spread with herbs, a creamy scrambled egg add-in, or a protein-rich pancake topping. You can also blend it with a little milk and seasoning for a quick creamy dip.
Extra Little Tips for Freshness
Use the freshest milk you can find, and avoid ultra-high temperature milk if possible because it may not curdle well. Chill the finished curds before serving if you want a firmer, cleaner spoonful.
Make It a Showstopper
Serve it in a simple white bowl with a drizzle of honey for sweet servings or a sprinkle of herbs for savory ones. Keep the presentation clean so the soft curds and creamy texture really shine.
Variations to Try
- Herb Cottage Cheese: Add chopped chives, parsley, and black pepper.
- Honey Breakfast Bowl: Serve with berries, honey, and toasted nuts.
- Savory Toast Spread: Mix with garlic powder, pepper, and fresh dill.
- Creamy Lemon Style: Add a tiny extra squeeze of lemon after chilling.
- Peppery Snack Bowl: Finish with cracked pepper and sliced cucumber on the side.
FAQ’s
Q1: Can I use bottled lemon juice?
A1: Fresh lemon juice gives a cleaner flavor, but bottled lemon juice can work in a pinch.
Q2: Why did my milk not curdle?
A2: The milk may not have been hot enough, or it may have been ultra-high temperature processed.
Q3: Can I make it without cream?
A3: Yes, the cream is for a softer finish. You can skip it for drier curds.
Q4: How long should I drain it?
A4: Drain for 10 minutes for creamy curds or closer to 15 minutes for a firmer texture.
Q5: Can I add more salt?
A5: Yes, add it slowly and taste as you go.
Q6: Is this good for breakfast?
A6: Absolutely. It pairs beautifully with fruit, toast, eggs, or vegetables.
Q7: Can I use low-fat milk?
A7: Yes, but the curds will be lighter and less creamy.
Q8: What should I do with the whey?
A8: Use it in smoothies, pancakes, bread dough, or soups.
Q9: Can I freeze it?
A9: Freezing is not recommended because the texture can become watery.
Q10: Does it taste strongly like lemon?
A10: Not really. The lemon helps form the curds and leaves only a gentle brightness.
Conclusion
Homemade Cottage Cheese with Lemon Juice is one of those recipes that makes your kitchen feel calm, capable, and a little bit magical. With warm milk, fresh lemon, and a few gentle steps, you get soft curds that taste fresh, creamy, and completely worth making from scratch.
Print
Homemade Cottage Cheese with Lemon Juice
- Prep Time: 10 minutes
- Cook Time: 25 minutes
- Total Time: 35 minutes
- Yield: 6 servings 1x
- Category: Fresh Cheese
- Method: Stovetop
- Cuisine: American
- Diet: Vegetarian
Description
Fresh, creamy cottage cheese made from whole milk, lemon juice, salt, and a little cream for a soft homemade finish.
Ingredients
- 1 gallon whole milk
- 1/2 cup fresh lemon juice
- 1 teaspoon fine sea salt
- 1/4 cup heavy cream
Instructions
- Warm a large pot over low heat, then pour in 1 gallon whole milk.
- Heat the milk slowly to 190°F, stirring often to prevent scorching.
- Turn off the heat and gently stir in 1/2 cup fresh lemon juice.
- Let the pot sit undisturbed for 10 minutes so the curds separate from the whey.
- Line a fine mesh strainer with cheesecloth and place it over a large bowl.
- Pour the curds and whey into the lined strainer.
- Drain for 10 to 15 minutes, depending on your preferred texture.
- Transfer the curds to a bowl and gently stir in 1 teaspoon fine sea salt and 1/4 cup heavy cream.
- Serve right away or chill before serving.
Notes
- Use fresh lemon juice for the cleanest flavor.
- Drain less for creamier curds and longer for firmer curds.
- Avoid ultra-high temperature milk because it may not curdle well.
- Store in an airtight container in the refrigerator for up to 4 days.
Nutrition
- Serving Size: 1/2 cup
- Calories: 190
- Sugar: 6g
- Sodium: 430mg
- Fat: 11g
- Saturated Fat: 7g
- Unsaturated Fat: 3g
- Trans Fat: 0g
- Carbohydrates: 7g
- Fiber: 0g
- Protein: 15g
- Cholesterol: 40mg
Keywords: homemade cottage cheese, lemon juice cottage cheese, fresh cheese, stovetop cheese, easy dairy recipe