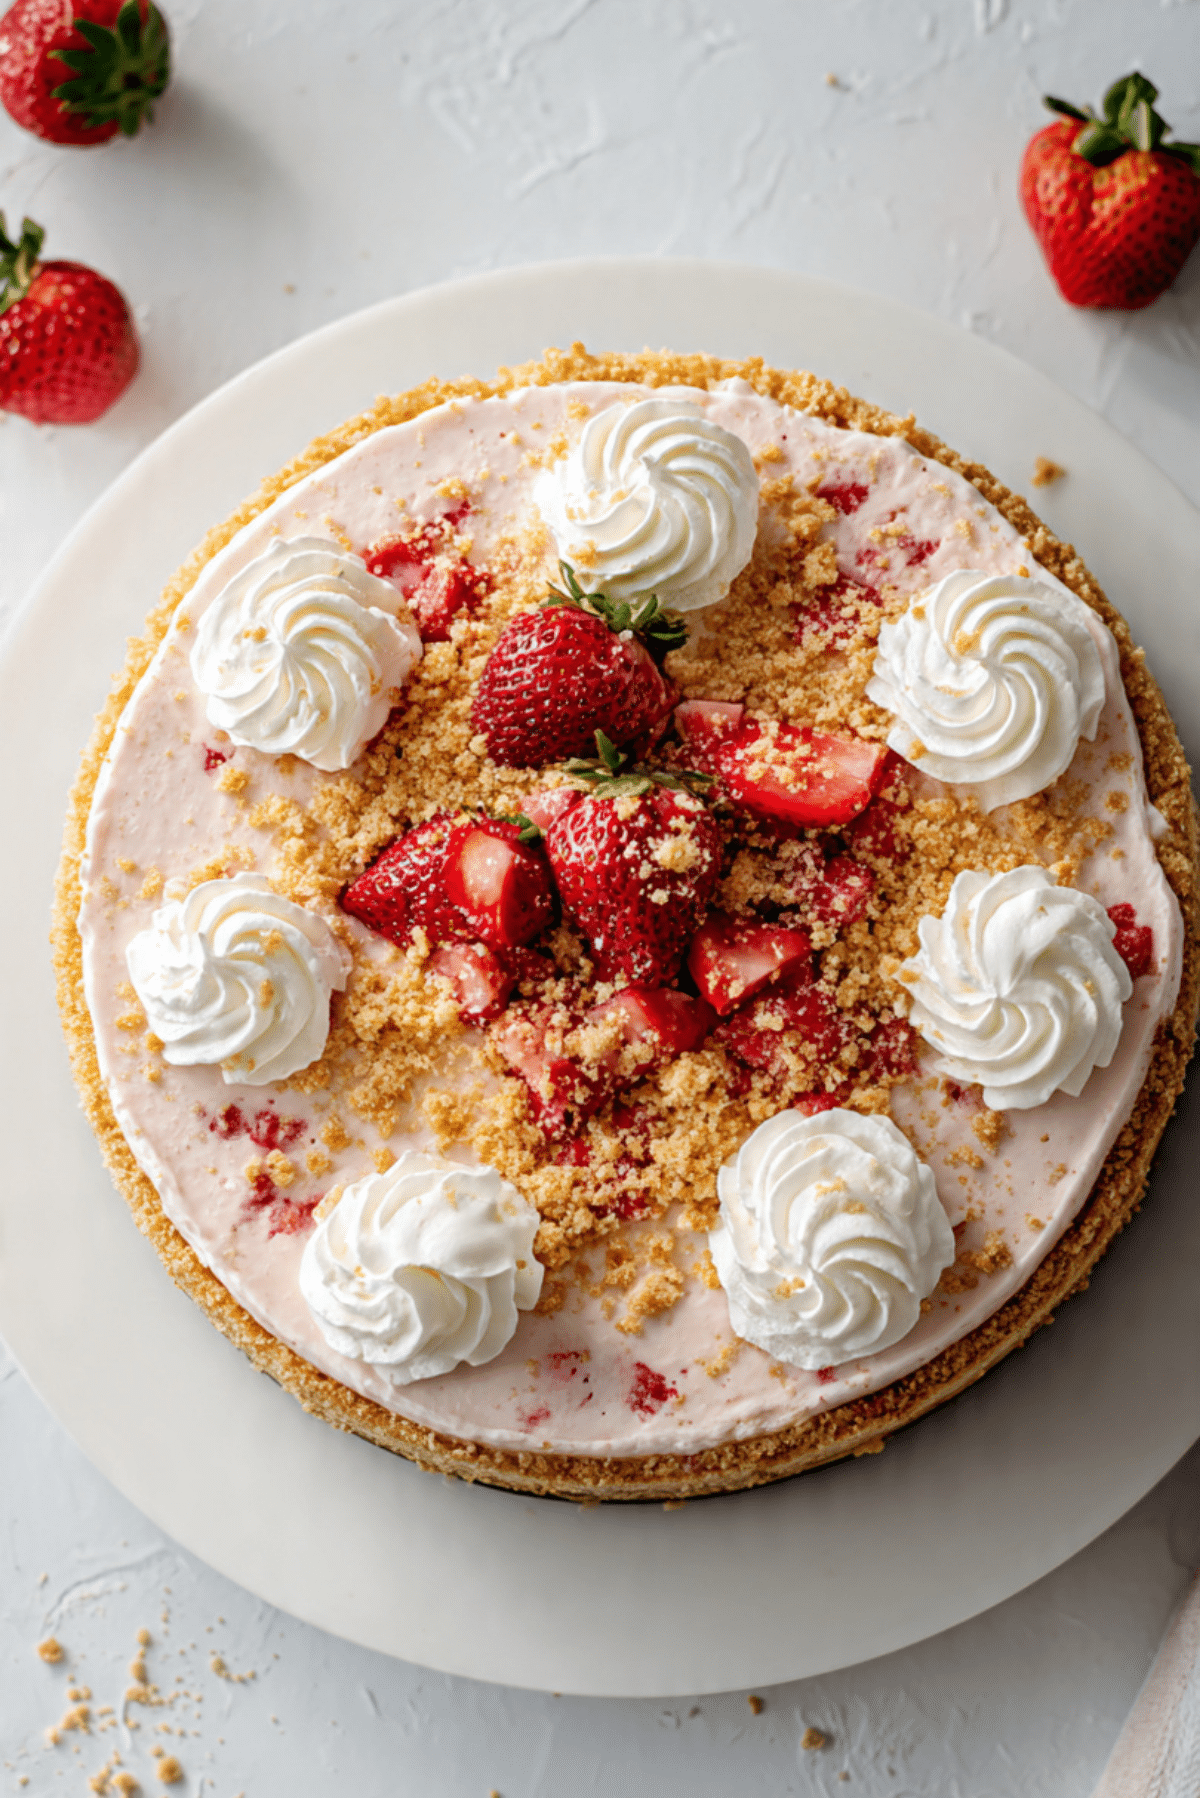
Strawberry Crunch Cheesecake
The first thing that gets you with this dessert is the contrast. You get that silky, creamy center, the sweet berry finish, and then that bright little crackle from the crunchy topping that makes every bite feel extra special. Trust me, you’re going to love this, because it has that bakery-style look but still feels wonderfully homemade and doable in a real kitchen.
Why This Dessert Always Gets People Excited
There is something about the mix of strawberries, cream cheese, and buttery cookie crumbs that instantly feels fun and comforting. It has a nostalgic charm, almost like those strawberry shortcake ice cream bars from childhood, but turned into something richer and more elegant. The creamy filling melts softly on the tongue, while the topping brings in color, sweetness, and that irresistible crunch that keeps you going back for one more forkful.
A Sweet Story Behind the Crunch
This style of dessert takes inspiration from two beloved classics, traditional baked cheesecake and the famous strawberry shortcake crumble that shows up on nostalgic frozen treats. Over time, home bakers started blending the two into one showy dessert, creating something that feels both retro and fresh. And now let’s dive into what makes it such a keeper in a home kitchen, because this one really earns its place on the table.
What Makes This One So Reliable and So Easy to Love
This dessert is not just pretty, it is one you can count on when you want something that tastes impressive and still feels approachable.
Versatile: It fits birthdays, holidays, brunch tables, and summer gatherings just as easily as it fits a quiet weekend baking day.
Budget-Friendly: Most of the ingredients are easy to find and familiar, which means you can create a bakery-style result without chasing specialty items.
Quick and Easy: The steps are straightforward, and each stage builds naturally on the last, so the process feels calm instead of overwhelming.
Customizable: You can adjust the topping, change the fruit garnish, or even play with the crust while keeping the creamy heart of the dessert intact.
Crowd-Pleasing: Creamy filling, berry sweetness, and cookie crunch are a combination that rarely leaves leftovers behind.
Make-Ahead Friendly: This is actually better once it has had time to rest and chill, which makes entertaining feel much easier.
Great for Leftovers: A slice the next day is just as dreamy, and maybe even better once all the flavors settle in together.
Little Baker Secrets That Make a Big Difference
Before we get into the tools and ingredients, let me tell you, it’s worth every bite when you treat a few small details with care.
- Use room temperature cream cheese: This helps the filling turn silky and smooth instead of lumpy.
- Mix on low speed once the eggs go in: Too much air can lead to cracking, so gentle mixing is your friend here.
- Bake until the center still has a slight wobble: That soft jiggle means it will set into the perfect creamy texture as it cools.
- Cool it gradually: A sudden temperature change can stress the cheesecake, so patience really pays off.
- Add the crunch topping after chilling: This keeps the texture crisp and prevents it from softening too much.
Kitchen Tools That Make the Process Feel Easy
Once you have a few simple tools ready, everything flows much more smoothly from crust to final topping.
9-inch springform pan: This makes it easy to release the dessert cleanly and keep those beautiful sides intact.
Food processor: Perfect for turning the cookies and freeze-dried strawberries into fine, even crumbs.
Mixing bowls: You will want separate bowls for the crust, filling, and crunchy topping to keep the process organized.
Electric mixer: Helps create a smooth, fluffy filling without too much effort.
Rubber spatula: Great for scraping down the bowl and folding ingredients together evenly.
Roasting pan or deep baking dish: Useful for creating a water bath, which helps the filling bake gently and evenly.
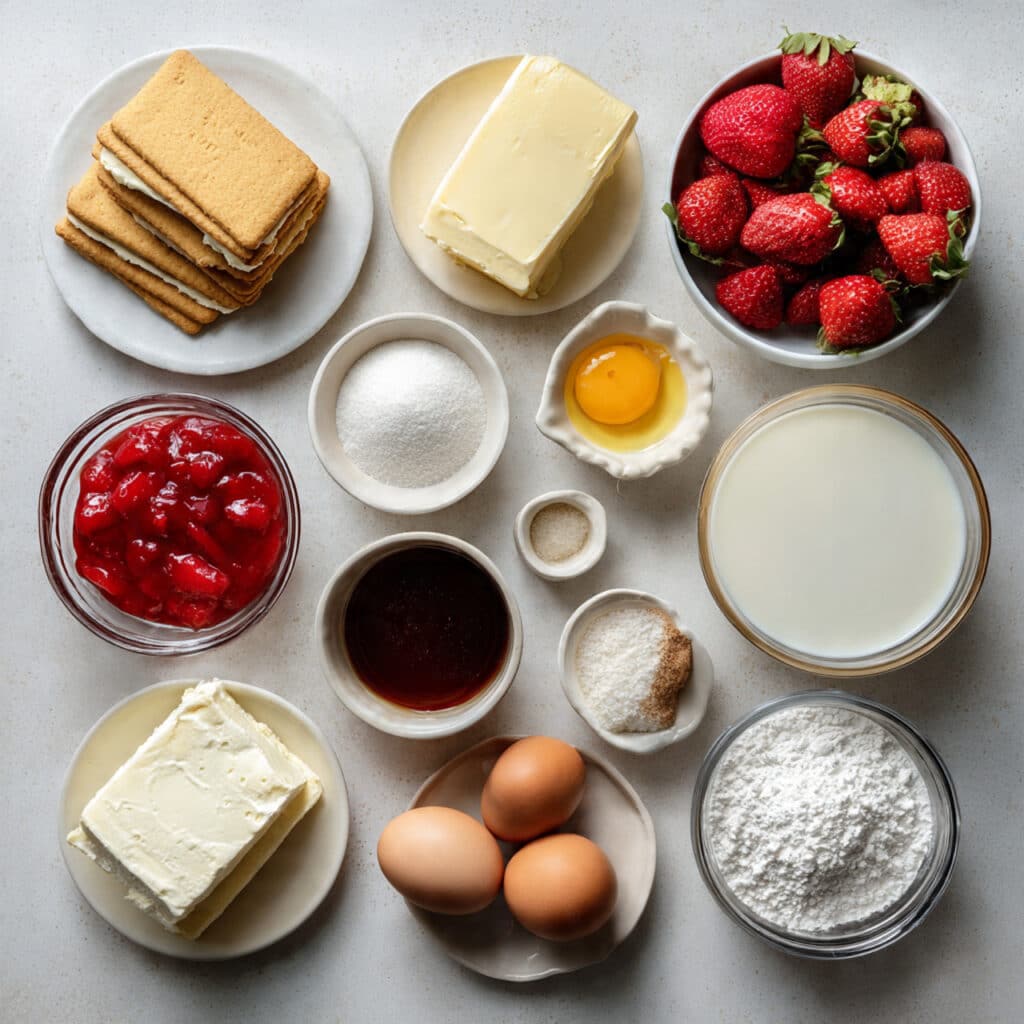
Everything That Goes Into This Creamy, Crunchy Favorite
Now we are getting to the heart of it, and this is where all those textures start to come together. Every ingredient has a job, and when they work together, the result is rich, bright, and completely crave-worthy.
- Golden sandwich cookies: 30 cookies, divided. These create a sweet, buttery crust and also form the base of the strawberry crunch topping.
- Unsalted butter: 8 tablespoons, melted and divided. This binds the cookie crumbs and gives both the crust and topping that rich, toasty flavor.
- Cream cheese: 24 ounces, softened. This is the creamy foundation of the filling and gives the dessert its classic tangy richness.
- Granulated sugar: 1 cup. This sweetens the filling and balances the tang of the cream cheese.
- Sour cream: 3/4 cup, room temperature. This adds smoothness and a subtle tang that keeps the filling from feeling too heavy.
- Vanilla extract: 2 teaspoons. It rounds out the flavor and makes the creamy layers taste fuller and warmer.
- Large eggs: 3, room temperature. These help the filling set while keeping it soft and velvety.
- Cornstarch: 1 tablespoon. This adds a little stability and helps the filling bake up beautifully.
- Freeze-dried strawberries: 1 cup. These bring concentrated berry flavor and that signature pink crunch without making the topping soggy.
- Strawberry preserves: 1/2 cup. This creates a glossy berry layer on top and adds fruity sweetness.
- Fresh strawberries: 1 cup, hulled and sliced. These add freshness, color, and that juicy finish that makes each slice look extra inviting.
- Heavy whipping cream: 1 cup, cold. This is whipped for a soft topping that lightens the final presentation.
- Powdered sugar: 2 tablespoons. This sweetens the whipped cream gently without making it heavy.
Easy Swaps When You Need a Little Flexibility
Sometimes you work with what is already in the kitchen, and thankfully this recipe gives you room to do that without losing its charm.
Golden sandwich cookies: Vanilla wafers or graham crackers.
Sour cream: Full-fat Greek yogurt.
Strawberry preserves: Strawberry jam with a smoother texture.
Freeze-dried strawberries: Freeze-dried raspberries for a berry twist.
Heavy whipping cream: Store-bought whipped topping if you need a faster finish.
The Ingredients That Really Steal the Show
A couple of components do a lot of heavy lifting here, and they are worth appreciating before you start baking.
Freeze-dried strawberries: They bring bold berry flavor without extra moisture, which is exactly why the crunchy topping stays crisp and colorful.
Cream cheese: This is what gives the filling that classic luscious texture, rich enough to feel indulgent but still tangy enough to keep every bite balanced.
Let’s Bake It, Step by Step
This is the part where everything starts to feel real, and honestly, it is such a satisfying process. You go from a few simple bowls of ingredients to a dessert that looks like it came straight from a bakery case.
- Preheat Your Equipment: Preheat the oven to 325°F. Wrap the outside of a 9-inch springform pan with foil so it is ready for a water bath.
- Combine Ingredients: Pulse 24 golden sandwich cookies in a food processor until finely crushed. Mix the crumbs with 5 tablespoons melted butter until the mixture looks like wet sand. In a separate bowl, beat the softened cream cheese and granulated sugar until smooth. Beat in the sour cream, vanilla extract, and cornstarch. Add the eggs one at a time, mixing on low speed just until combined.
- Prepare Your Cooking Vessel: Press the cookie crust mixture firmly into the bottom of the springform pan. Place the pan inside a larger roasting pan.
- Assemble the Dish: Pour the cheesecake filling over the crust and smooth the top. Pour hot water into the roasting pan until it reaches about halfway up the sides of the springform pan.
- Cook to Perfection: Bake for 65 to 70 minutes, until the edges are set and the center still has a slight wobble. Turn off the oven, crack the door, and let the cheesecake rest inside for 1 hour.
- Finishing Touches: Remove the cheesecake and let it cool completely, then chill until firm. Warm the strawberry preserves just enough to loosen them, then spread over the top and arrange the sliced fresh strawberries. Pulse the remaining 6 golden sandwich cookies with the freeze-dried strawberries, then mix with the remaining 3 tablespoons melted butter. Press this crunchy mixture around the sides and spoon some over the top. Whip the heavy cream with powdered sugar until soft peaks form, then pipe or dollop it around the edge.
- Serve and Enjoy: Slice with a warm knife for clean edges, then serve chilled and enjoy every creamy, crunchy, berry-filled bite.
The Best Part, That Texture and Flavor Payoff
What makes this dessert such a total game-changer is the way each layer does something different. The crust is buttery and tender, the center is cool and velvety, the strawberry layer feels bright and glossy, and the topping gives you that crisp little finish that wakes everything up. As it chills, the flavors settle into each other beautifully, and the berry notes become even more pronounced against the rich filling.
Helpful Tricks for the Smoothest, Prettiest Result
A few thoughtful details can make the whole experience easier and more rewarding.
- Let the cream cheese, sour cream, and eggs come to room temperature before mixing.
- Wipe the knife clean between slices if you want those neat bakery-style cuts.
- Chill the dessert well before adding the final whipped cream for the cleanest finish.
- Press the crunch mixture on gently so it sticks without crushing the sides.
A Few Things That Can Go Wrong, and How to Avoid Them
Every good bake has a couple of moments where care matters, and knowing them ahead of time makes the whole process feel a lot more relaxed.
- Overmixing the eggs: This can add too much air and lead to cracking, so mix only until they disappear into the batter.
- Skipping the gradual cooling: Sudden cooling can shock the filling, so let it rest in the turned-off oven first.
- Adding the crunch too early: If you add it before chilling, it can soften more than you want.
- Using low-fat dairy: The texture will not be as rich or stable, so full-fat ingredients really work best here.
A Quick Look at the Nutrition
These numbers are approximate, but they give you a helpful idea of what to expect per serving.
Servings: 12
Calories per serving: 510
Note: These are approximate values.
Timing at a Glance
Before you start, it helps to know how the process breaks down so the day feels easy to plan.
Prep Time: 30 minutes
Cook Time: 1 hour 10 minutes
Total Time: 1 hour 40 minutes
Make-Ahead and Storage Tips That Actually Help
This dessert is a dream for planning ahead, which is one more reason people love making it for gatherings. You can bake it a full day in advance, keep it chilled in the pan, and decorate with whipped cream shortly before serving. Leftover slices can be stored covered in the refrigerator for up to 4 days. You can also freeze individual slices, wrapped well and stored in an airtight container, for up to 1 month. Thaw them in the refrigerator overnight for the best texture.
Delicious Ways to Serve It
When it is time to bring it to the table, a few little touches can make it feel even more special. Serve each slice chilled with extra fresh strawberries on the side, or add a spoonful of lightly sweetened whipped cream for an airy finish. It also pairs beautifully with hot coffee, iced tea, or a simple glass of cold milk if you want to keep the whole vibe cozy and classic.
Leftovers That Still Feel Exciting
The nice thing about leftovers here is that they do not feel like leftovers at all. Crumble a slice into a dessert jar with extra whipped cream for a quick parfait, or cut chilled slices into little bars for a party tray. You can even fold a few small cubes into vanilla ice cream for a fun berry cheesecake sundae moment.
Extra Little Tips Worth Knowing
Sometimes the smallest tips are the ones you remember most the next time you make a recipe.
Keep the springform pan on a baking sheet when moving it in and out of the oven for extra stability. Chill the mixing bowl before whipping the cream so it fluffs up faster. And if you want the strawberry layer to look especially glossy, stir the preserves until completely smooth before spreading them on top.
How to Make It Look Truly Celebration-Worthy
Presentation matters, and this dessert gives you plenty to work with. Pipe the whipped cream in soft swirls around the edge, then tuck a few strawberry slices between the swirls for color. Press the crunch topping firmly but neatly around the sides so every slice has that signature look. When you bring it to the table whole, it has that wow factor right away.
Fun Variations to Try Next Time
Once you make it once, it is hard not to imagine all the little ways you can change it up.
Chocolate Strawberry Version: Drizzle a little melted white chocolate over the finished top for a sweeter, more dessert-shop feel.
Berry Mix Version: Use a mix of freeze-dried strawberries and raspberries in the crunch topping for deeper berry flavor.
Mini Version: Turn the same idea into mini cheesecakes in a muffin tin for parties and easy portioning.
Lemon Brightened Version: Add 1 teaspoon lemon zest to the filling for a fresher, tangier finish.
Extra Crunch Version: Reserve a little more topping and sprinkle it over each slice right before serving for maximum texture.
FAQ’s
Q1: Can I make it a day ahead?
Yes, and it is actually even better after a long chill because the filling firms up and the flavors settle beautifully.
Q2: Do I have to use a water bath?
It is strongly recommended because it helps the filling bake more gently and evenly, which gives you a creamier texture.
Q3: Can I use graham crackers instead of golden sandwich cookies?
Yes, the crust will still be delicious, though the topping will lose a little of that classic sweet cookie flavor.
Q4: Why use freeze-dried strawberries instead of fresh?
They give concentrated berry flavor without moisture, which is exactly what keeps the crunch topping crisp.
Q5: How do I know when the cheesecake is done?
The edges should look set while the center still has a gentle wobble when the pan is nudged.
Q6: Can I freeze the whole dessert?
Yes, wrap it well after chilling and freeze it for up to 1 month, then thaw overnight in the refrigerator.
Q7: What if my top cracks a little?
No problem at all, because the strawberry layer and whipped cream cover it beautifully.
Q8: Can I use jam instead of preserves?
Yes, as long as it spreads smoothly and has good strawberry flavor.
Q9: How should I cut clean slices?
Use a sharp knife dipped in warm water, then wipe it clean between each cut.
Q10: Is it very sweet?
It is definitely indulgent, but the tangy cream cheese and fresh strawberries keep it from feeling too heavy or one-note.
Conclusion
This one has everything you want in a showstopping dessert, creamy filling, bright berry flavor, and that irresistible crunchy finish that makes each bite feel special. It is playful, pretty, and surprisingly doable, which is probably why it wins people over so fast. Let me tell you, it’s worth every bite, and once you set that first slice on a plate, you will understand exactly why.
Print
Strawberry Crunch Cheesecake
- Prep Time: 30 minutes
- Cook Time: 1 hour 10 minutes
- Total Time: 1 hour 40 minutes
- Yield: 12 servings 1x
- Category: Dessert
- Method: Baked
- Cuisine: American
- Diet: Vegetarian
Description
A creamy baked cheesecake with a buttery golden cookie crust, glossy strawberry topping, fresh berries, whipped cream, and a sweet strawberry crunch coating that adds the perfect crisp finish.
Ingredients
- 24 golden sandwich cookies, divided
- 8 tablespoons unsalted butter, melted and divided
- 24 ounces cream cheese, softened
- 1 cup granulated sugar
- 3/4 cup sour cream, room temperature
- 2 teaspoons vanilla extract
- 3 large eggs, room temperature
- 1 tablespoon cornstarch
- 1 cup freeze-dried strawberries
- 1/2 cup strawberry preserves
- 1 cup fresh strawberries, hulled and sliced
- 1 cup heavy whipping cream, cold
- 2 tablespoons powdered sugar
Instructions
- Preheat the oven to 325°F. Wrap the outside of a 9-inch springform pan with foil.
- Pulse 24 golden sandwich cookies into fine crumbs. Mix with 5 tablespoons melted butter, then press firmly into the bottom of the springform pan.
- Beat the cream cheese and granulated sugar until smooth. Beat in the sour cream, vanilla extract, and cornstarch. Add the eggs one at a time, mixing on low speed just until combined.
- Pour the filling over the crust and smooth the top. Place the springform pan inside a larger roasting pan and add hot water to the roasting pan until it reaches halfway up the sides of the springform pan.
- Bake for 65 to 70 minutes, until the edges are set and the center still has a slight wobble. Turn off the oven, crack the door, and let the cheesecake rest inside for 1 hour.
- Remove and cool completely, then chill until firm.
- Warm the strawberry preserves until spreadable, then spread over the top and arrange the sliced fresh strawberries.
- Pulse the remaining 6 golden sandwich cookies with the freeze-dried strawberries. Mix with the remaining 3 tablespoons melted butter, then press the mixture around the sides and spoon some over the top.
- Whip the heavy whipping cream with powdered sugar until soft peaks form, then pipe or dollop it around the edge before serving.
Notes
- Use room temperature cream cheese, sour cream, and eggs for the smoothest filling.
- Mix gently after adding the eggs to avoid too much air in the batter.
- Chill well before slicing for clean, neat pieces.
- Add the crunch topping after chilling so it stays crisp.
Nutrition
- Serving Size: 1 slice
- Calories: 510
- Sugar: 28g
- Sodium: 290mg
- Fat: 35g
- Saturated Fat: 21g
- Unsaturated Fat: 11g
- Trans Fat: 0g
- Carbohydrates: 43g
- Fiber: 2g
- Protein: 7g
- Cholesterol: 128mg
Keywords: strawberry crunch cheesecake, baked cheesecake, strawberry dessert, cream cheese dessert, cookie crust cheesecake