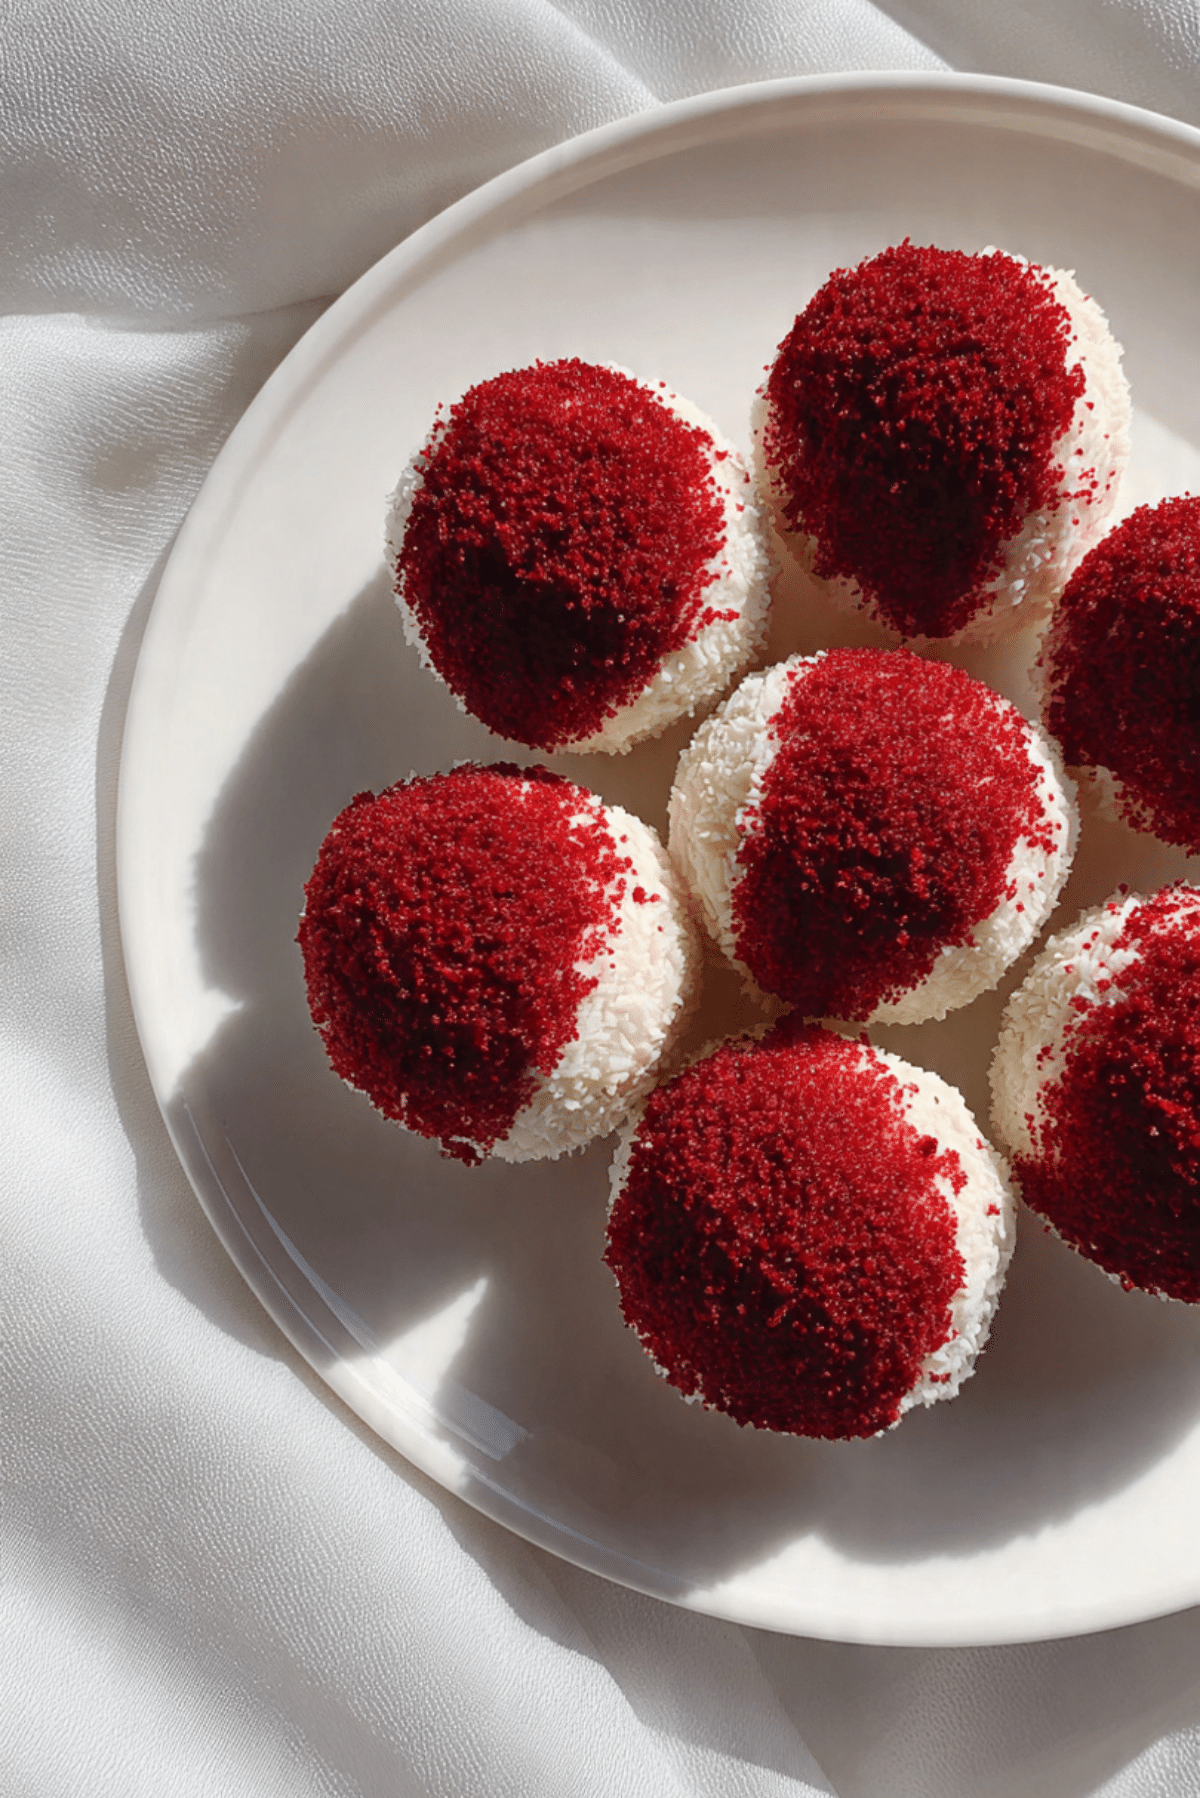
Red Velvet Snowballs
There is something magical about Red Velvet Snowballs that makes you pause and just admire them. Their deep red hue peeking through a soft, creamy coating invites curiosity and indulgence. Imagine the first bite, a tender, moist center giving way to a delicate sweetness that melts in your mouth, leaving traces of cocoa and vanilla lingering just long enough to make you smile. Trust me, you’re going to love this cozy, festive treat that feels like a celebration in every bite.
Behind the Recipe
Red Velvet Snowballs bring back memories of holiday kitchens filled with laughter and the warm aroma of cocoa and sugar. They are playful, fun to make, and even more fun to share. Rolling each snowball by hand is a bit like shaping tiny gifts, each one a promise of sweetness and delight. This recipe captures that nostalgic feeling while keeping things simple enough for any home baker.
Recipe Origin or Trivia
Red velvet treats have a fascinating history rooted in American Southern baking traditions. Originally, the red color came from the reaction of natural cocoa with acidic ingredients like vinegar and buttermilk. Today, we use vibrant red food coloring to achieve that signature hue. Over the decades, red velvet has evolved from cakes and cupcakes to inventive creations like these snowballs, turning traditional flavors into bite-sized, shareable delights.
Why You’ll Love Red Velvet Snowballs
Making Red Velvet Snowballs is like creating little bundles of joy. Here’s why they are so irresistible:
Versatile: Perfect for holidays, birthdays, or just a cozy night in, these treats fit every occasion.
Budget-Friendly: Simple ingredients that you likely already have in your pantry keep this recipe friendly on the wallet.
Quick and Easy: With a few straightforward steps, you can whip up a batch in under an hour.
Customizable: Add a dash of cinnamon, swap in dark chocolate chips, or drizzle with white chocolate for a personal touch.
Crowd-Pleasing: Everyone loves a bite-sized dessert, and the vibrant color makes them especially appealing.
Make-Ahead Friendly: Prepare these snowballs in advance and store them for an easy grab-and-go treat.
Great for Leftovers: If any last, they stay moist and flavorful, making them perfect for enjoying over a couple of days.
Chef’s Pro Tips for Perfect Results
Getting these snowballs just right is easier with a few insider tips:
- Use room temperature ingredients for smoother batter and even mixing.
- Chill the snowballs briefly before coating to prevent the coating from melting.
- Don’t overmix the batter; it keeps the centers tender and soft.
- Roll gently to maintain a uniform, round shape without compressing the air out.
Kitchen Tools You’ll Need
Making Red Velvet Snowballs is simple with a few handy tools:
Mixing Bowls: For combining dry and wet ingredients efficiently.
Whisk: To incorporate ingredients evenly and remove lumps.
Measuring Cups and Spoons: Essential for precise baking results.
Baking Sheet: A flat surface for forming and chilling your snowballs.
Cooling Rack: Helps keep the coating intact and prevents sogginess.
Spoons or Small Ice Cream Scoop: Makes shaping the snowballs easy and uniform.
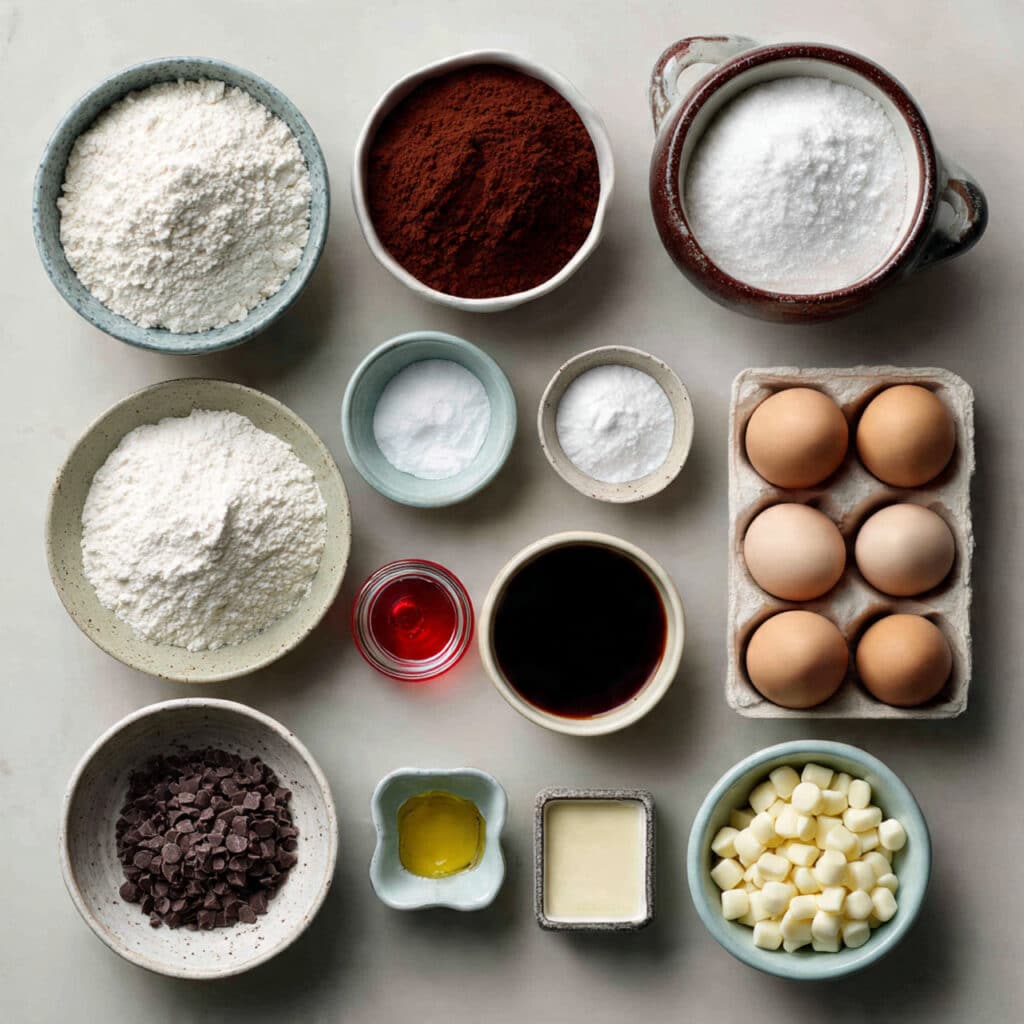
Ingredients in Red Velvet Snowballs
Every ingredient plays a role in creating the perfect texture and flavor harmony:
- All-Purpose Flour: 1 ½ cups, provides structure and a soft crumb.
- Unsweetened Cocoa Powder: 2 tablespoons, adds subtle chocolate depth.
- Granulated Sugar: ¾ cup, sweetens and balances the cocoa.
- Baking Powder: 1 teaspoon, helps the snowballs rise and stay fluffy.
- Baking Soda: ½ teaspoon, works with buttermilk to enhance texture.
- Salt: ¼ teaspoon, intensifies flavor and balances sweetness.
- Buttermilk: ½ cup, tenderizes the crumb and adds tang.
- Vegetable Oil: ¼ cup, keeps the snowballs moist.
- Eggs: 2 large, bind the ingredients and enrich the flavor.
- Red Food Coloring: 1 tablespoon, gives the signature red hue.
- Vanilla Extract: 1 teaspoon, adds warmth and aromatic depth.
- White Chocolate Chips: ½ cup, optional coating for sweetness and texture contrast.
Ingredient Substitutions
Keep your snowballs flexible with these swaps:
All-Purpose Flour: Whole wheat flour for a nuttier texture.
Buttermilk: Milk with a teaspoon of lemon juice or vinegar.
Vegetable Oil: Melted coconut oil for a subtle flavor twist.
White Chocolate Chips: Semi-sweet chocolate for less sweetness.
Ingredient Spotlight
Red Food Coloring: The hero of Red Velvet Snowballs, providing that iconic festive color.
Buttermilk: Ensures a soft, tender crumb and enhances the cocoa flavor naturally.
Instructions for Making Red Velvet Snowballs
Let’s dive into creating these bite-sized delights:
- Preheat Your Equipment: Preheat oven to 350°F (175°C) and line a baking sheet with parchment paper.
- Combine Ingredients: In one bowl, whisk together flour, cocoa powder, baking powder, baking soda, and salt. In another, mix sugar, eggs, buttermilk, vegetable oil, red food coloring, and vanilla until smooth. Gradually combine wet and dry ingredients until fully incorporated.
- Prepare Your Cooking Vessel: Line a tray or plate with parchment paper to hold the snowballs as they chill.
- Assemble the Dish: Scoop small portions of batter and roll into smooth balls using your hands or a small scoop. Place each snowball on the prepared tray.
- Cook to Perfection: Chill in the fridge for 15–20 minutes to firm up the shape before coating.
- Finishing Touches: Roll the chilled snowballs in white chocolate chips or dip in melted white chocolate for a glossy finish.
- Serve and Enjoy: Arrange on a plate and enjoy immediately or store in an airtight container for later indulgence.
Texture & Flavor Secrets
These snowballs are a sensory treat, with a tender, moist center and a slightly crisp coating. The cocoa flavor gently unfolds, while the white chocolate adds a sweet, creamy contrast. Each bite offers a melt-in-your-mouth experience that is soft yet structured enough to hold together.
Cooking Tips & Tricks
A few extra pointers to keep in mind:
- Chill the snowballs before coating for cleaner finishes.
- Use a light hand when rolling to avoid dense centers.
- Store in layers with parchment between for easy stacking.
What to Avoid
Common pitfalls and fixes:
- Overmixing the batter leads to dense snowballs, mix gently.
- Skipping chilling can cause coating to slide, always refrigerate briefly.
- Using too large a portion can make baking uneven, keep uniform sizes.
Nutrition Facts
Servings: 12
Calories per serving: 180
Note: These are approximate values.
Preparation Time
Prep Time: 20 minutes
Cook Time: 15 minutes
Total Time: 35 minutes
Make-Ahead and Storage Tips
Red Velvet Snowballs are perfect for prepping ahead. Keep them in an airtight container in the fridge for up to 3 days. They freeze well for up to a month; thaw at room temperature before serving. Coatings can be added just before serving for optimal texture.
How to Serve Red Velvet Snowballs
Serve these snowballs on a decorative plate for parties, alongside tea or coffee for a cozy afternoon, or as a playful dessert after dinner. Their bright color makes them a centerpiece no matter the occasion.
Creative Leftover Transformations
Leftover snowballs can be chopped into parfait layers with whipped cream, crumbled over ice cream, or even served as mini truffles with a drizzle of chocolate.
Additional Tips
Add a sprinkle of edible glitter for festive occasions, or a pinch of sea salt on top of the chocolate coating to enhance flavor. Store in a cool, dry place to maintain freshness.
Make It a Showstopper
Arrange the snowballs in a pyramid or circle on a platter, add contrasting garnishes like berries, and use delicate paper cups to highlight each one. Presentation elevates these little treats from simple to spectacular.
Variations to Try
- Chocolate Lovers: Add cocoa nibs or mini dark chocolate chunks inside.
- Nutty Twist: Roll in finely chopped pistachios or almonds.
- Berry Surprise: Insert a small freeze-dried raspberry in the center.
- Citrus Zest: Add orange zest to the coating for a fresh aroma.
- Mint Infusion: A hint of mint extract in the batter for a festive twist.
FAQ’s
-
Q1: Can I make these snowballs without food coloring?
A1: Yes, the cocoa will give a natural color, but they won’t be bright red. -
Q2: How long can I store them?
A2: Up to 3 days in the fridge or 1 month in the freezer. -
Q3: Can I use almond milk instead of buttermilk?
A3: Yes, just add a teaspoon of vinegar for acidity. -
Q4: Are these gluten-free?
A4: Not as written, but gluten-free flour can be substituted. -
Q5: Can I make mini snowballs?
A5: Absolutely, just reduce baking time slightly. -
Q6: Do I need to chill before coating?
A6: Yes, it ensures the coating adheres properly. -
Q7: Can I use dark chocolate instead of white?
A7: Yes, it works beautifully and balances the sweetness. -
Q8: Are these suitable for kids?
A8: Definitely, they are soft, sweet, and safe for all ages. -
Q9: Can I add nuts inside?
A9: Yes, finely chopped nuts add texture without overpowering. -
Q10: Can I prepare them a day ahead?
A10: Yes, keep them refrigerated and add coatings just before serving.
Conclusion
Red Velvet Snowballs are more than just a treat; they are a celebration of color, flavor, and fun. Whether for a holiday, special occasion, or just a quiet moment of indulgence, these snowballs bring joy in every bite. Let me tell you, it’s worth every second of preparation to see the smiles and hear the delighted murmurs as everyone enjoys this playful dessert.
Print
Red Velvet Snowballs
- Prep Time: 20 minutes
- Cook Time: 15 minutes
- Total Time: 35 minutes
- Yield: 12 servings
- Category: Dessert
- Method: Baking
- Cuisine: American
- Diet: Vegetarian
Description
Delightful bite-sized Red Velvet Snowballs with a tender cocoa-infused center and creamy white chocolate coating, perfect for festive occasions or a cozy treat at home
Ingredients
- All-Purpose Flour: 1 ½ cups
- Unsweetened Cocoa Powder: 2 tablespoons
- Granulated Sugar: ¾ cup
- Baking Powder: 1 teaspoon
- Baking Soda: ½ teaspoon
- Salt: ¼ teaspoon
- Buttermilk: ½ cup
- Vegetable Oil: ¼ cup
- Eggs: 2 large
- Red Food Coloring: 1 tablespoon
- Vanilla Extract: 1 teaspoon
- White Chocolate Chips: ½ cup
Instructions
- Preheat oven to 350°F (175°C) and line a baking sheet with parchment paper.
- In one bowl, whisk together flour, cocoa powder, baking powder, baking soda, and salt. In another, mix sugar, eggs, buttermilk, vegetable oil, red food coloring, and vanilla until smooth. Gradually combine wet and dry ingredients until fully incorporated.
- Line a tray or plate with parchment paper to hold the snowballs as they chill.
- Scoop small portions of batter and roll into smooth balls using your hands or a small scoop. Place each snowball on the prepared tray.
- Chill in the fridge for 15–20 minutes to firm up the shape before coating.
- Roll the chilled snowballs in white chocolate chips or dip in melted white chocolate for a glossy finish.
- Arrange on a plate and enjoy immediately or store in an airtight container for later indulgence.
Notes
- Use room temperature ingredients for smoother mixing.
- Chill snowballs before coating to prevent melting.
- Don’t overmix the batter to keep centers tender.
- Roll gently to maintain uniform shape.
- Store in layers with parchment between for easy stacking.
Nutrition
- Serving Size: 1 snowball
- Calories: 180
- Sugar: 15g
- Sodium: 90mg
- Fat: 8g
- Saturated Fat: 5g
- Unsaturated Fat: 3g
- Trans Fat: 0g
- Carbohydrates: 25g
- Fiber: 1g
- Protein: 2g
- Cholesterol: 35mg
Keywords: Red Velvet, Snowballs, Dessert, Holiday Treat, Bite-Sized, Cocoa, White Chocolate