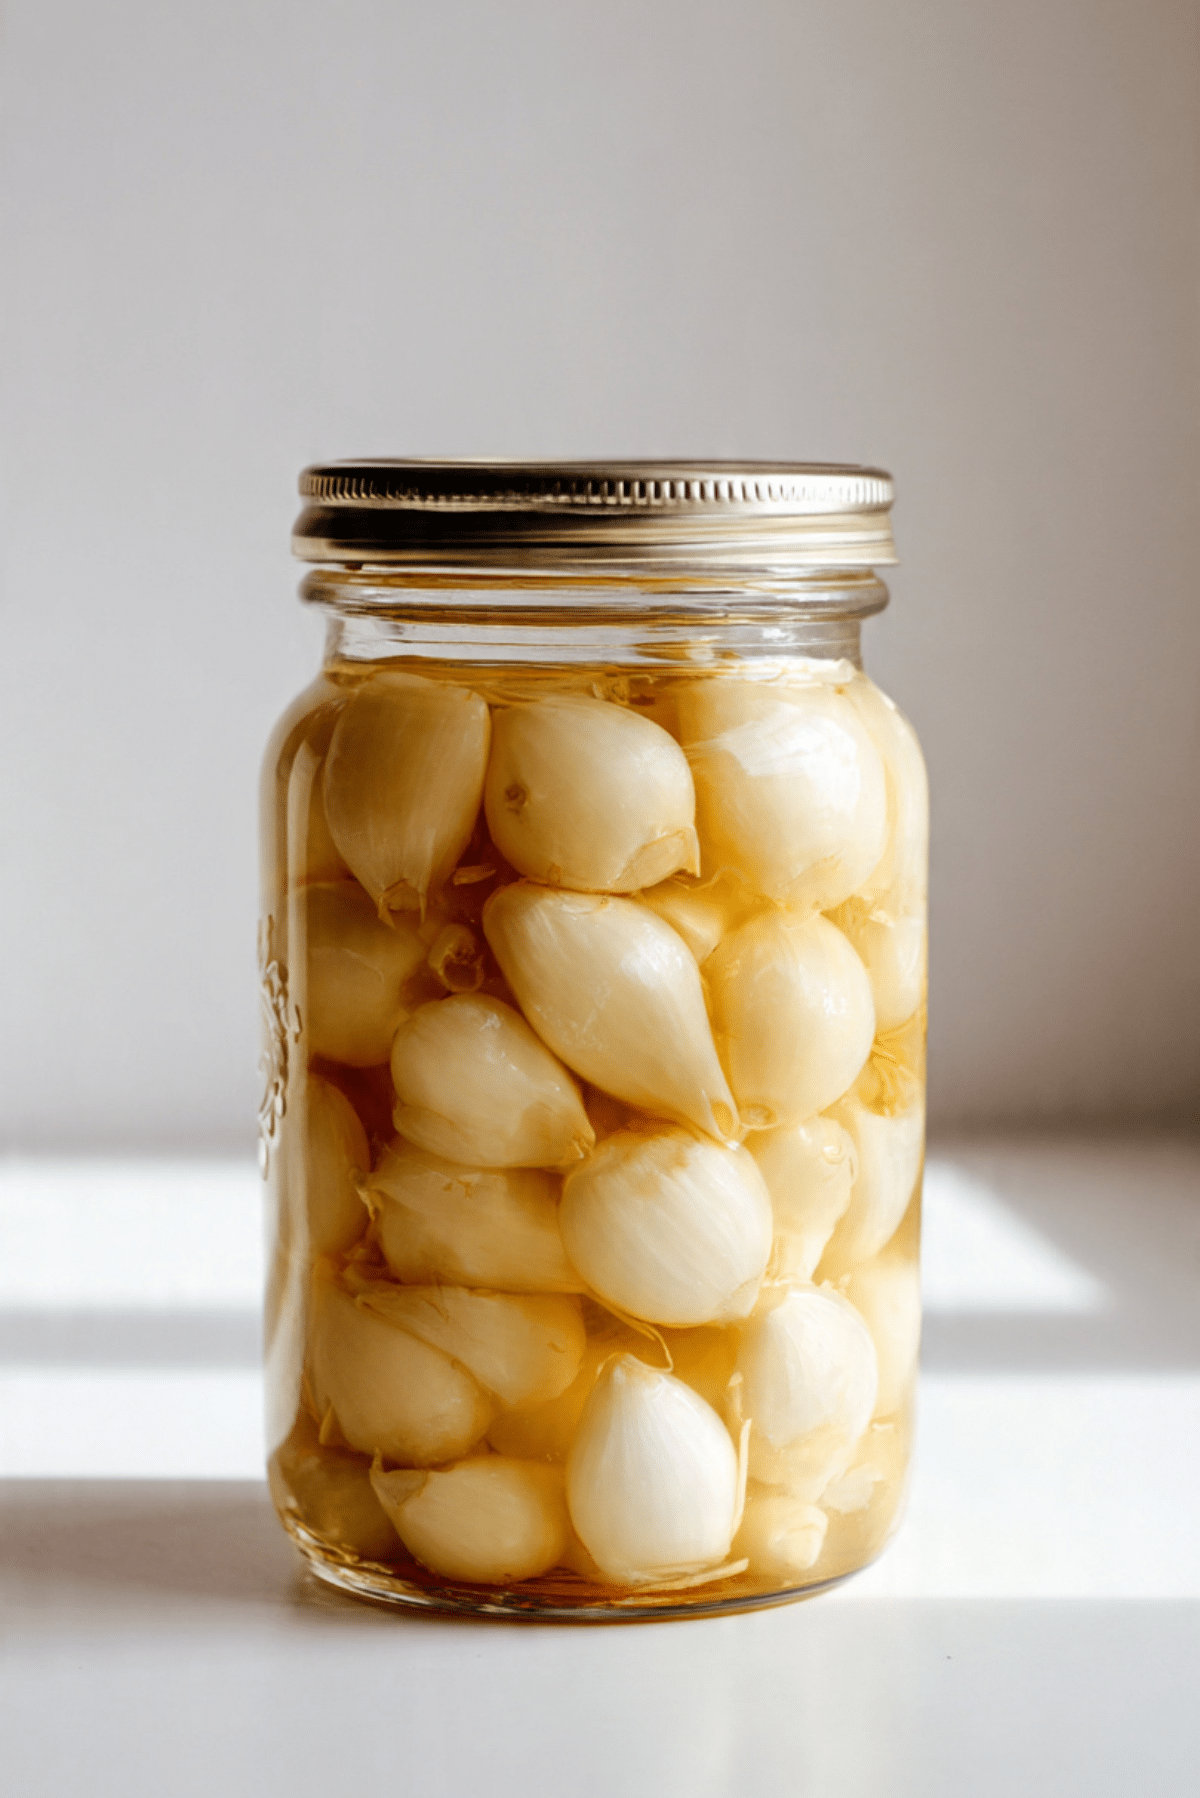
Pickled Garlic
There is something almost magical about opening a jar of pickled garlic. The sharp bite of raw garlic softens into something mellow and tangy, the cloves turning slightly golden and glossy as they soak in that bright brine. The aroma is bold yet inviting, and once you taste one, trust me, you’re going to love this. It is punchy, a little sweet, and surprisingly addictive.
And now, let me take you deeper into why this simple jar deserves a permanent spot in your fridge.
A Bold Little Jar That Transforms Everything
Pickled garlic may look humble, but it completely changes the way you cook. Those once fiery cloves become tender, almost buttery in texture, with a gentle acidity that wakes up salads, sandwiches, and roasted vegetables.
It is the kind of condiment that quietly elevates a meal. Chop it into dressings, slice it over grain bowls, or enjoy a clove straight from the jar if you are feeling brave. This one’s a total game changer because it gives you flavor without the harsh burn of raw garlic.
A Tradition Rooted in Preservation and Flavor
Long before refrigerators were common, people relied on vinegar and salt to preserve harvests. Garlic, being abundant and sturdy, was often preserved this way across Mediterranean and Middle Eastern kitchens.
In many cultures, jars of pickled garlic sit proudly on the table next to olives, breads, and cheeses. It is not just about extending shelf life, it is about layering flavor into everyday meals. Over time, the cloves mellow and absorb the brine, becoming something entirely new while still holding onto their bold personality.
And that history makes each jar feel a little special, like you are continuing a simple but meaningful tradition.
Why This Recipe Works Every Single Time
Before we get into the details, let me tell you why this method is so reliable and worth keeping.
Versatile: These cloves slide into salads, pasta, wraps, and even charcuterie boards. You will find yourself reaching for them constantly.
Budget-Friendly: Garlic, vinegar, and pantry staples are affordable and easy to find. No fancy ingredients needed.
Quick and Easy: The hands on time is minimal. Most of the magic happens while the jar rests.
Customizable: You can adjust sweetness, saltiness, or spice level to suit your taste.
Crowd-Pleasing: The tangy, mellow flavor surprises people in the best way.
Make-Ahead Friendly: In fact, it gets better after a few days in the fridge.
Great for Leftovers: Use the brine in salad dressings or marinades so nothing goes to waste.
Insider Secrets for Perfectly Balanced Flavor
Making pickled garlic is simple, but a few small details make all the difference.
- Use fresh, firm garlic bulbs. Soft or sprouting cloves will not give you the same clean flavor.
- Simmer the brine just long enough to dissolve the sugar and salt, do not boil aggressively.
- Make sure the cloves are fully submerged in the liquid to prevent discoloration.
- Let the jar rest for at least 48 hours before tasting for best flavor development.
These little steps ensure your jar turns out crisp, tangy, and beautifully balanced.
Kitchen Tools That Make It Effortless
You do not need much, which is part of the charm.
Medium Saucepan: For gently heating the vinegar brine.
Glass Jar with Lid: A clean, airtight jar keeps everything fresh and safe.
Small Knife: To trim the garlic ends and make peeling easier.
Measuring Cups and Spoons: For accurate flavor balance.
Simple tools, big flavor payoff.
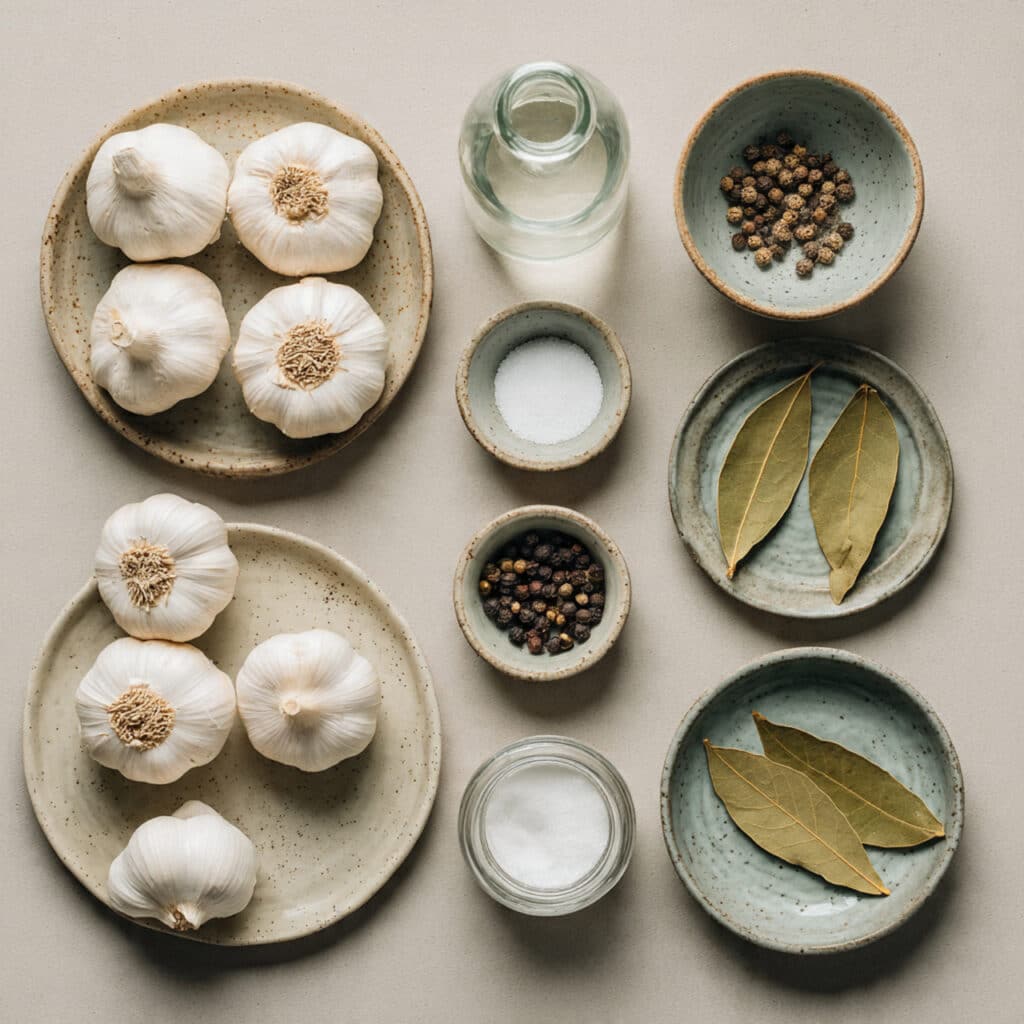
Ingredients That Come Together in Perfect Harmony
The beauty of this dish lies in its simplicity. Each ingredient has a purpose, and together they create that irresistible tang.
- Fresh Garlic Bulbs: 4 large bulbs, about 40 to 45 cloves, peeled. The star of the jar, providing bold flavor that mellows over time.
- White Distilled Vinegar: 1 ½ cups. Brings the sharp acidity that preserves and brightens.
- Filtered Water: 1 cup. Softens the vinegar’s intensity for a balanced brine.
- Granulated Sugar: 2 tablespoons. Adds subtle sweetness to round out the acidity.
- Kosher Salt: 1 tablespoon. Enhances flavor and supports preservation.
- Whole Black Peppercorns: 1 teaspoon. Adds gentle warmth and depth.
- Bay Leaves: 2 whole leaves. Infuses a delicate herbal note.
Easy Swaps If You Want to Experiment
If you like to tweak things, here are a few ideas.
White Distilled Vinegar: Apple cider vinegar for a fruitier tang.
Granulated Sugar: Honey for a softer sweetness.
Black Peppercorns: Red pepper flakes for a bit of heat.
Bay Leaves: Fresh thyme sprigs for a different herbal twist.
The Stars of the Jar
Two ingredients truly define this dish.
Garlic: Once soaked in brine, it becomes tender, slightly sweet, and far less sharp than raw cloves.
White Distilled Vinegar: It preserves, brightens, and gives that signature tangy punch that makes each bite pop.
Let’s Make It Together
Now that everything is ready, let’s walk through it step by step.
- Preheat Your Equipment: There is no oven needed, but make sure your jar and lid are thoroughly cleaned and dried.
- Combine Ingredients: In a medium saucepan, combine the white distilled vinegar, filtered water, granulated sugar, kosher salt, black peppercorns, and bay leaves. Stir gently over medium heat until the sugar and salt dissolve completely.
- Prepare Your Cooking Vessel: Place the peeled garlic cloves into the clean glass jar, packing them snugly but not crushing them.
- Assemble the Dish: Carefully pour the warm brine over the garlic cloves, ensuring they are fully submerged.
- Cook to Perfection: There is no extended cooking here. Once poured, allow the jar to cool to room temperature before sealing tightly.
- Finishing Touches: Seal the jar and refrigerate for at least 48 hours to allow flavors to develop.
- Serve and Enjoy: After resting, enjoy the cloves straight from the jar or sliced into your favorite dishes.
Watching Texture and Flavor Transform
At first, the garlic is crisp and sharp. After soaking, it becomes tender yet still slightly firm, with a satisfying bite. The vinegar’s acidity mellows, blending with sweetness and salt to create a balanced tang. The peppercorns add subtle warmth, while bay leaves whisper herbal notes in the background.
Let me tell you, it is worth every bite.
Simple Tips to Make It Even Better
A few extra touches can elevate your jar.
- Use warm brine, not boiling, to keep garlic texture intact.
- Always store in the refrigerator after sealing.
- Taste after two days, but know that flavor deepens over a week.
Mistakes to Avoid for the Best Results
Even simple recipes have small pitfalls.
- Do not skip fully submerging the cloves, exposed garlic can discolor.
- Avoid using iodized table salt, which can cloud the brine.
- Do not rush the resting time, patience truly improves flavor.
Nutritional Snapshot
Servings: 10
Calories per serving: 25
Note: These are approximate values.
Timing at a Glance
Prep Time: 15 minutes
Cook Time: 5 minutes
Total Time: 20 minutes
Storing and Planning Ahead
This is perfect for meal prep. Once sealed, store the jar in the refrigerator for up to 3 weeks. The flavor intensifies over time. Freezing is not recommended, as it changes texture. Always use a clean utensil when removing cloves to keep the brine fresh.
Serving Ideas to Spark Creativity
Scatter slices over avocado toast, toss into pasta salads, or serve alongside roasted vegetables. They also shine on charcuterie boards and inside wraps. The brine itself makes an incredible base for vinaigrettes.
Turning Leftovers Into Something New
Chop leftover cloves into creamy dips. Blend them into hummus for extra zing. Stir a spoonful of brine into soups for a subtle tang.
Extra Flavor Boosting Tips
Keep experimenting with spices. Try mustard seeds or coriander seeds for added depth. Adjust sweetness if you prefer a sharper finish. Keep notes so your next batch is even better.
Make It Look Beautiful on the Table
Serve in a clear glass jar so the pale golden cloves shine through. Add a small spoon beside it and place it among colorful dishes for contrast. A simple presentation lets the garlic speak for itself.
Fun Variations to Try
- Add sliced jalapeños for heat.
- Include fresh dill for a herbal twist.
- Swap part of the vinegar with rice vinegar for a milder tang.
- Add thin slices of fresh ginger for subtle warmth.
FAQ’s
Q1: How long does pickled garlic last?
It stays fresh in the refrigerator for up to 3 weeks when properly stored.
Q2: Can I use apple cider vinegar instead?
Yes, it gives a slightly fruitier flavor.
Q3: Why did my garlic turn blue?
This can happen naturally due to sulfur compounds reacting, and it is usually safe.
Q4: Can I store it at room temperature?
No, this version is designed for refrigeration only.
Q5: Can I reduce the sugar?
Yes, but it may taste sharper.
Q6: Is it very spicy?
Not at all, the heat of raw garlic mellows significantly.
Q7: Can I reuse the brine?
You can use it in dressings, but not for a new batch of garlic.
Q8: How soon can I eat it?
After 48 hours, though flavor improves over time.
Q9: Can I add herbs?
Absolutely, thyme or dill work beautifully.
Q10: Is this recipe vegan?
Yes, all ingredients are plant based.
Conclusion
Pickled garlic may be simple, but it delivers bold, layered flavor in every single clove. It is tangy, tender, and endlessly useful. Once you make a jar, you will wonder how your fridge ever felt complete without it. Give it a try, let it rest, and then enjoy that first mellow, flavorful bite.
Print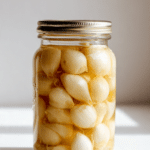
Pickled Garlic
- Prep Time: 15 minutes
- Cook Time: 5 minutes
- Total Time: 20 minutes
- Yield: 10 servings 1x
- Category: Condiment
- Method: Refrigeration
- Cuisine: Mediterranean
- Diet: Vegan
Description
Tangy, mellow pickled garlic cloves preserved in a simple vinegar brine with subtle sweetness and warm spice. Perfect for adding bold flavor to salads, sandwiches, and charcuterie boards.
Ingredients
- 4 large fresh garlic bulbs, about 40 to 45 cloves, peeled
- 1 ½ cups white distilled vinegar
- 1 cup filtered water
- 2 tablespoons granulated sugar
- 1 tablespoon kosher salt
- 1 teaspoon whole black peppercorns
- 2 whole bay leaves
Instructions
- Clean and thoroughly dry a glass jar with a tight-fitting lid.
- In a medium saucepan, combine the white distilled vinegar, filtered water, granulated sugar, kosher salt, black peppercorns, and bay leaves. Heat over medium heat, stirring until the sugar and salt dissolve completely.
- Place the peeled garlic cloves into the clean glass jar, packing them snugly without crushing.
- Carefully pour the warm brine over the garlic cloves, ensuring they are fully submerged.
- Allow the jar to cool to room temperature, then seal tightly with the lid.
- Refrigerate for at least 48 hours before serving to allow the flavors to develop.
Notes
- Store in the refrigerator for up to 3 weeks.
- Always ensure garlic cloves remain fully submerged in the brine.
- The flavor deepens after several days of refrigeration.
- The brine can be used in salad dressings or marinades.
Nutrition
- Serving Size: 1 serving
- Calories: 25
- Sugar: 1g
- Sodium: 180mg
- Fat: 0g
- Saturated Fat: 0g
- Unsaturated Fat: 0g
- Trans Fat: 0g
- Carbohydrates: 5g
- Fiber: 0.5g
- Protein: 1g
- Cholesterol: 0mg
Keywords: pickled garlic, homemade pickled garlic, garlic condiment, refrigerator pickles, tangy garlic cloves