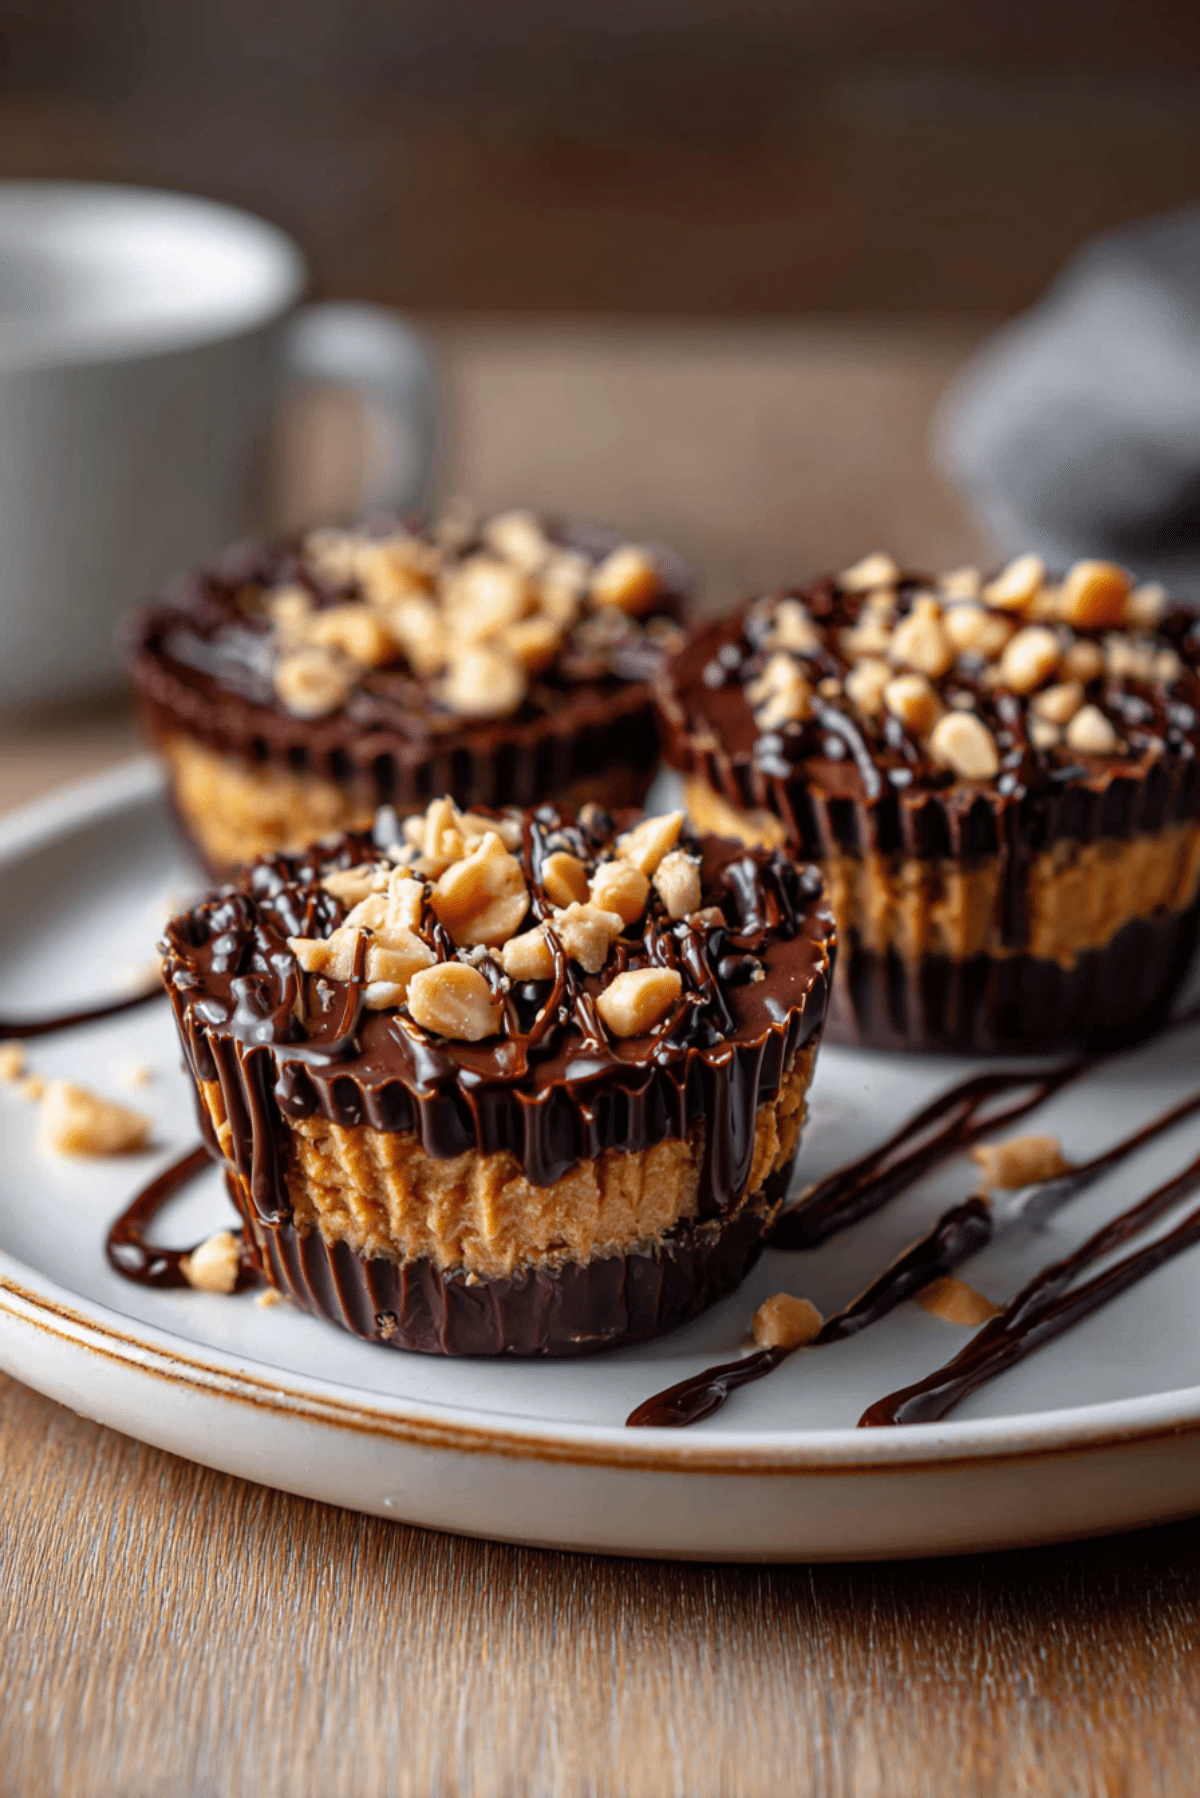
No-Bake Peanut Butter Oat Cups
If there’s one treat that disappears faster than you can say “peanut butter,” it’s these no-bake peanut butter oat cups. Creamy, crunchy, sweet, and satisfying, they check every box. No oven needed, no fancy gadgets, and no stress. Just a handful of pantry staples and a craving for something utterly delicious.
Behind the Recipe
This recipe came about one rainy afternoon when I needed a pick-me-up but didn’t want to turn on the oven. I had oats, peanut butter, and chocolate, so I started mixing and layering, hoping for something tasty. The result? A magical combination of textures and flavors that quickly became a go-to sweet fix. These oat cups feel like a warm hug in snack form.
Recipe Origin or Trivia
Peanut butter and oats are a match made in American pantry heaven. Oats have long been a staple in no-bake cookies, especially during warmer months when folks steer clear of hot kitchens. Pair them with peanut butter, which rose to popularity in the early 20th century, and you get a snack rooted in tradition but modern in simplicity and health appeal. These cups echo the nostalgic feel of childhood desserts while fitting right into today’s quick-and-clean eating vibe.
Why You’ll Love No-Bake Peanut Butter Oat Cups
They’re not just easy, they’re addictive. Here’s why:
Versatile: Great as a snack, dessert, or pre-workout bite. You can change the flavor with mix-ins.
Budget-Friendly: Uses affordable pantry staples with no need for special ingredients.
Quick and Easy: No baking required. You’ll be done in under 30 minutes.
Customizable: Add dried fruit, swap nut butters, or throw in seeds for a twist.
Crowd-Pleasing: A hit with both kids and adults. Great for potlucks and parties.
Make-Ahead Friendly: Perfect for prepping in batches and storing for the week.
Great for Leftovers: Keep in the fridge for those sudden sweet cravings.
Chef’s Pro Tips for Perfect Results
Want these to turn out absolutely irresistible? Keep these in mind:
- Use creamy peanut butter for smoother texture, but chunky adds extra crunch if that’s your vibe.
- Don’t overheat the chocolate, or it might seize. Melt gently.
- Use cupcake liners for easy removal and perfect portions.
- Add a pinch of sea salt on top for a flavor pop.
- Chill fully before eating so the layers set beautifully.
Kitchen Tools You’ll Need
These come together with just a few basics:
Mixing Bowls: One for the oat layer, one for the chocolate.
Spoon or Spatula: For mixing and spreading.
Cupcake Pan: Standard size works best to shape the cups.
Cupcake Liners: Helps remove the cups easily and keeps things tidy.
Microwave or Stovetop Pot: To melt chocolate.
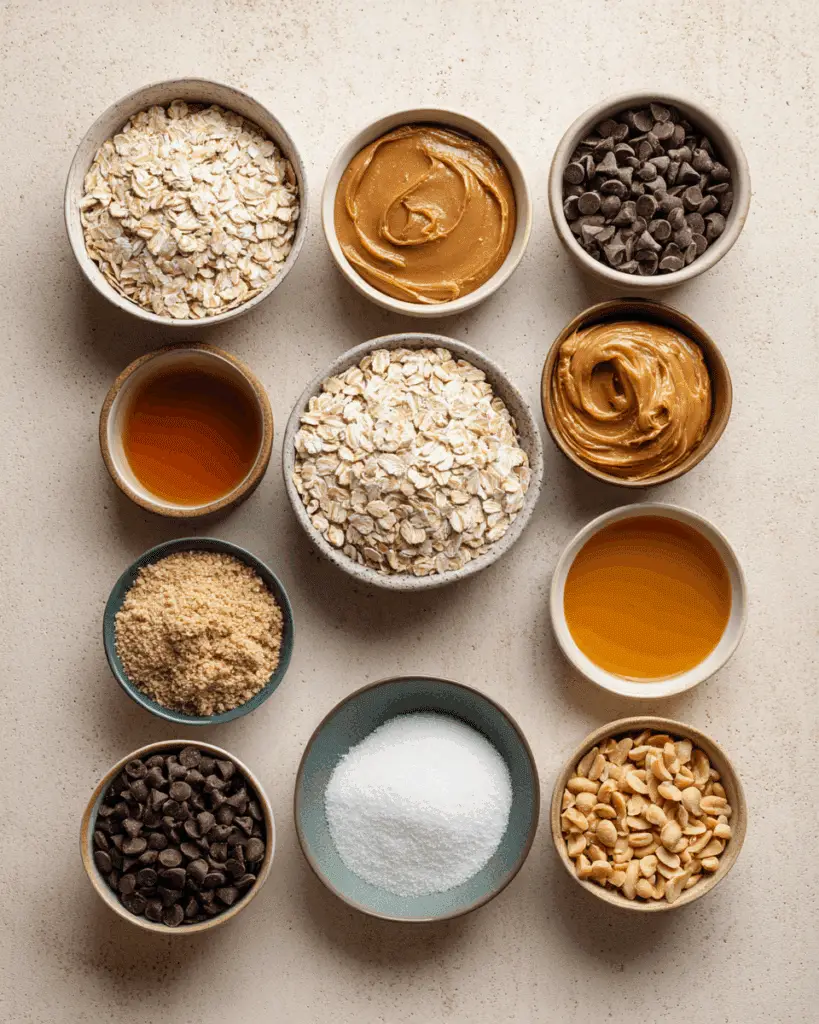
Ingredients in No-Bake Peanut Butter Oat Cups
This combo brings flavor, texture, and balance to every bite.
- Old-Fashioned Rolled Oats: 2 cups — Adds heartiness and chewy texture.
- Creamy Peanut Butter: 1 cup — Brings richness and binds the base.
- Maple Syrup or Honey: 1/2 cup — Adds natural sweetness and keeps the mixture moist.
- Coconut Oil: 1/4 cup — Helps everything hold together when chilled.
- Vanilla Extract: 1 teaspoon — Adds warmth and depth of flavor.
- Salt: 1/4 teaspoon — Balances the sweetness and enhances other flavors.
- Semi-Sweet Chocolate Chips: 1 cup — Melts into a luscious topping.
- Peanut Butter (for drizzle): 2 tablespoons — Finishing touch for flavor and visual flair.
- Chopped Peanuts (optional): 2 tablespoons — Adds crunch and a rustic look.
Ingredient Substitutions
Make it work with what you have on hand:
Peanut Butter: Use almond or cashew butter.
Maple Syrup or Honey: Swap with agave or brown rice syrup.
Coconut Oil: Try unsalted butter or any mild-flavored oil.
Chocolate Chips: Dark chocolate chunks or milk chocolate work too.
Rolled Oats: Quick oats in a pinch, though texture will be softer.
Ingredient Spotlight
Peanut Butter: This creamy staple adds richness, protein, and that unmistakable nutty flavor. It also binds the oats beautifully.
Coconut Oil: More than just a binder, it hardens when chilled, giving the cups their firm shape and slight sheen.
Instructions for Making No-Bake Peanut Butter Oat Cups
Now let’s make some magic. These steps are your roadmap to no-bake bliss.
-
Preheat Your Equipment:
No oven needed, but line a standard cupcake pan with paper liners and set aside. -
Combine Ingredients:
In a large bowl, mix rolled oats, peanut butter, maple syrup, melted coconut oil, vanilla extract, and salt until well combined. -
Prepare Your Cooking Vessel:
Scoop the oat mixture evenly into the lined cupcake pan, pressing down firmly to create a base layer. -
Assemble the Dish:
Melt the chocolate chips using a microwave or double boiler. Spoon melted chocolate over each oat cup. Tap the pan gently to even out the layer. -
Cook to Perfection:
These don’t need cooking, just pop the tray in the fridge for about 1–2 hours until firm. -
Finishing Touches:
Drizzle with a bit of peanut butter and sprinkle chopped peanuts on top for flair. -
Serve and Enjoy:
Remove from liners and enjoy chilled or at room temperature. Store extras in the fridge.
Texture & Flavor Secrets
Each bite starts with a chewy oat base, followed by a silky smooth chocolate top. The nutty richness of peanut butter balances with the sweetness of the maple syrup, while a sprinkle of salt and chopped peanuts gives you that satisfying crunch. It’s a layered experience you’ll crave again and again.
Cooking Tips & Tricks
These tricks will make things even easier:
- Always press down the oat layer firmly for compact cups.
- Freeze for faster setting if you’re short on time.
- Lightly grease the spoon before mixing to avoid sticky struggles.
What to Avoid
Stay away from these common mistakes:
- Using dry oats only: You need enough wet ingredients to bind.
- Overheating the chocolate: Go slow and stir often.
- Skipping the chill: They won’t hold their shape properly without it.
Nutrition Facts
Servings: 12
Calories per serving: 220
Note: These are approximate values.
Preparation Time
Prep Time: 15 minutes
Cook Time: 0 minutes
Total Time: 2 hours (chilling included)
Make-Ahead and Storage Tips
These cups are ideal for prepping ahead. Make a batch, refrigerate in an airtight container, and you’ll have a treat ready for the week. They also freeze beautifully. Just thaw slightly before eating to enjoy the texture.
How to Serve No-Bake Peanut Butter Oat Cups
Serve chilled for that satisfying crunch and snap. Pair with a glass of cold almond milk, black coffee, or even crumble one into a bowl of vanilla Greek yogurt for a quick parfait-style dessert.
Creative Leftover Transformations
If you somehow don’t devour them all, try this:
- Chop and add to smoothie bowls.
- Break into chunks as a topping for ice cream.
- Sandwich between banana slices for a fun twist.
Additional Tips
- Add a pinch of cinnamon or nutmeg for warmth.
- Want a mocha version? Stir in instant coffee powder with the oats.
- For a layered look, alternate oat and chocolate in thinner layers.
Make It a Showstopper
Presentation matters. Use mini cupcake liners in fun colors, drizzle chocolate in zigzag patterns, and sprinkle flaky sea salt or edible glitter. Stack them high on a cake stand or arrange in a circular pattern on a rustic wooden tray for the wow factor.
Variations to Try
- Chocolate Coconut: Add shredded coconut to the oat base.
- Berry Bliss: Stir in freeze-dried raspberries for fruity pops.
- Nut-Free: Use sunflower seed butter for allergy-safe treats.
- Protein-Packed: Add a scoop of vanilla or chocolate protein powder.
- Pumpkin Spice: Mix in pumpkin puree and spices in place of some peanut butter.
FAQ’s
Q1: Can I use steel-cut oats instead of rolled oats?
No, steel-cut oats won’t soften properly. Stick with rolled or quick oats.
Q2: How long do these last in the fridge?
Up to 7 days in an airtight container.
Q3: Can I freeze them?
Yes, they freeze well for up to 2 months.
Q4: What kind of peanut butter works best?
Natural creamy peanut butter is ideal. Just stir well before using.
Q5: Can I make these vegan?
Absolutely. Use maple syrup and dairy-free chocolate chips.
Q6: Are they gluten-free?
Yes, if you use certified gluten-free oats.
Q7: Can I make these in a square pan instead?
Sure. Press mixture into an 8×8 pan and slice into bars once chilled.
Q8: Do I need to toast the oats?
Not necessary, but toasting them adds a nice nutty flavor.
Q9: What’s the best way to melt the chocolate?
Microwave in 30-second bursts or use a double boiler on low heat.
Q10: Can I skip the chocolate topping?
You can, but it adds richness and contrast. It’s worth including.
Conclusion
There you have it. A no-bake treat that’s rich, satisfying, and oh-so-easy. Whether you’re in need of a sweet snack, an energy boost, or just a little joy in the form of peanut butter and chocolate, these oat cups deliver every time. Trust me, you’re going to love this.
Print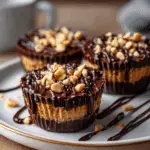
No-Bake Peanut Butter Oat Cups
- Prep Time: 15 minutes
- Cook Time: 0 minutes
- Total Time: 2 hours
- Yield: 12 servings 1x
- Category: Snacks, Desserts
- Method: No-Bake
- Cuisine: American
- Diet: Vegetarian
Description
These No-Bake Peanut Butter Oat Cups are a quick and easy treat made with wholesome ingredients. Featuring a chewy oat base, creamy peanut butter, and a smooth chocolate topping, they’re perfect for snacks, desserts, or on-the-go energy bites.
Ingredients
- 2 cups old-fashioned rolled oats
- 1 cup creamy peanut butter
- 1/2 cup maple syrup or honey
- 1/4 cup coconut oil
- 1 teaspoon vanilla extract
- 1/4 teaspoon salt
- 1 cup semi-sweet chocolate chips
- 2 tablespoons peanut butter (for drizzle)
- 2 tablespoons chopped peanuts (optional)
Instructions
- Line a standard cupcake pan with paper liners and set aside.
- In a large bowl, mix rolled oats, peanut butter, maple syrup, melted coconut oil, vanilla extract, and salt until well combined.
- Scoop the oat mixture evenly into the lined cupcake pan, pressing down firmly to create a base layer.
- Melt the chocolate chips using a microwave or double boiler. Spoon melted chocolate over each oat cup and tap the pan gently to even out the layer.
- Refrigerate for 1–2 hours until firm.
- Drizzle with additional peanut butter and sprinkle chopped peanuts on top.
- Remove from liners and enjoy chilled or at room temperature.
Notes
- Press down oat mixture firmly for compact cups.
- Freeze for faster setting if needed.
- Store in an airtight container in the fridge for up to 7 days or freeze up to 2 months.
Nutrition
- Serving Size: 1 cup
- Calories: 220
- Sugar: 10g
- Sodium: 100mg
- Fat: 15g
- Saturated Fat: 6g
- Unsaturated Fat: 8g
- Trans Fat: 0g
- Carbohydrates: 18g
- Fiber: 3g
- Protein: 6g
- Cholesterol: 0mg
Keywords: no-bake peanut butter oat cups, easy snack recipe, chocolate oat cups, healthy dessert, quick no-bake treat