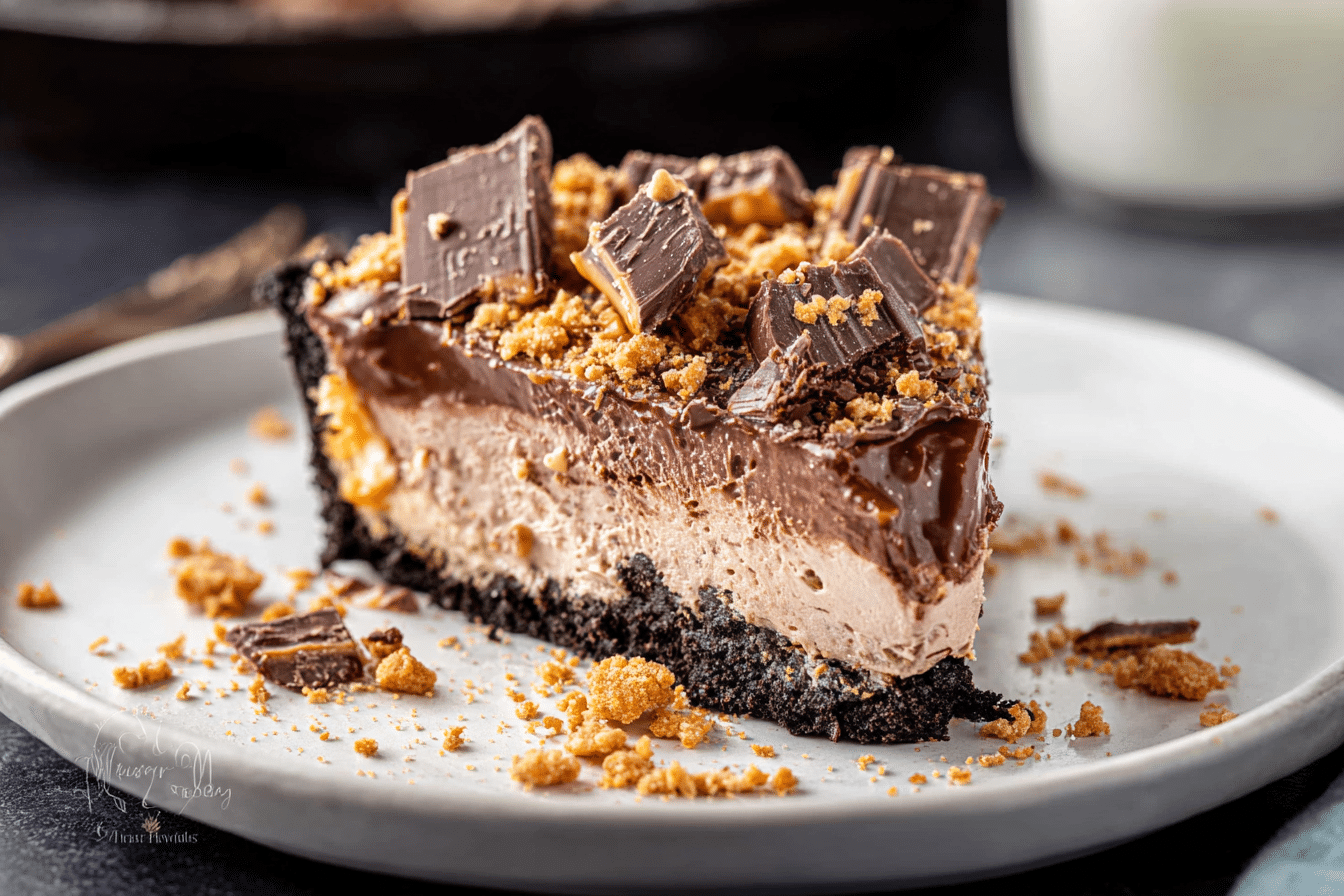
No-Bake Chocolate Butterfinger Pie
Get ready for a dessert that will make your taste buds do a happy dance! This No-Bake Chocolate Butterfinger Pie is the ultimate combination of creamy, crunchy, and chocolaty goodness. Picture a rich chocolate crust loaded with Oreo crumbs, topped with layers of peanut butter cream, chopped Butterfingers, and whipped topping, finished with chocolate pudding and a drizzle of chocolate syrup. It’s indulgent, playful, and perfect for any occasion. Trust me, this one’s going to disappear fast!
Recipe Origin:
Inspired by classic candy bar pies and modern no-bake desserts, this pie transforms familiar flavors into a luscious treat that’s simple to make and always a showstopper.
Kitchen Tools You’ll Need:
Mixing Bowls: One for the crust and another for the filling layers.
Spatula & Whisk: Essential for smooth and creamy mixtures.
Pie Dish: Standard 9-inch pie dish works perfectly.
Measuring Cups & Spoons: Accurate measurements make all the difference.
Knife & Cutting Board: For chopping the Butterfinger bars.
Electric Mixer (Optional): Speeds up cream cheese and whipped topping blending.
Refrigerator: Chill the pie for set layers and perfect texture.
Why You’ll Love No-Bake Chocolate Butterfinger Pie
This dessert is not just about sweet layers—it’s about creating moments of indulgence without the stress of baking.
Versatile: Perfect for last-minute dessert needs, holiday gatherings, or even a fun weeknight treat. Imagine serving this at a party—your friends will rave about it before you even cut a slice!
Budget-Friendly: Uses common pantry ingredients and candy bars you likely already have. No fancy or expensive items needed—just pure deliciousness.
Quick and Easy: No oven required! It’s straightforward and beginner-friendly, letting you enjoy dessert without the hassle.
Customizable: Love extra crunch? Add more chopped candy bars or sprinkle nuts. Prefer something lighter? Reduce the chocolate syrup or whipped topping.
Crowd-Pleasing: Kids and adults alike will adore the crunchy, creamy layers. This pie is guaranteed to be a hit at any table.
Print
No-Bake Chocolate Butterfinger Pie
- Prep Time: 20 minutes
- Cook Time: 0 minutes
- Total Time: 2 hours 20 minutes (including chilling)
- Yield: 8 servings 1x
- Category: Dessert
- Method: No-Bake
- Cuisine: American
- Diet: Vegetarian
Description
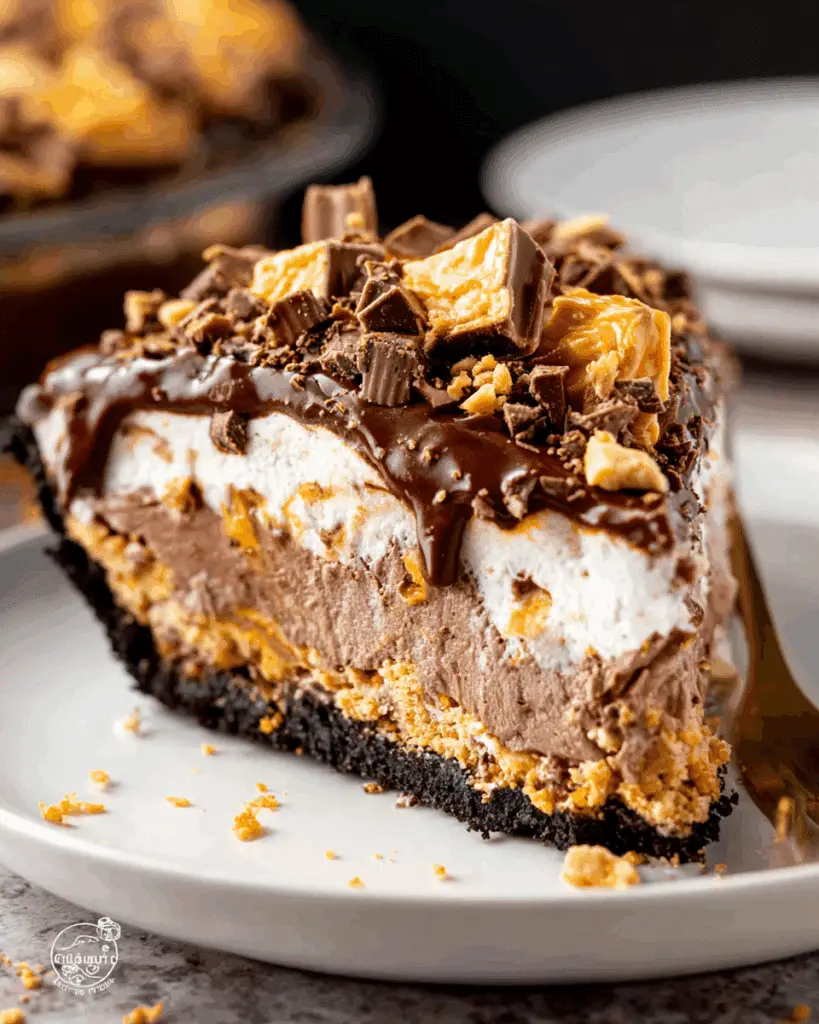
No Bake Chocolate Butterfinger Pie is a rich, indulgent dessert with a crunchy Oreo crust, creamy peanut butter and cream cheese filling, and layers of chocolate pudding and Butterfinger pieces. Perfect for chocolate lovers and quick to assemble without baking.
Ingredients
-
For the crust:
- 2 ½ cups (250 g) Oreo cookie crumbs
- ½ cup (115 g) unsalted butter, melted and slightly cooled
- ⅛ teaspoon salt
-
For the filling and toppings:
- 8 ounces (225 g) full-fat cream cheese, softened
- ¼ cup (65 g) creamy peanut butter
- ½ cup (60 g) powdered sugar
- 2 cups (280 g) chopped Butterfinger bars, plus more for topping
- 16 ounces (450 g) whipped topping, divided
- 2 3.4 oz boxes (96 g) chocolate fudge instant pudding mix
- 2 ½ cups (600 ml) milk
- 2 tablespoons (20 g) semisweet chocolate chips
- Chocolate syrup, for drizzling
Instructions
- In a medium bowl, combine Oreo crumbs, melted butter, and salt. Press mixture into the bottom and up the sides of a 9-inch pie pan to form the crust. Chill in the refrigerator for 15 minutes.
- In a large bowl, beat cream cheese, peanut butter, and powdered sugar until smooth. Fold in 2 cups chopped Butterfinger and half of the whipped topping.
- Spread the cream cheese mixture evenly into the chilled crust.
- In another bowl, whisk together chocolate fudge pudding mix and milk according to package instructions until thickened. Fold in remaining whipped topping.
- Layer the pudding mixture over the cream cheese layer in the pie crust.
- Top with additional chopped Butterfinger, chocolate chips, and drizzle with chocolate syrup.
- Refrigerate for at least 2 hours or until firm before serving.
Notes
- For easier slicing, chill the pie overnight.
- Use a good-quality peanut butter for the best flavor.
- Butterfinger pieces can be chopped larger or smaller depending on desired texture.
- This pie can be made in a 9×13 pan for a larger crowd.
Nutrition
- Serving Size: 1 slice (1/8 pie)
- Calories: 520
- Sugar: 45g
- Sodium: 300mg
- Fat: 33g
- Saturated Fat: 18g
- Unsaturated Fat: 13g
- Trans Fat: 0g
- Carbohydrates: 50g
- Fiber: 2g
- Protein: 7g
- Cholesterol: 55mg
Keywords: no bake chocolate Butterfinger pie, Oreo crust pie, chocolate peanut butter pie, easy dessert, no bake pie
Chef’s Pro Tips for Perfect Results:
- Crust: Use slightly cooled melted butter to avoid soggy crumbs. Press evenly into the pan for a stable base.
- Chopped Butterfingers: Chop roughly for the best crunch and texture.
- Cream Cheese & Peanut Butter: Make sure they’re softened to blend smoothly.
- Whipped Topping: Divide as needed and fold gently to maintain fluffiness.
- Chocolate Pudding: Use instant pudding for convenience and thick, creamy layers.
Ingredients for No-Bake Chocolate Butterfinger Pie
Here’s what makes this pie a crowd favorite:
For the Crust:
Oreo Cookie Crumbs: The chocolatey base that holds everything together.
Unsalted Butter: Binds the crumbs and adds richness.
Salt: Balances the sweetness for a more complex flavor.
For the Filling and Toppings:
Cream Cheese: Adds a smooth, tangy richness to the peanut butter layer.
Peanut Butter: Creamy, nutty, and indulgent—it’s the heart of the filling.
Powdered Sugar: Sweetens and smooths the peanut butter mixture.
Butterfinger Bars: Crunchy, chocolatey candy that makes this pie irresistible.
Whipped Topping: Lightens the pie and adds a fluffy texture.
Chocolate Fudge Instant Pudding Mix: Creates a decadent chocolate layer.
Milk: Necessary to prepare the pudding perfectly.
Semisweet Chocolate Chips: Adds small bursts of chocolate goodness.
Chocolate Syrup: Drizzled on top for a final indulgent touch.
(Note: the full ingredients list, including measurements, is provided in the recipe card directly below.)
Instructions
Let’s assemble this irresistible pie:
Prepare the Crust: Mix Oreo crumbs, melted butter, and salt in a bowl. Press firmly into the bottom of a 9-inch pie dish. Chill in the fridge for 10–15 minutes to set.
Make the Peanut Butter Layer: Beat together softened cream cheese, peanut butter, and powdered sugar until smooth. Fold in chopped Butterfinger bars and half of the whipped topping. Spread evenly over the chilled crust.
Prepare the Chocolate Pudding: In a medium bowl, whisk together pudding mix and milk until thickened. Fold in remaining whipped topping and chocolate chips. Spread this layer over the peanut butter filling.
Top the Pie: Sprinkle additional chopped Butterfingers on top and drizzle generously with chocolate syrup.
Chill to Set: Refrigerate the pie for at least 2 hours, or until layers are firm and flavors meld together beautifully.
Serve and Enjoy: Slice and serve chilled for a perfectly layered, creamy, crunchy, chocolatey indulgence.
Nutrition Facts
Servings: 8
Calories per Serving: Approx. 450
Preparation Time
Prep Time: 20 minutes
Chill Time: 2 hours
Total Time: 2 hours 20 minutes
How to Serve No-Bake Chocolate Butterfinger Pie
This pie is perfect on its own or paired with simple accompaniments:
Whipped Cream: Extra fluffy topping always enhances the indulgence.
Fresh Fruit: Strawberries or raspberries add a tart contrast.
Coffee or Milk: Balances the sweetness beautifully.
As a Standalone Dessert: This pie is so rich, it doesn’t need anything else—perfect for a decadent treat.
Make-Ahead and Storage Tips
Prep Ahead: Assemble the pie up to a day in advance and refrigerate.
Storage: Keep in an airtight container in the fridge for up to 3 days.
Freeze for Later: The pie can be frozen uncut—thaw overnight before serving.
Variations to Try:
- Add a layer of caramel sauce between the peanut butter and chocolate layers.
- Use chopped Snickers or Twix bars instead of Butterfingers.
- Sprinkle crushed pretzels on top for a salty-sweet twist.
Additional Tips:
Garnish Creatively: Top with chocolate curls, cocoa powder, or candy pieces.
Serving Size: Rich dessert—smaller slices are satisfying.
Kid-Friendly: Skip chocolate syrup drizzle if serving to little ones.
Double the Batch: Ideal for parties or gatherings—just use a larger pan or two pies.
FAQ Section
Q1: Can I make this pie gluten-free?
A1: Yes! Use gluten-free chocolate sandwich cookies for the crust.
Q2: Can I substitute peanut butter with almond or cashew butter?
A2: Absolutely! It will change the flavor slightly but remain delicious.
Q3: Can I make this ahead of time?
A3: Yes, assemble and refrigerate up to a day in advance.
Q4: How long does this pie last in the fridge?
A4: Up to 3 days in an airtight container.
Q5: Can I freeze the pie?
A5: Yes, freeze uncut. Thaw in the fridge overnight before serving.
Q6: Can I add extra chocolate chips?
A6: Sure! Sprinkle in the filling or on top for more chocolate goodness.
Q7: Can I make it with sugar-free pudding mix?
A7: Yes, substitute for regular pudding to reduce sugar content.
Q8: Can I use light cream cheese or peanut butter?
A8: You can, but the pie may be less rich and creamy.
Q9: Can I layer more candy bars?
A9: Definitely! The pie is flexible—more layers mean more fun and texture.
Q10: Can I use homemade chocolate cookies for the crust?
A10: Yes, crush them finely and mix with butter to make a perfect base.
Conclusion
No-Bake Chocolate Butterfinger Pie is a playful, indulgent dessert that’s perfect for any occasion. With a crunchy cookie crust, creamy peanut butter filling, chopped candy bars, whipped topping, and luscious chocolate layers, it’s an irresistible treat that’s fun to make and impossible to resist. Whether you’re impressing friends, celebrating a holiday, or just treating yourself, this pie delivers on flavor, texture, and wow factor. Slice it, serve it, savor it, and get ready to fall in love bite by bite!
Follow along with this easy no-bake pie recipe featuring chocolate and Butterfinger candy: