No Bake Black Forest Cheesecake
The first time I made this, I remember thinking how something so rich and elegant could come together without ever turning on the oven. The silky cream layer, the deep chocolate base, and that glossy cherry topping all melt together into something that feels both indulgent and effortless. Trust me, you’re going to love this, especially when you realize how simple it actually is.
A dessert that feels fancy but is secretly effortless
There’s something about the combination of chocolate and cherries that instantly feels luxurious. The smooth creaminess contrasts beautifully with the slight crunch of the base, while the cherries add that sweet and slightly tart finish that keeps every bite interesting. This one’s a total game changer for gatherings, because it looks impressive but requires very little effort.
A sweet story rooted in classic flavors
Black Forest flavors come from the famous German dessert known as Black Forest cake, which traditionally combines chocolate, cream, and cherries. This no bake version keeps that same spirit but transforms it into something lighter and easier to prepare at home. It’s like taking a classic and giving it a modern, relaxed twist that fits right into everyday kitchens.
Why this recipe works every single time
Before we dive deeper, let me tell you why this dessert has become such a favorite.
Versatile: You can dress it up for special occasions or keep it simple for a cozy night in, it always fits the mood.
Budget-Friendly: Most ingredients are simple pantry staples, which makes it accessible without sacrificing flavor.
Quick and Easy: No oven, no complicated steps, just mix, layer, and chill.
Customizable: You can adjust sweetness, swap toppings, or even change the crust if you like.
Crowd-Pleasing: Chocolate and cherries are a combination that rarely disappoints anyone.
Make-Ahead Friendly: It actually tastes better after chilling, which makes it perfect for planning ahead.
Great for Leftovers: The flavors deepen overnight, making the next slice even more delicious.
Chef secrets to make it truly unforgettable
Now that you’re excited, here are a few little tricks that make all the difference.
- Use full-fat cream cheese for the creamiest texture.
- Chill the base before adding the filling so it holds together perfectly.
- Whip the cream until soft peaks form, not too stiff.
- Let the cheesecake set fully before slicing for clean layers.
Tools that make everything smoother
Before starting, having the right tools makes the process feel seamless.
Springform Pan: Makes it easy to remove the cheesecake without damaging the layers.
Mixing Bowls: You will need a few for combining ingredients separately.
Hand Mixer or Whisk: Helps achieve that smooth, airy filling.
Spatula: Perfect for folding and spreading evenly.
Measuring Cups and Spoons: Ensures accuracy for consistent results.
Ingredients that come together beautifully
Each ingredient plays a role in building that rich, layered experience.
- Chocolate Biscuits: 200 grams, crushed, forms the crunchy base.
- Melted Butter: 100 grams, binds the crust together.
- Cream Cheese: 400 grams, provides the rich and creamy texture.
- Powdered Sugar: 120 grams, adds smooth sweetness.
- Vanilla Extract: 1 teaspoon, enhances the overall flavor.
- Heavy Cream: 250 milliliters, whipped to create a light texture.
- Dark Chocolate: 100 grams, melted for depth and richness.
- Cherry Pie Filling: 300 grams, brings sweetness and slight tartness.
- Fresh Cherries: 100 grams, for garnish and fresh flavor.
Easy swaps if you want to experiment
Sometimes you want to tweak things, and that’s totally fine.
Chocolate Biscuits: Use graham crackers or digestive biscuits.
Heavy Cream: Swap with whipped topping if needed.
Dark Chocolate: Milk chocolate for a sweeter profile.
Cherry Pie Filling: Use fresh cherry compote if available.
Powdered Sugar: Honey or maple syrup in adjusted amounts.
Spotlight on the stars of the recipe
Let’s take a closer look at what really makes this dessert shine.
Dark Chocolate: Adds richness and balances the sweetness perfectly.
Cherry Pie Filling: Provides that signature fruity contrast that defines the whole experience.

Let’s bring it all together step by step
And now let’s dive into the fun part where everything comes to life.
- Preheat Your Equipment: No oven needed, but prepare your springform pan by lining the base.
- Combine Ingredients: Mix crushed biscuits with melted butter until it resembles wet sand.
- Prepare Your Cooking Vessel: Press the mixture firmly into the pan and chill for 20 minutes.
- Assemble the Dish: Beat cream cheese, powdered sugar, and vanilla until smooth, then fold in whipped cream and melted chocolate. Spread over the chilled crust.
- Cook to Perfection: No baking required, simply chill the cheesecake for at least 4 hours until set.
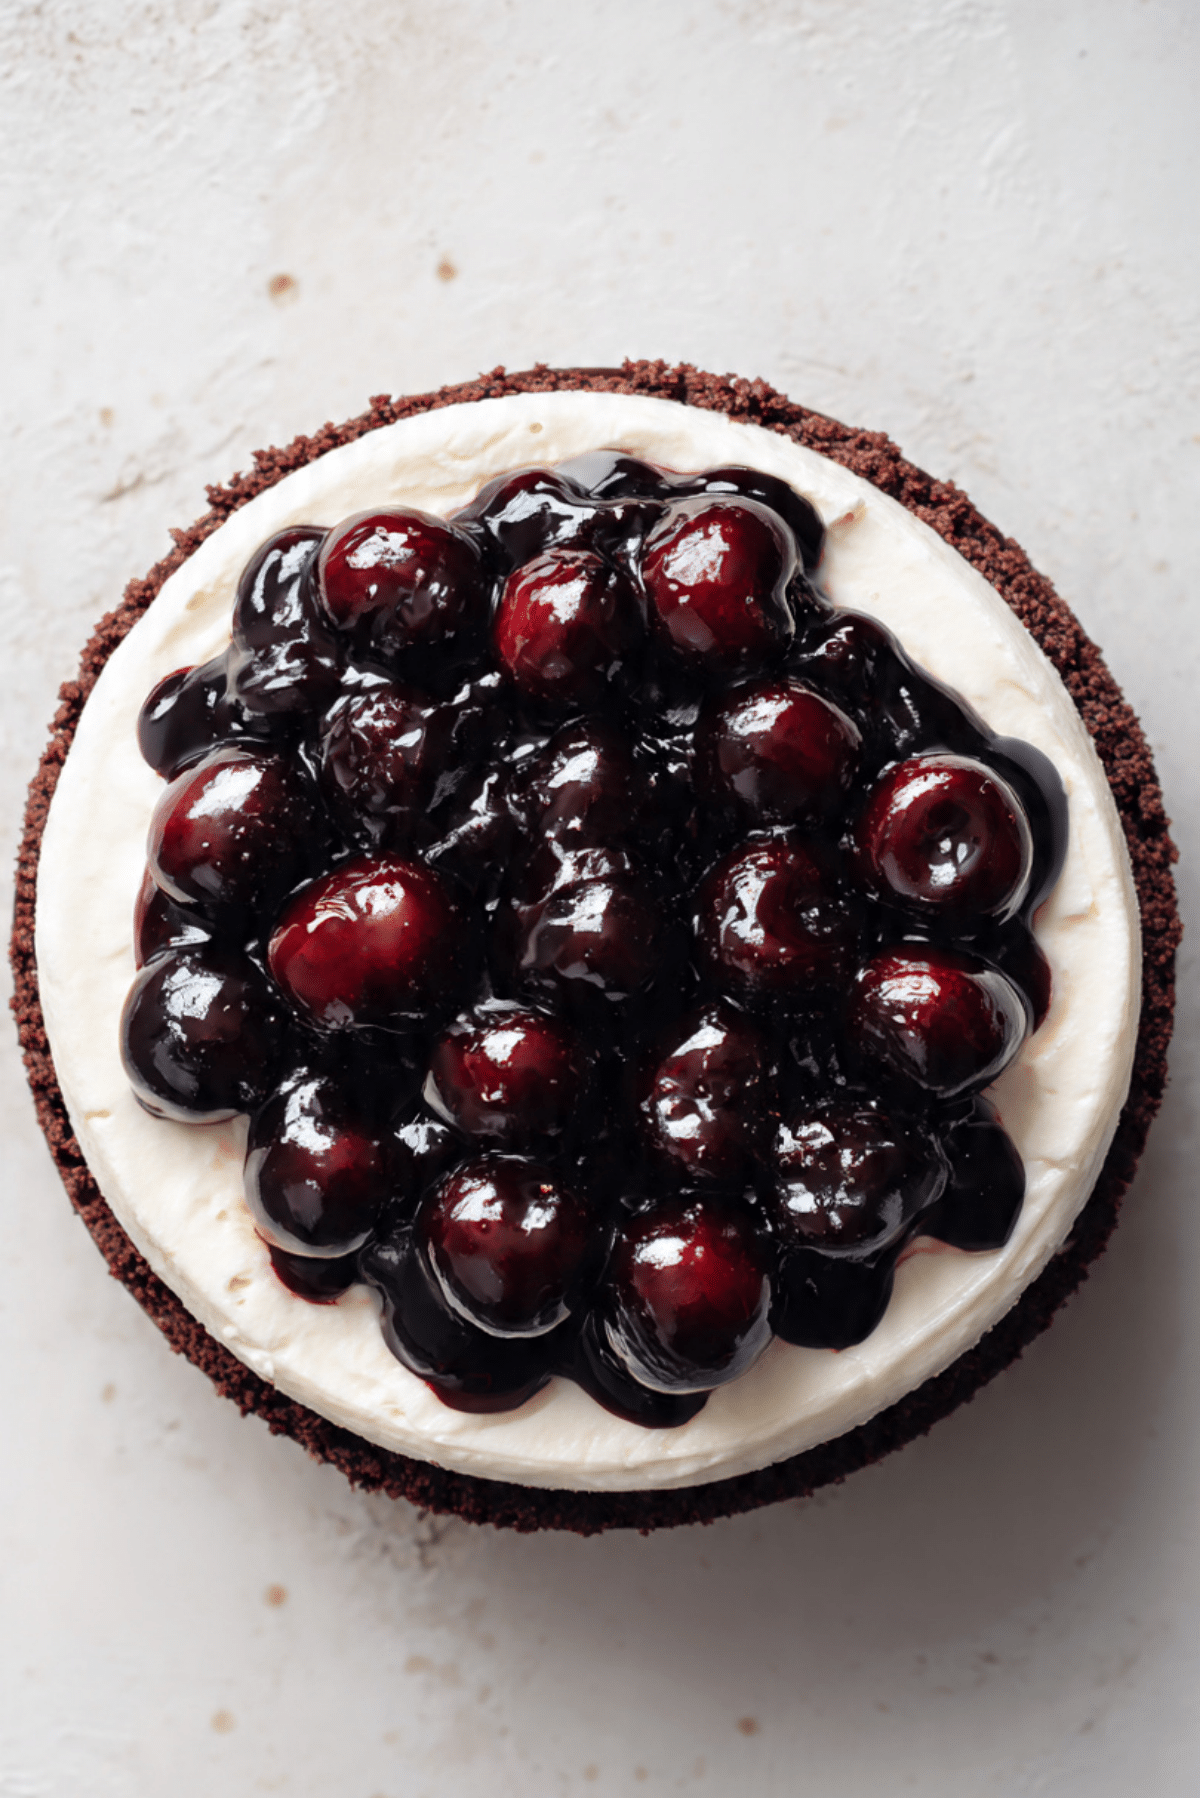
- Finishing Touches: Spoon cherry pie filling on top and decorate with fresh cherries.
- Serve and Enjoy: Slice gently and enjoy every creamy, chocolatey, fruity bite.
A perfect balance of textures and flavors
The base has a slight crunch that contrasts beautifully with the smooth and airy filling. Then comes the topping, which adds a glossy, juicy layer that bursts with flavor. Each bite feels layered, rich, and refreshing all at once.
Helpful tips to make it even better
A few extra tips can take your dessert from good to unforgettable.
- Chill overnight for the best texture
- Use high quality chocolate for deeper flavor
- Slice with a warm knife for clean edges
What to avoid for best results
Let’s keep things smooth and stress free.
- Overmixing the cream, which can make it dense
- Skipping chill time, it needs to set properly
- Using low fat cream cheese, it affects texture
Nutrition snapshot to keep in mind
Servings: 8
Calories per serving: 420
Note: These are approximate values.
Timing everything just right
Prep Time: 25 minutes
Cook Time: 0 minutes
Total Time: 4 hours 25 minutes
Make ahead and store like a pro
This dessert is perfect for planning ahead. You can prepare it a day in advance and keep it chilled. Store leftovers in the fridge for up to three days, or freeze slices individually for longer storage. When ready to enjoy, let it thaw slightly for the best texture.
Serving ideas that elevate the experience
Serve it slightly chilled with a drizzle of extra chocolate or a spoon of cherry sauce on the side. A cup of coffee or tea pairs beautifully with its richness.
Turn leftovers into something new
If you have leftovers, crumble them into parfaits with whipped cream, or blend into a milkshake for a fun twist.
Extra little touches that matter
Add a sprinkle of chocolate shavings or a light dusting of cocoa powder for extra visual appeal and flavor depth.
Make it look as good as it tastes
Use a sharp knife for clean slices and wipe between cuts. Arrange cherries neatly on top for that classic look that makes everyone reach for a piece.
Fun variations to explore
Try these ideas if you want to change things up.
- Add a layer of chocolate ganache between filling and topping
- Use white chocolate instead of dark
- Add a hint of almond extract for a nutty note
- Make mini versions in jars for individual servings
FAQ’s
Q1: Can I make it without a springform pan?
Yes, you can use a regular pan lined with parchment for easy removal.
Q2: How long does it need to chill?
At least 4 hours, but overnight is even better.
Q3: Can I use fresh cherries instead of filling?
Yes, just cook them slightly with sugar to soften.
Q4: Can I freeze it?
Absolutely, wrap slices well and freeze up to one month.
Q5: Why is my filling too soft?
It may need more chilling time or better whipped cream consistency.
Q6: Can I make it less sweet?
Yes, reduce powdered sugar slightly.
Q7: What chocolate works best?
Good quality dark chocolate gives the best flavor.
Q8: Can I skip the chocolate layer?
You can, but it adds depth to the dessert.
Q9: How do I get clean slices?
Use a warm knife and wipe between cuts.
Q10: Can I make it in advance?
Yes, it actually tastes better the next day.
Conclusion
And just like that, you have a dessert that feels elegant, tastes incredible, and comes together with ease. It’s rich, creamy, and perfectly balanced with that cherry finish. Let me tell you, it’s worth every bite, and once you try it, it might just become your go to dessert for every occasion.
Print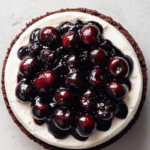
No Bake Black Forest Cheesecake
- Prep Time: 25 minutes
- Cook Time: 0 minutes
- Total Time: 4 hours 25 minutes
- Yield: 8 servings
- Category: Dessert
- Method: No Bake
- Cuisine: German-Inspired
- Diet: Vegetarian
Description
A rich and creamy no bake Black Forest cheesecake with a chocolate biscuit base, silky cheesecake filling, and sweet cherry topping, perfect for any occasion.
Ingredients
- Chocolate Biscuits: 200 grams, crushed, forms the crunchy base
- Melted Butter: 100 grams, binds the crust together
- Cream Cheese: 400 grams, provides the rich and creamy texture
- Powdered Sugar: 120 grams, adds smooth sweetness
- Vanilla Extract: 1 teaspoon, enhances overall flavor
- Heavy Cream: 250 milliliters, whipped to create a light texture
- Dark Chocolate: 100 grams, melted for depth and richness
- Cherry Pie Filling: 300 grams, brings sweetness and slight tartness
- Fresh Cherries: 100 grams, for garnish and fresh flavor
Instructions
- Preheat Your Equipment: Prepare a springform pan by lining the base
- Combine Ingredients: Mix crushed biscuits with melted butter until it resembles wet sand
- Prepare Your Cooking Vessel: Press mixture firmly into the pan and chill for 20 minutes
- Assemble the Dish: Beat cream cheese, powdered sugar, and vanilla until smooth, then fold in whipped cream and melted chocolate, spread over chilled crust
- Cook to Perfection: Chill the cheesecake for at least 4 hours until set
- Finishing Touches: Spoon cherry pie filling on top and decorate with fresh cherries
- Serve and Enjoy: Slice gently and enjoy every creamy, chocolatey, fruity bite
Notes
- Chill overnight for the best texture
- Use high quality chocolate for deeper flavor
- Slice with a warm knife for clean edges
Nutrition
- Serving Size: 1 slice
- Calories: 420
- Sugar: 28 grams
- Sodium: 150 mg
- Fat: 28 grams
- Saturated Fat: 16 grams
- Unsaturated Fat: 10 grams
- Trans Fat: 0 grams
- Carbohydrates: 38 grams
- Fiber: 2 grams
- Protein: 6 grams
- Cholesterol: 85 mg
Keywords: No Bake Black Forest Cheesecake, Chocolate Cherry Cheesecake, Easy Cheesecake Recipe, No Bake Dessert, Cherry Dessert