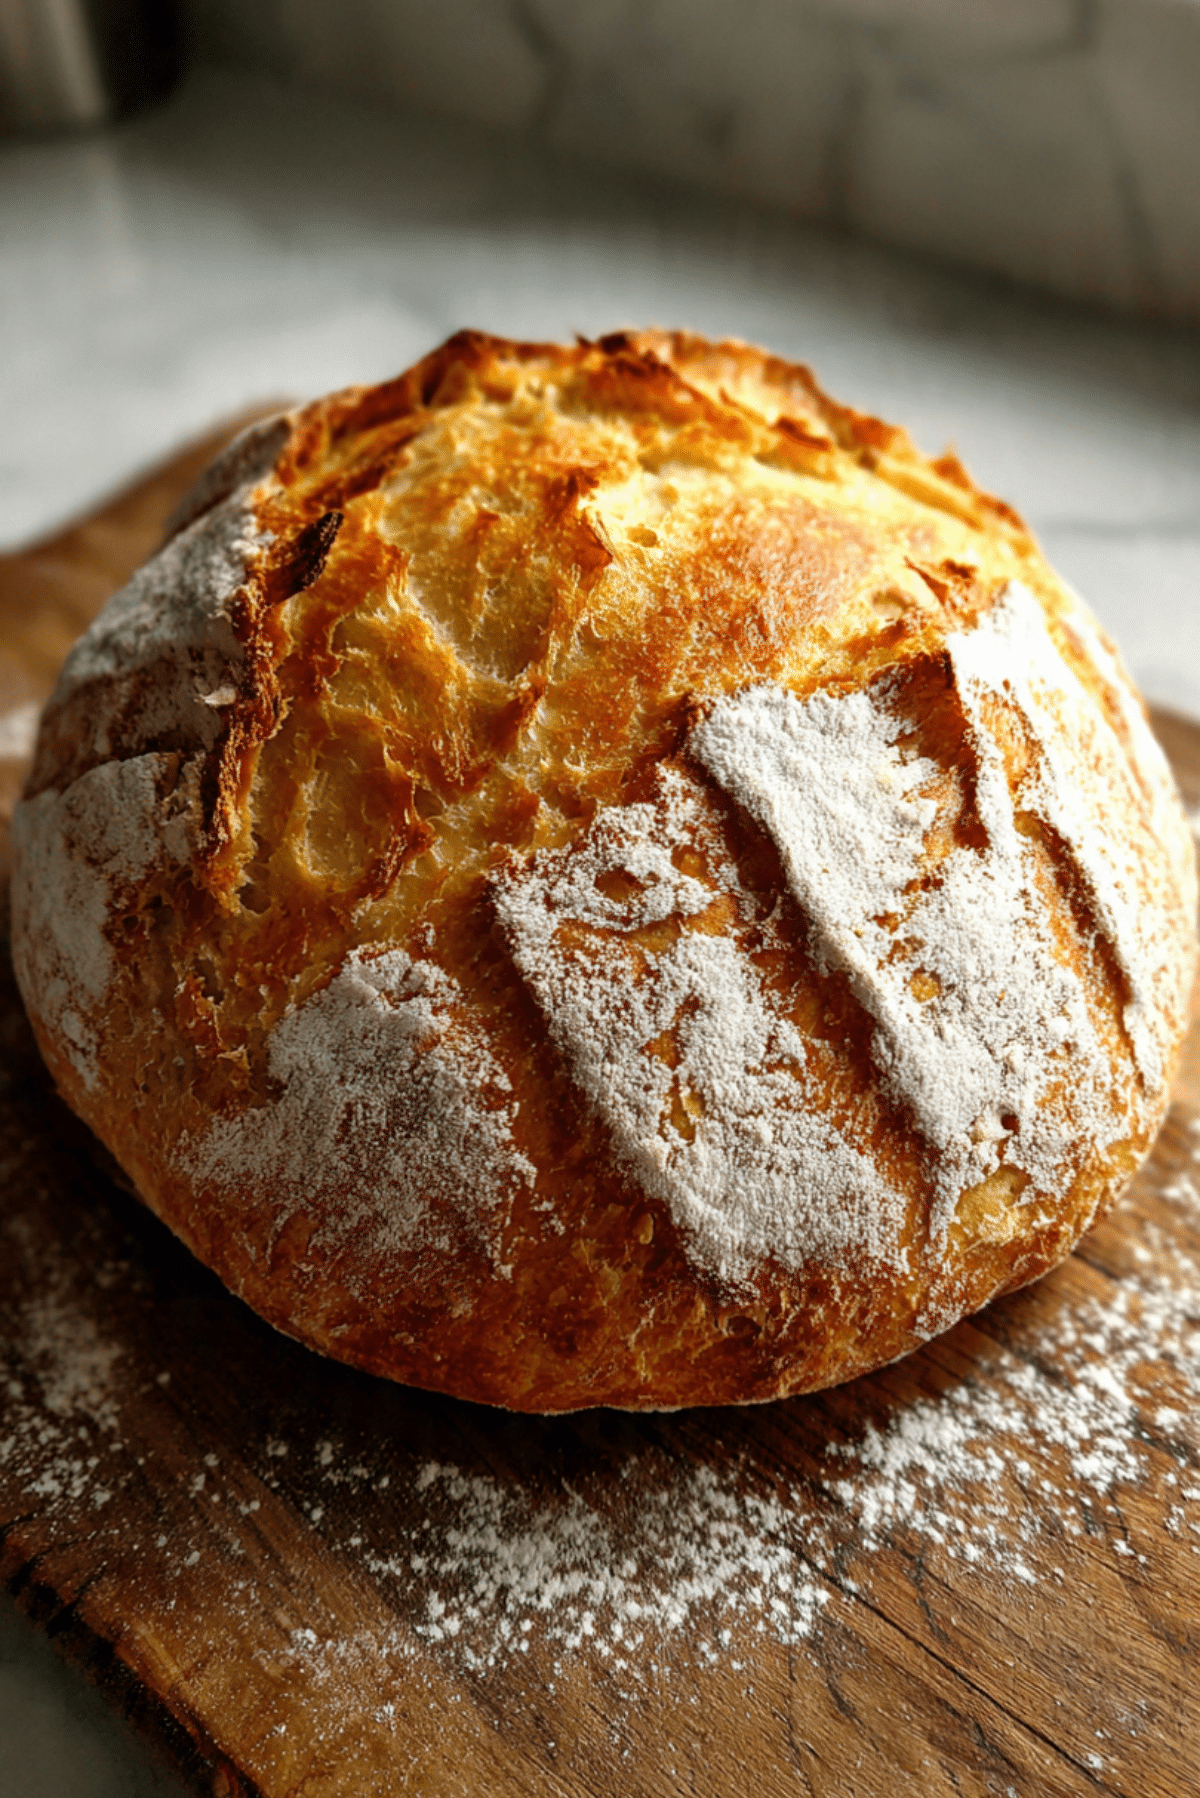
Miracle No Knead Bread
If you’ve ever dreamed of making bakery-style artisan bread at home with zero fuss, then this Miracle No Knead Bread is going to win your heart. It’s crusty on the outside, tender and chewy on the inside, and delivers the kind of depth you’d expect from a long fermentation. And the best part? No kneading, no complicated techniques, and barely any hands-on time. It’s the kind of recipe that makes you feel like a bread-making genius with hardly any effort at all.
Behind the Recipe
This bread came into my life on a chilly weekend when I was craving that freshly baked bread aroma but didn’t feel like dragging out the stand mixer or getting elbow-deep in dough. I wanted something effortless but deeply satisfying. That’s when I stumbled upon this minimalist method that relies on time, not muscle, to work its magic. It became my go-to for lazy Saturdays, for sharing with friends, or just tearing into while still warm, slathered in butter.
Recipe Origin or Trivia
The no knead bread revolution started with Jim Lahey, a New York City baker who introduced the world to the idea that time and patience could replace traditional kneading. By letting the dough rest for hours, the gluten develops naturally, resulting in that artisan texture we all crave. It’s rooted in old-world European techniques but modernized for home cooks everywhere. This method has since become a staple in home kitchens around the globe.
Why You’ll Love Miracle No Knead Bread
This isn’t just another bread recipe. This is the one that will change the way you think about baking bread forever.
Versatile: Perfect for sandwiches, dipping in soup, or just snacking straight from the cutting board.
Budget-Friendly: Only four pantry staples needed.
Quick and Easy: Minimal effort, just mix and forget until baking time.
Customizable: Add herbs, seeds, garlic, or cheese for endless variations.
Crowd-Pleasing: Impresses every time with that golden crust and chewy center.
Make-Ahead Friendly: The dough can rest overnight or longer in the fridge.
Great for Leftovers: Toasts beautifully and makes killer croutons.
Chef’s Pro Tips for Perfect Results
Let me tell you, a few small tweaks can make this already great bread truly exceptional.
- Use warm water, not hot: Too much heat can kill the yeast before it starts working. Aim for just slightly warmer than room temp.
- Let the dough rest long enough: Don’t rush it. That long fermentation is key to flavor and texture.
- Use a Dutch oven or heavy pot: This traps the steam, creating that crisp, golden crust.
- Preheat your pot: A ripping hot vessel gives the bread an instant burst of heat, helping it rise beautifully.
- Score the top if desired: A single slash helps control the rise and gives it that artisan look.
Kitchen Tools You’ll Need
You won’t need fancy equipment, but a few basics help make this bread a breeze.
Large mixing bowl: For combining and fermenting the dough.
Wooden spoon or spatula: No kneading means no mixer required.
Dutch oven or heavy oven-safe pot with lid: This creates the perfect steamy baking environment.
Parchment paper: Makes transferring and cleanup super simple.
Cooling rack: Helps keep the crust crisp after baking.
Ingredients in Miracle No Knead Bread
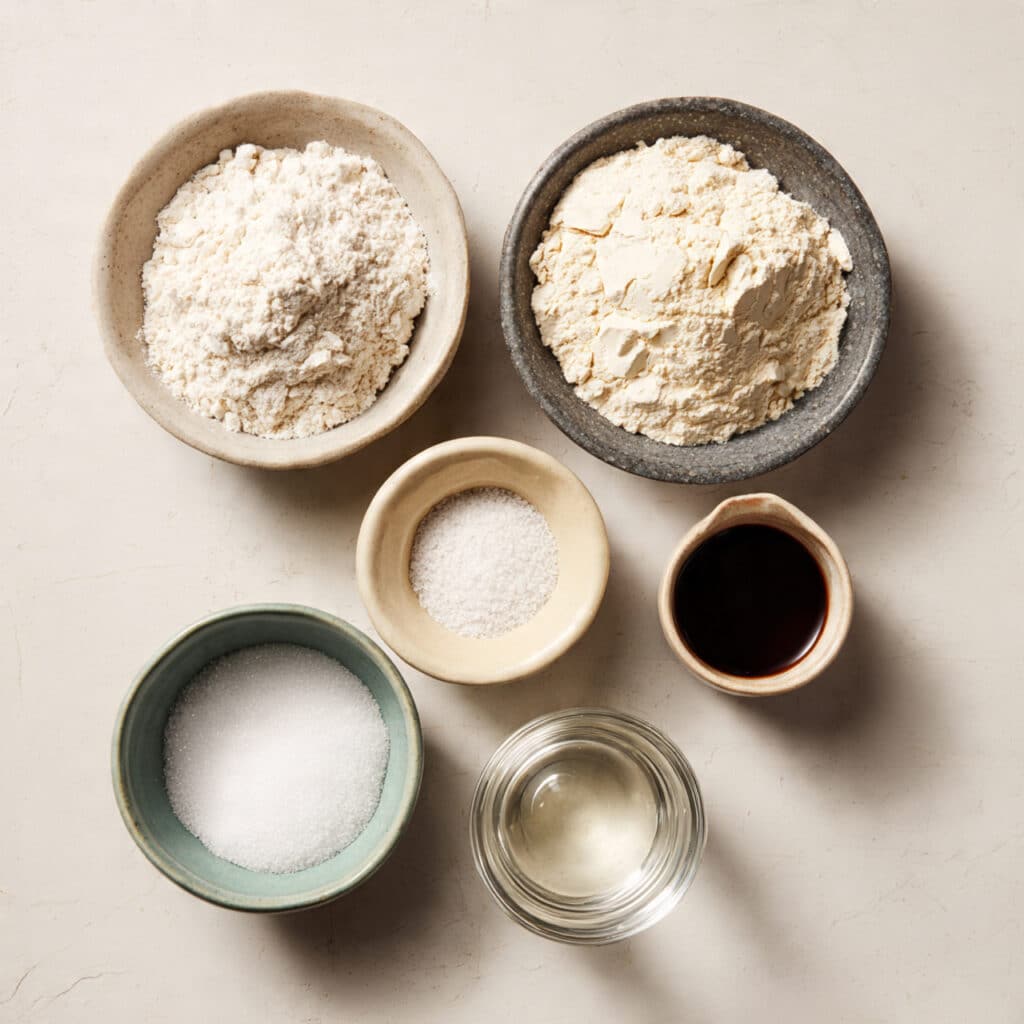
Each of these simple ingredients plays a role in creating that chewy crumb and crackly crust we all love.
- All-Purpose Flour: 3 cups. This is the backbone of the bread, creating structure and chew.
- Instant Yeast: 1/2 teaspoon. Just a touch gets things moving without overpowering the flavor.
- Salt: 1 1/4 teaspoons. Enhances flavor and strengthens the dough.
- Warm Water: 1 1/2 cups. Helps activate the yeast and brings the dough together.
Ingredient Substitutions
Sometimes you need to work with what you have, and that’s totally fine.
All-Purpose Flour: Bread flour for a slightly chewier texture.
Instant Yeast: Active dry yeast, just dissolve it in warm water first.
Salt: Sea salt or kosher salt, adjusting to taste.
Warm Water: Use filtered water for best results, especially if your tap water is hard.
Ingredient Spotlight
All-Purpose Flour: The versatile hero of this recipe, it provides just the right balance of protein and starch for soft but structured bread.
Instant Yeast: A powerful little agent that wakes up with just a bit of moisture and warmth, creating those beautiful air pockets inside the loaf.
Instructions for Making Miracle No Knead Bread
Making this bread is as easy as mixing, resting, and baking. No machines, no kneading, no stress.
-
Preheat Your Equipment:
Place your Dutch oven (with lid) inside the oven and preheat to 450°F about 30 minutes before baking. -
Combine Ingredients:
In a large bowl, mix flour, yeast, and salt. Pour in the warm water and stir until a shaggy dough forms. It will look rough, and that’s perfect. -
Prepare Your Cooking Vessel:
While the dough rests, line a clean bowl or surface with parchment paper and sprinkle lightly with flour. -
Assemble the Dish:
After 12 to 18 hours of rest at room temperature, the dough should be bubbly and slightly risen. Gently turn it out onto a floured surface and shape into a loose ball. -
Cook to Perfection:
Carefully place the dough (on parchment) into the hot Dutch oven. Cover with lid and bake for 30 minutes, then remove lid and bake another 10 to 15 minutes until deep golden brown. -
Finishing Touches:
Remove the bread and let cool completely on a wire rack to allow the interior to set and crust to crisp. -
Serve and Enjoy:
Slice into that gorgeous loaf and listen to the crackle. Perfect with butter, olive oil, or just as is.
Texture & Flavor Secrets
This bread has it all. A crust so crisp it crackles when you cut through it, and an interior that’s soft, airy, and chewy. Letting the dough ferment slowly creates deep, nutty, slightly tangy flavors that you just can’t get from a quick-rise dough. That balance of crust and crumb is what makes it truly addictive.
Cooking Tips & Tricks
A few bonus tricks can take this bread from great to unforgettable.
- Use a digital thermometer to check doneness. Aim for 200 to 210°F internal temp.
- Try resting the dough overnight in the fridge for even more flavor.
- For a rustic look, dust the top lightly with flour before baking.
What to Avoid
Let’s avoid those rookie mistakes that can mess with your miracle loaf.
- Don’t use too much yeast. Less is more here.
- Don’t skip the preheat. A hot pot is essential for crust development.
- Don’t cut the bread too early. Letting it rest ensures the inside finishes setting up.
Nutrition Facts
Servings: 10
Calories per serving: 150
Note: These are approximate values.
Preparation Time
Prep Time: 5 minutes
Cook Time: 45 minutes
Total Time: 13 hours (including rest time)
Make-Ahead and Storage Tips
This dough is made for make-ahead magic. You can mix it up the night before, let it rise slowly, and bake the next day. Once baked, store it in a paper bag or wrapped in a towel at room temp for up to 3 days. Want to freeze it? Slice it first, then freeze the slices in a zip-top bag. They reheat beautifully in the toaster or oven.
How to Serve Miracle No Knead Bread
This bread pairs with just about anything. Serve it with soups and stews, as a sandwich base, alongside pasta, or on a cheeseboard. Toast it for breakfast, dip it in olive oil, or use it as a hearty side for a leafy salad. It’s the definition of an everyday staple.
Creative Leftover Transformations
Don’t let a single slice go to waste. Here’s how to breathe new life into leftovers:
- Make homemade croutons by cubing and toasting with herbs.
- Turn it into garlic bread for an easy dinner side.
- Use as the base for a rustic open-faced sandwich.
- Grind into fresh breadcrumbs for coating meats or veggies.
Additional Tips
- For extra crunch, spritz the dough with water before baking.
- Add rosemary or thyme into the dough for a herby twist.
- Use a lame or sharp blade to score the top if you want fancy patterns.
Make It a Showstopper
Presentation matters. Let your loaf cool completely, then slice it on a wooden board with a serrated knife nearby. Dust the top with a touch of flour before baking for a classic bakery look. Wrap it in parchment with twine if gifting, or serve it whole on the table and let guests tear into it for a rustic, shared experience.
Variations to Try
- Cheddar Jalapeño: Add shredded sharp cheddar and minced jalapeño to the dough.
- Rosemary Sea Salt: Mix in fresh rosemary and sprinkle coarse sea salt on top.
- Whole Wheat: Replace 1 cup of flour with whole wheat flour for a nuttier flavor.
- Olive & Herb: Add chopped kalamata olives and Italian herbs.
- Cinnamon Raisin: Stir in cinnamon and soaked raisins for a sweet twist.
FAQ’s
Q1: Can I use active dry yeast instead of instant?
A1: Yes, just dissolve it in warm water first before mixing into the dough.
Q2: Do I really need a Dutch oven?
A2: It helps trap steam for the best crust, but an oven-safe pot with a tight lid can also work.
Q3: Can I refrigerate the dough before baking?
A3: Absolutely. In fact, it enhances the flavor. Just bring to room temp before baking.
Q4: Why is my dough so sticky?
A4: That’s normal. Avoid adding too much flour. Use floured hands and tools to handle it.
Q5: Can I double the recipe?
A5: Yes, but make sure your pot is big enough, or split into two loaves.
Q6: Can I bake this on a baking sheet?
A6: You can, but the crust won’t be as crisp as with a covered pot.
Q7: Is it okay to let it rise more than 18 hours?
A7: Yes, but keep it under 24 to avoid over-fermentation.
Q8: How do I store the bread?
A8: Wrap in a towel or paper bag and store at room temp. Avoid plastic bags.
Q9: Can I use whole wheat flour entirely?
A9: You can, but the texture will be denser. Try a 50-50 blend for balance.
Q10: My bread didn’t rise much. What went wrong?
A10: Check your yeast freshness and ensure water isn’t too hot or cold.
Conclusion
This Miracle No Knead Bread is the kind of recipe that turns any home cook into an artisan baker. With its perfect crust, chewy crumb, and foolproof method, it’s one of those recipes you’ll return to again and again. So go ahead, mix it up, let time do the work, and get ready to fall in love with homemade bread like never before.
Print
Miracle No Knead Bread
- Prep Time: 5 minutes
- Cook Time: 45 minutes
- Total Time: 13 hours
- Yield: 1 loaf (about 10 slices) 1x
- Category: Bread
- Method: Baking
- Cuisine: American
- Diet: Vegetarian
Description
Crusty on the outside, soft and chewy on the inside, this Miracle No Knead Bread requires no kneading, no mixer, and barely any effort. Just mix, rest, and bake into bakery-quality bread at home.
Ingredients
- 3 cups all-purpose flour
- 1/2 teaspoon instant yeast
- 1 1/4 teaspoons salt
- 1 1/2 cups warm water
Instructions
- Preheat Your Equipment: Place a Dutch oven with lid into the oven and preheat to 450°F about 30 minutes before baking.
- Combine Ingredients: In a large bowl, mix flour, yeast, and salt. Pour in warm water and stir until a shaggy dough forms.
- Prepare Your Cooking Vessel: Line a bowl or surface with parchment paper and dust lightly with flour.
- Assemble the Dish: After 12–18 hours of rest, gently shape the dough into a loose ball and place on prepared parchment.
- Cook to Perfection: Carefully place dough (on parchment) into hot Dutch oven. Cover and bake 30 minutes, uncover and bake another 10–15 minutes until golden brown.
- Finishing Touches: Remove from pot and let cool completely on a wire rack.
- Serve and Enjoy: Slice and serve with butter, olive oil, or your favorite spread.
Notes
- Use a digital thermometer to check doneness, aiming for 200–210°F internally.
- For more flavor, rest dough overnight in the fridge.
- Try scoring the top with a blade for an artisan touch.
Nutrition
- Serving Size: 1 slice
- Calories: 150
- Sugar: 0g
- Sodium: 290mg
- Fat: 0.5g
- Saturated Fat: 0g
- Unsaturated Fat: 0.5g
- Trans Fat: 0g
- Carbohydrates: 31g
- Fiber: 1g
- Protein: 4g
- Cholesterol: 0mg
Keywords: no knead bread, easy homemade bread, miracle bread, Dutch oven bread, crusty bread