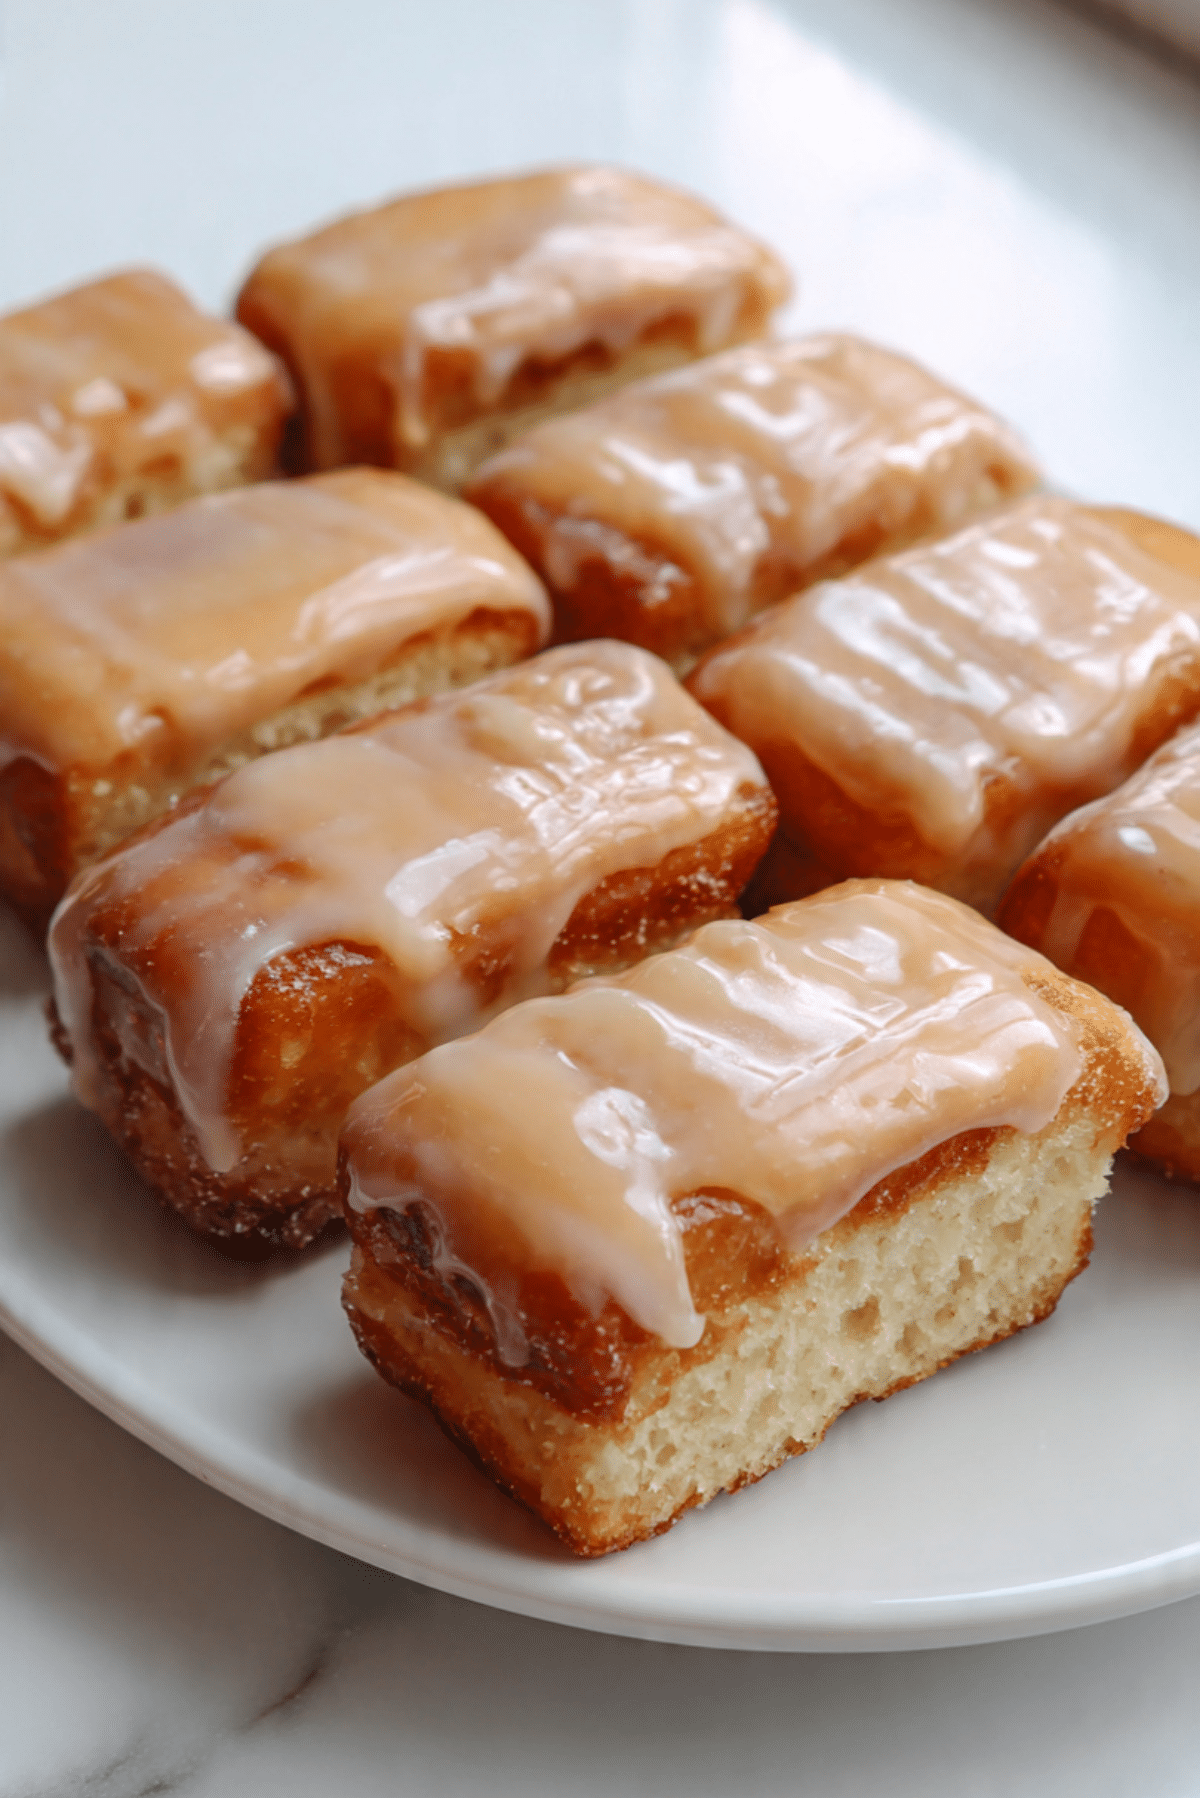
Maple Donut Bars
The moment these maple glazed bars come out of the kitchen, the whole room fills with that cozy bakery aroma that feels like a warm hug. Soft, fluffy dough, a golden surface, and that rich maple glaze slowly settling on top. Trust me, you’re going to love this. Every bite is tender, lightly sweet, and finished with that unmistakable maple flavor that feels both nostalgic and indulgent.
And honestly, there is something extra satisfying about making them at home. Watching the batter come together, seeing the bars rise into soft pillows, then finishing them with a glossy maple glaze. Let me tell you, it’s worth every bite.
The Sweet Magic Behind These Maple Donut Bars
There is something wonderfully comforting about maple flavored treats. The deep caramel like sweetness of maple syrup pairs beautifully with soft baked dough, creating a balance that feels both rich and delicate.
These bars deliver that classic donut shop flavor but in a shape that feels just a little more fun. Their rectangular form makes them easy to bake, glaze, and serve. The result is a bakery style treat with a soft crumb inside and a silky maple topping that shines like liquid amber.
And now, let’s take a quick step into where this delicious idea comes from.
A Little Backstory on Maple Sweet Treats
Maple syrup has long been a treasured ingredient across North America, especially in regions where maple trees grow abundantly. Early settlers and Indigenous communities both celebrated the natural sweetness of maple sap, turning it into syrup that could flavor everything from breakfast pancakes to baked goods.
As donuts became popular in bakeries and cafes, maple quickly became one of the favorite glaze flavors. Eventually, bakers began shaping donuts into bars, which allowed more surface area for that irresistible maple topping. The result was a pastry that felt indulgent yet comforting, perfect alongside a morning coffee or an afternoon treat.
And now that you know the story behind them, let’s talk about why this version works so well.
Why This Recipe Works Every Time
These bars are not just delicious, they are reliable and approachable. Here are a few reasons they become an instant favorite.
Versatile: They work beautifully for breakfast, brunch spreads, dessert trays, or even a cozy weekend snack.
Budget-Friendly: Most of the ingredients are pantry staples, which means you can create a bakery style treat without a specialty shopping trip.
Quick and Easy: The batter comes together quickly and the baking process is straightforward, even for beginner bakers.
Customizable: You can adjust the glaze sweetness, add spices, or even top them with chopped nuts.
Crowd-Pleasing: Maple flavor has a universal appeal, making these bars a hit at gatherings.
Make-Ahead Friendly: They hold their softness well, which means you can prepare them earlier in the day.
Great for Leftovers: If any remain, they stay tender and flavorful the next day.
And now, before we start mixing anything, a few expert insights will help make your batch perfect.
Insider Tips for Bakery Style Results
Making these bars is simple, but a few small techniques make a big difference.
- Use room temperature ingredients. This helps the batter mix smoothly and bake evenly.
- Do not overmix the batter. Gentle mixing keeps the texture soft and tender.
- Allow the bars to cool slightly before glazing so the glaze settles beautifully.
- Adjust maple intensity by adding a little extra maple syrup to the glaze if desired.
Next, let’s gather the kitchen tools that will make the process smooth.
Kitchen Tools That Make the Process Easier
A few basic tools will help everything come together effortlessly.
Mixing Bowl: A large bowl allows the batter ingredients to blend smoothly without spilling.
Whisk: Ideal for combining dry ingredients and creating a smooth batter.
Measuring Cups and Spoons: Accurate measurements ensure consistent texture and flavor.
Baking Pan: A rectangular pan helps form the classic bar shape.
Cooling Rack: Allows the bars to cool evenly before glazing.
Now that the tools are ready, let’s talk ingredients.
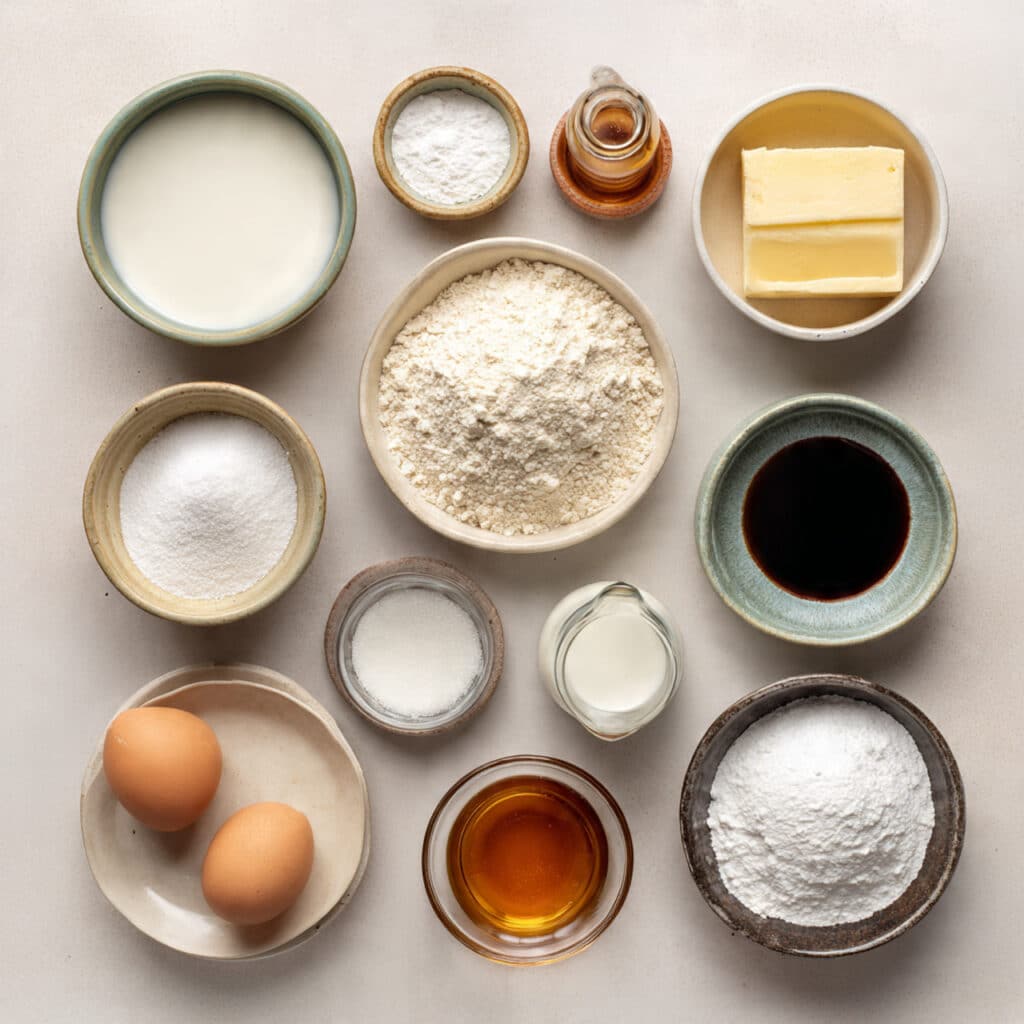
Ingredients That Bring Everything Together
Each ingredient plays a small but important role in creating soft, flavorful bars.
- All Purpose Flour: 2 cups, provides the structure and soft crumb.
- Granulated Sugar: ½ cup, adds sweetness and supports browning.
- Baking Powder: 2 teaspoons, helps the bars rise and stay fluffy.
- Salt: ½ teaspoon, balances the sweetness and enhances flavor.
- Whole Milk: ¾ cup, adds moisture and richness.
- Unsalted Butter, melted: ¼ cup, brings tenderness and buttery flavor.
- Maple Syrup: ¼ cup, gives the signature maple taste.
- Egg: 1 large egg, helps bind the batter and create structure.
- Vanilla Extract: 1 teaspoon, rounds out the sweetness.
- Powdered Sugar: 1 cup, forms the base of the glaze.
- Additional Maple Syrup: 2 tablespoons, intensifies the glaze flavor.
- Milk for Glaze: 2 tablespoons, smooths the glaze to the perfect consistency.
And if you ever need to tweak the ingredients, there are some easy swaps.
Flexible Ingredient Swaps
Sometimes you work with what you have, and that is perfectly fine.
Whole Milk: You can use almond milk or oat milk.
Butter: Coconut oil works as a dairy free substitute.
Maple Syrup: Honey can provide sweetness, though the flavor will change slightly.
Vanilla Extract: Maple extract can enhance the maple flavor even more.
Now let’s highlight the stars of the recipe.
Spotlight on Key Ingredients
A couple of ingredients truly define the personality of these bars.
Maple Syrup: This is the heart of the flavor. Its deep caramel notes create that unmistakable maple sweetness.
Butter: Melted butter enriches the batter and gives the bars their tender crumb.
And now comes the fun part.
Let’s Bake These Delicious Bars
Here are the steps you’re going to follow.
- Preheat Your Equipment: Preheat your oven to 350°F and lightly grease a rectangular baking pan.
- Combine Ingredients: In a bowl, whisk flour, sugar, baking powder, and salt. In another bowl mix milk, melted butter, maple syrup, egg, and vanilla.
- Prepare Your Cooking Vessel: Line or grease the baking pan so the bars release easily after baking.
- Assemble the Dish: Pour the wet mixture into the dry ingredients and stir gently until just combined.
- Cook to Perfection: Spread the batter evenly in the pan and bake for about 18 to 22 minutes until lightly golden and set.
- Finishing Touches: Whisk powdered sugar, maple syrup, and milk to form a smooth glaze. Spread over slightly cooled bars.
- Serve and Enjoy: Slice into bars and enjoy the soft texture with that glossy maple finish.
The Flavor and Texture Experience
When you bite into one of these bars, the first thing you notice is the tender crumb. Soft and airy, almost like a classic donut interior. Then comes the maple glaze, silky and sweet, with that deep caramel flavor that lingers pleasantly.
Together, the textures create a perfect balance. Light inside, smooth on top, and completely satisfying.
Helpful Tips for the Best Results
A few extra tips can elevate your batch even further.
- Allow the glaze to set before slicing for clean edges.
- For extra maple flavor, add a small splash of maple extract to the glaze.
- Use a serrated knife for neat bar cuts.
Common Mistakes to Avoid
Even simple recipes have a few pitfalls.
- Overmixing the batter can create dense bars.
- Baking too long can dry out the texture.
- Glazing while too hot can cause the glaze to melt and run off.
Nutritional Snapshot
Servings: 12
Calories per serving: 210
Note: These are approximate values.
Preparation Time Overview
Prep Time: 10 minutes
Cook Time: 20 minutes
Total Time: 30 minutes
Make Ahead and Storage Tips
You can prepare these bars earlier in the day and store them in an airtight container at room temperature. They stay soft for about two days.
For longer storage, place them in the refrigerator where they keep well for up to four days. To refresh them, warm slightly before serving so the glaze softens again.
Freezing also works well. Wrap the bars individually and store them for up to two months.
Serving Ideas to Make Them Shine
Serve these bars with a hot cup of coffee, tea, or warm milk. They also fit beautifully on brunch tables alongside fruit and yogurt.
For an extra indulgent presentation, drizzle a little extra maple syrup on top just before serving.
Turning Leftovers Into Something New
If you somehow have leftovers, here are a few fun ideas.
Slice the bars into cubes and use them as a topping for vanilla yogurt or ice cream. You can also warm them slightly and serve with fresh berries for a quick dessert.
Extra Tips for Flavor and Freshness
Store the bars in a sealed container to maintain softness. If the glaze becomes firm, a few seconds in the microwave brings back that smooth texture.
And remember, a little extra maple drizzle never hurts.
Make Them Look Bakery Perfect
Presentation makes these bars even more tempting. Arrange them neatly on a white platter and let the maple glaze catch the light. A light dusting of powdered sugar can add a delicate finish.
Trust me, they will disappear quickly.
Delicious Variations to Try
Here are a few ways to put your own twist on them.
Maple Cinnamon Bars: Add half a teaspoon of cinnamon to the batter.
Nutty Maple Bars: Sprinkle chopped walnuts or pecans over the glaze.
Maple Chocolate Drizzle: Drizzle melted chocolate across the glazed bars.
Vanilla Maple Bars: Add extra vanilla extract for deeper flavor.
Orange Maple Bars: Add a teaspoon of orange zest to brighten the taste.
FAQ’s
Q1: Can I make these bars ahead of time?
Yes. They stay soft for up to two days at room temperature when stored properly.
Q2: Can I freeze them?
Yes, wrap them individually and freeze for up to two months.
Q3: Can I reduce the sweetness?
You can slightly reduce the glaze or use less powdered sugar.
Q4: Can I add spices?
Absolutely. Cinnamon or nutmeg works beautifully.
Q5: Do I need maple extract?
No, the maple syrup provides plenty of flavor.
Q6: Can I bake them in muffin tins?
Yes, just reduce the baking time slightly.
Q7: How do I know they are done?
A toothpick inserted into the center should come out clean.
Q8: Can I use plant based milk?
Yes, almond or oat milk works well.
Q9: Can I make the glaze thicker?
Add a bit more powdered sugar.
Q10: What is the best way to cut the bars?
Use a sharp knife after the glaze sets for neat slices.
Conclusion
These maple donut bars bring together comfort, sweetness, and bakery style goodness in every bite. Soft, fluffy, and finished with that glossy maple glaze, they are the kind of treat that instantly brightens a morning or makes an afternoon feel special.
Trust me, once you make them, they will quickly become a favorite in your kitchen. Give them a try, share them with someone you love, and enjoy every delicious bite.
Print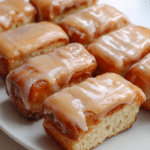
Maple Donut Bars
- Prep Time: 10 minutes
- Cook Time: 20 minutes
- Total Time: 30 minutes
- Yield: 12 bars 1x
- Category: Breakfast
- Method: Baked
- Cuisine: American
- Diet: Vegetarian
Description
Soft, fluffy maple donut bars baked until golden and topped with a smooth maple glaze. They have that cozy bakery-style flavor with a tender crumb and a sweet maple finish that makes them perfect for breakfast, brunch, or an anytime treat.
Ingredients
- 2 cups all purpose flour
- 1/2 cup granulated sugar
- 2 teaspoons baking powder
- 1/2 teaspoon salt
- 3/4 cup whole milk
- 1/4 cup unsalted butter, melted
- 1/4 cup maple syrup
- 1 large egg
- 1 teaspoon vanilla extract
- 1 cup powdered sugar
- 2 tablespoons maple syrup
- 2 tablespoons milk
Instructions
- Preheat the oven to 350°F and lightly grease a rectangular baking pan.
- In a large bowl, whisk together the all purpose flour, granulated sugar, baking powder, and salt.
- In a separate bowl, mix the whole milk, melted butter, 1/4 cup maple syrup, egg, and vanilla extract until smooth.
- Pour the wet ingredients into the dry ingredients and stir gently until just combined.
- Spread the batter evenly into the prepared pan.
- Bake for 18 to 22 minutes, or until the top is lightly golden and the center is set.
- Let the bars cool slightly in the pan.
- To make the glaze, whisk together the powdered sugar, 2 tablespoons maple syrup, and 2 tablespoons milk until smooth.
- Spread the glaze over the slightly cooled bars.
- Let the glaze set, then slice into bars and serve.
Notes
- Do not overmix the batter or the bars may turn dense instead of soft and fluffy.
- Let the bars cool slightly before glazing so the glaze stays on top instead of melting away.
- For a stronger maple flavor, add a small splash of maple extract to the glaze.
- Store leftovers in an airtight container at room temperature for up to 2 days, or refrigerate for up to 4 days.
Nutrition
- Serving Size: 1 bar
- Calories: 210
- Sugar: 18g
- Sodium: 170mg
- Fat: 7g
- Saturated Fat: 4g
- Unsaturated Fat: 2g
- Trans Fat: 0g
- Carbohydrates: 34g
- Fiber: 0g
- Protein: 3g
- Cholesterol: 28mg
Keywords: maple donut bars, baked donut bars, maple glaze bars, breakfast bars, homemade donut bars, sweet brunch recipe