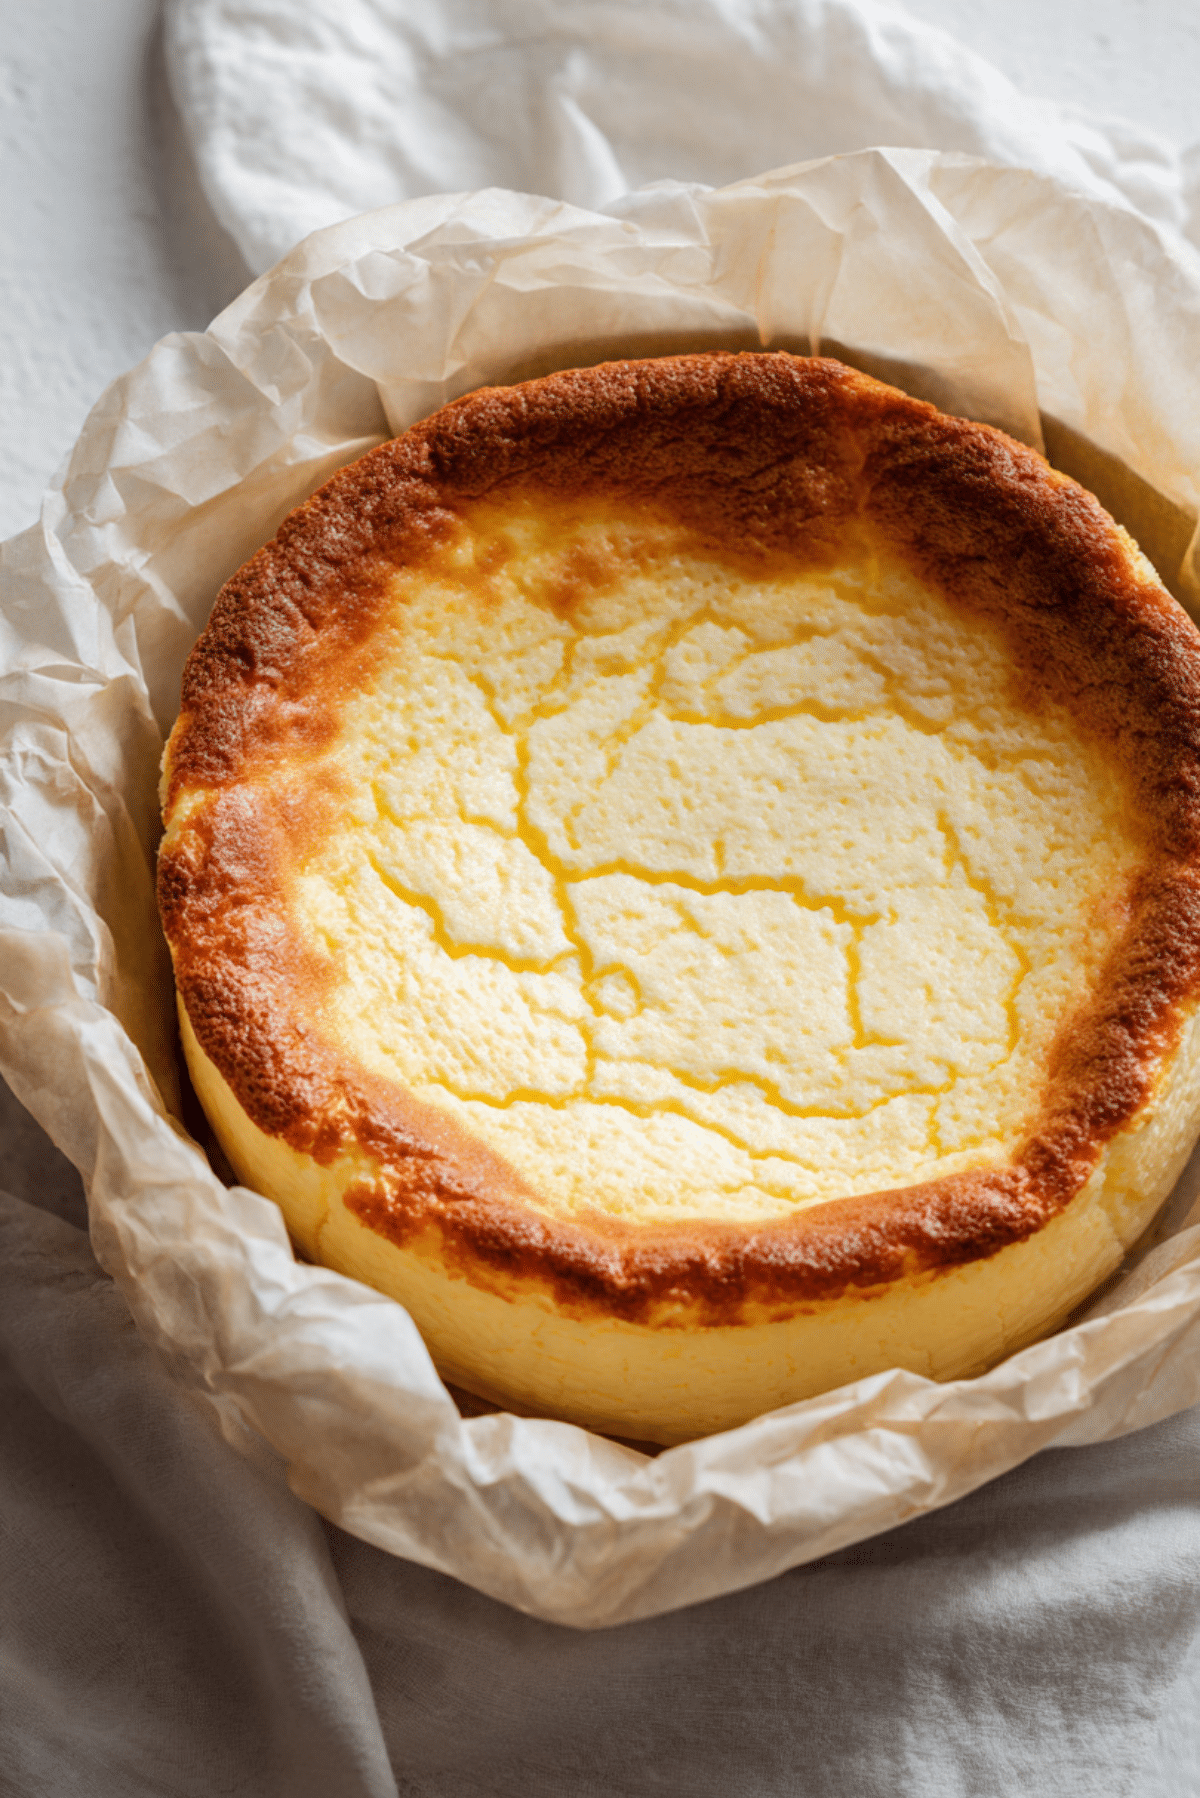
Greek Yogurt “Japanese Cheesecake” Hack
There is something almost magical about pulling a light, fluffy cheesecake from the oven and watching it settle into that signature pillowy shape. This version keeps things wonderfully simple, using creamy Greek yogurt to create a soft, airy dessert that feels elegant without making your kitchen feel like a baking lab. Trust me, you’re going to love this. It is delicate, lightly tangy, just sweet enough, and the texture is pure cloud.
Why This Light and Fluffy Dessert Wins Everyone Over
Some desserts impress because they are rich and dramatic, and others steal the show because they feel almost weightless. This one lands right in that sweet spot. It has the gentle sweetness of a soufflé-style cake, the subtle tang of yogurt, and a melt-in-your-mouth finish that makes each bite feel a little special.
And now let’s dive a little deeper, because part of the charm here is that this dessert looks bakery-worthy while staying surprisingly approachable for home bakers.
The Story Behind This Airy Cheesecake Favorite
This style of cheesecake is inspired by the famously soft and jiggly cakes loved in Japan, known for their feather-light crumb and delicate bounce. Unlike dense New York-style cheesecake, this one leans on whipped egg whites for lift, which gives it that signature airy texture and elegant height.
Using Greek yogurt as a shortcut is a clever home-baker twist. It brings creamy body and a gentle tang that mimics the richness you want, but with a lighter, fresher feel. Let me tell you, it’s worth every bite.
Reasons This Recipe Earns a Spot in Your Dessert Rotation
This dessert has a lot going for it, and once you make it, you’ll see why it feels like such a keeper.
Versatile: It works beautifully for brunch, afternoon coffee, dinner parties, or a quiet late-night treat when you want something sweet but not too heavy.
Budget-Friendly: The ingredient list is refreshingly simple, using everyday staples you may already have in your kitchen.
Quick and Easy: The method is straightforward, especially for a soufflé-style dessert, and the steps feel very manageable once everything is set out.
Customizable: You can keep it classic or add touches like lemon zest, a little vanilla, or a dusting of powdered sugar for your own spin.
Crowd-Pleasing: The soft texture and gentle sweetness make it appealing even to people who usually say desserts are too rich.
Make-Ahead Friendly: It tastes lovely once cooled and chilled, which makes it ideal for planning ahead.
Great for Leftovers: Any extra slices hold up nicely in the fridge and make a dreamy little snack the next day.
Smart Baking Secrets for the Best Rise and Texture
Before we get into the equipment and ingredients, here are a few little tricks that make a big difference.
- Use room temperature ingredients: This helps the batter blend smoothly, which means a more even texture.
- Whip the egg whites to glossy medium peaks: You want structure, but not a dry, stiff foam that is hard to fold in.
- Fold gently and patiently: The air in the egg whites is what gives the cake its lift, so treat that batter kindly.
- Bake with a water bath: This keeps the heat gentle and moist, helping the cake rise evenly and stay tender.
- Cool gradually: A sudden drop in temperature can cause too much sinking, so let the cake ease into cooling.
Kitchen Tools That Make This Bake Easier
Now that the texture game is covered, let’s gather the tools that help bring it all together smoothly.
Mixing bowls: You will need separate bowls for the yolk mixture and the egg whites, which keeps the process clean and easy to manage.
Hand mixer or stand mixer: This is essential for whipping the egg whites into that airy, glossy meringue.
Fine-mesh sieve: Sifting the cornstarch helps prevent lumps and keeps the batter silky.
Whisk: A whisk helps blend the yogurt mixture until smooth before folding in the whites.
Rubber spatula: This is the best tool for folding the batter gently without knocking out too much air.
8-inch round cake pan: This size gives the cake a nice height and helps create that classic soufflé-style look.
Large roasting pan or deep baking tray: You will use this for the water bath, which is key for the soft, tender finish.
Parchment paper: Lining the pan helps with easy release and gives the cake neat edges.
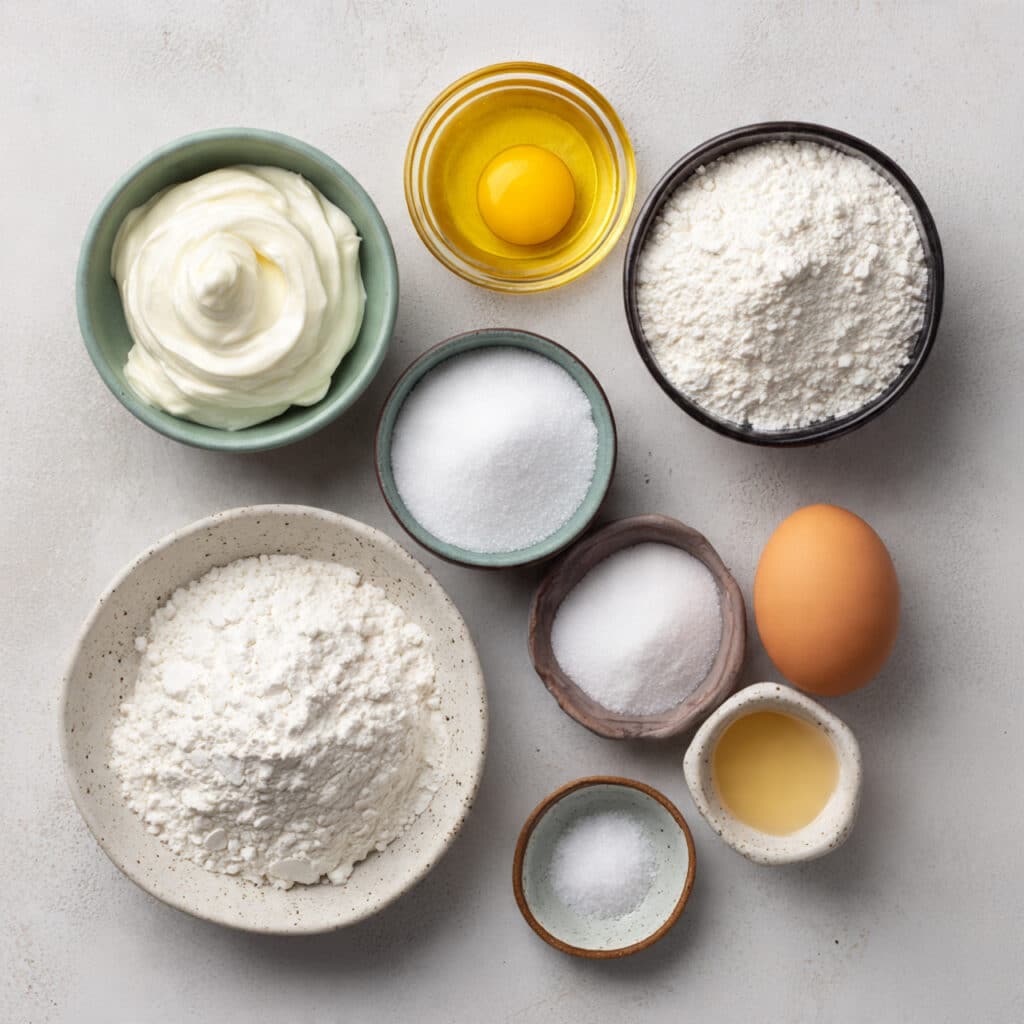
What You’ll Need to Create This Cloud-Like Dessert
The beauty of this recipe is how a handful of simple ingredients can transform into something so soft and elegant. Each one has a job to do, and together they create that signature lift, tenderness, and creamy flavor.
- Greek yogurt: 1 cup (240 grams), this gives the batter its creamy body and light tangy flavor.
- Large eggs: 4, separated, the yolks add richness while the whites create the airy rise.
- Granulated sugar: 1/2 cup (100 grams), this sweetens the cake gently without overpowering its delicate flavor.
- Cornstarch: 1/4 cup (30 grams), this helps stabilize the batter and gives the crumb a soft, tender structure.
- Lemon juice: 1 tablespoon, this brightens the flavor and helps support the whipped egg whites.
- Vanilla extract: 1 teaspoon, this adds warmth and rounds out the yogurt’s tang.
- Salt: 1/4 teaspoon, this sharpens and balances the sweetness.
- Powdered sugar: 1 tablespoon, optional for dusting after cooling and serving.
Easy Swaps if You Need a Flexible Version
Even though the original combination works beautifully, there is still room to adapt the recipe to what you have on hand.
Greek yogurt: Plain strained yogurt of similar thickness.
Cornstarch: Arrowroot starch, though the final texture may be slightly different.
Lemon juice: A small splash of milk plus a little extra vanilla for a softer flavor profile.
Vanilla extract: Vanilla bean paste or a little finely grated lemon zest.
Granulated sugar: Fine caster sugar, which dissolves especially well in the batter and meringue.
The Ingredients That Really Make the Magic Happen
A couple of ingredients deserve a little spotlight because they do most of the heavy lifting here.
Greek yogurt: This is the creamy heart of the cake. It adds moisture, structure, and that fresh tang that keeps the dessert tasting light instead of heavy.
Egg whites: These are the secret to the signature bounce. Once whipped and folded in properly, they give the cake its delicate height and soft, fluffy crumb.
Let’s Bake This Soft and Jiggly Beauty
This is where everything starts coming together. The batter is simple, the transformation is satisfying, and the oven does the final bit of magic. Here are the steps you’re going to follow.
- Preheat Your Equipment: Preheat your oven to 320°F (160°C). Line the bottom and sides of an 8-inch round cake pan with parchment paper. Set the pan inside a larger roasting pan for the water bath.
- Combine Ingredients: In a medium bowl, whisk together the Greek yogurt, egg yolks, 2 tablespoons of the granulated sugar, cornstarch, lemon juice, vanilla extract, and salt until completely smooth. In a separate clean bowl, beat the egg whites until foamy, then gradually add the remaining sugar and continue beating until glossy medium peaks form.
- Prepare Your Cooking Vessel: Bring a kettle or saucepan of water to a simmer so it is ready for the water bath. Make sure the cake pan is lined well and fits securely inside the larger pan.
- Assemble the Dish: Fold one-third of the whipped egg whites into the yogurt mixture to lighten it. Gently fold in the remaining whites in two additions, using a spatula and slow strokes until the batter looks airy and mostly uniform. Pour the batter into the prepared cake pan and smooth the top lightly.
- Cook to Perfection: Place the roasting pan on the oven rack and carefully pour hot water into the outer pan until it comes about halfway up the sides of the cake pan. Bake for 40 minutes, or until the cake is puffed, lightly golden, and just set in the center with a gentle wobble.
- Finishing Touches: Turn off the oven, crack the door slightly, and let the cake rest inside for 15 minutes. Remove it from the oven, lift it out of the water bath, and cool completely in the pan before unmolding. Dust with powdered sugar if using.
- Serve and Enjoy: Slice with a clean sharp knife and serve once fully cooled, or chill for an even neater texture. Every bite should feel soft, airy, and lightly creamy.
What Makes the Texture and Flavor So Special
The first thing you notice is the texture. It is tender and springy, almost like a dessert cloud, with a barely-there richness that feels silky instead of dense. The top gets a faint golden finish, while the inside stays pale, moist, and wonderfully delicate.
Flavor-wise, the Greek yogurt brings a fresh tang that keeps the sweetness in check. The vanilla softens the edges, and the touch of lemon makes the whole thing taste brighter and more alive. This one’s a total game-changer if you love desserts that feel elegant without being too much.
Helpful Tips for a Smoother Bake
A few simple habits can make the whole process feel easier and more reliable.
- Use a clean bowl for the egg whites: Even a small amount of grease can stop them from whipping properly.
- Fold with patience: Slow, gentle strokes help preserve volume, which is what gives the cake its lift.
- Do not overbake: The center should still have a slight wobble when you take it out.
- Cool it gradually: This helps reduce dramatic collapsing and keeps the texture soft.
Common Slip-Ups and How to Avoid Them
This dessert is friendly, but it does like a little care and attention.
- Overwhipping the egg whites: If they look dry or clumpy, they are too stiff and will be harder to fold in smoothly.
- Skipping the water bath: Dry oven heat can make the cake bake unevenly and lose some of its delicate texture.
- Opening the oven too early: Sudden temperature changes can interrupt the rise.
- Rushing the cooling: Letting it cool too quickly can cause more sinking than necessary.
A Quick Look at the Nutrition Facts
This dessert feels light, and the numbers reflect that nicely for a cheesecake-inspired treat.
Servings: 6
Calories per serving: 118
Note: These are approximate values.
Time Breakdown Before You Start
It helps to know just how manageable this bake really is before you begin.
Prep Time: 20 minutes
Cook Time: 55 minutes
Total Time: 1 hour 15 minutes
Make-Ahead and Storage Tips That Actually Help
This dessert fits beautifully into a make-ahead routine. You can bake it the day before serving, let it cool fully, and then chill it in the refrigerator. In fact, the texture becomes a little more settled and sliceable after some time in the fridge.
Store leftovers covered in the refrigerator for up to 3 days. For freezing, wrap individual slices well and freeze for up to 1 month. Thaw overnight in the refrigerator before serving. For reheating, a few seconds at room temperature is usually enough, since this cake is best enjoyed cool or just slightly tempered.
My Favorite Ways to Serve It
Once the cake is ready, the serving possibilities are simple but lovely. A plain slice is elegant all on its own, especially with a light dusting of powdered sugar.
You can also pair it with fresh berries, a spoonful of fruit compote, or a hot cup of tea or coffee. For a brunch table, it feels light and refined. For dessert after dinner, it brings that soft, sweet finish that never feels too heavy.
Clever Ways to Use Up Leftover Slices
Leftovers, if you have any, are surprisingly fun to work with. The chilled slices hold their shape well and still taste dreamy.
Try cutting a slice into cubes and layering it into a simple dessert cup with fruit. You can also serve thin slices with yogurt and berries for a breakfast-style treat that feels a little fancy. Another favorite is tucking a slice beside a scoop of fruit salad for an easy plated dessert.
A Few Extra Details That Make a Difference
Sometimes it is the small choices that take a good bake and make it feel really polished. Use the thickest plain Greek yogurt you can find, because a thinner yogurt can make the batter too loose.
Also, sift the cornstarch before adding it so the mixture stays smooth and lump-free. And when slicing, wipe your knife clean between cuts. It makes each piece look neater and more inviting.
How to Make It Look as Lovely as It Tastes
This cake already has natural charm, especially with its softly domed top and delicate crumb. A light snowfall of powdered sugar adds instant elegance without covering up its gentle color.
Serve it on a simple plate or cake stand and keep the styling clean. A few berries on the side can look beautiful, but even plain, it has that understated bakery feel that draws people in.
Fun Variations Worth Trying Next Time
Once you fall for the base version, there are a few easy ways to make it your own.
- Lemon Bright: Add 1 teaspoon finely grated lemon zest for a fresher citrus note.
- Vanilla Bean Style: Use vanilla bean paste instead of extract for deeper aroma and those lovely specks.
- Berry Topped: Serve with a spoonful of warm blueberry or strawberry compote for contrast.
- Honey Finish: Drizzle lightly with honey just before serving for a floral touch.
- Mini Cakes: Divide the batter into lined muffin cups and bake as smaller individual portions, checking early for doneness.
FAQ’s
1. Can I use regular yogurt instead of Greek yogurt?
Yes, but it should be thick. If it is too loose, the batter may not hold its structure as well, so straining it first is a smart move.
2. Why did my cake sink after baking?
A little sinking is normal for this style of cake. Too much can happen from overmixing, overbaking, or cooling it too quickly.
3. Can I make it sweeter?
Yes. You can increase the sugar by 1 to 2 tablespoons, but keeping it light helps preserve the delicate balance.
4. Do I really need the water bath?
Yes, it is highly recommended. It creates gentle, moist heat that helps the cake bake evenly and stay soft.
5. Can I make it ahead?
Absolutely. It is actually a great make-ahead dessert because it slices beautifully once chilled.
6. How do I know when it is done?
The top should be lightly golden, the edges should look set, and the center should still have a slight wobble.
7. Can I use a different pan size?
You can, but the baking time and height will change. An 8-inch round pan gives the best balance for this version.
8. Is this more like cheesecake or sponge cake?
It sits somewhere in between. It has a creamy flavor but a much lighter, airier texture than traditional cheesecake.
9. Can I skip the powdered sugar on top?
Yes, it is completely optional. The cake is lovely with or without it.
10. What is the best way to slice it cleanly?
Use a sharp knife and wipe it clean between slices. This keeps the soft interior looking tidy and polished.
Conclusion
This Greek Yogurt “Japanese Cheesecake” Hack is the kind of dessert that feels a little magical every single time. It is soft, light, gently tangy, and simple enough to make without stress, which is exactly the kind of baking win we all need more of. Whether you serve it for guests or keep it all to yourself one quiet afternoon, it has that special homemade charm that makes people pause after the first bite. Trust me, this is one you’ll want to make again.
Print
Greek Yogurt “Japanese Cheesecake” Hack
- Prep Time: 20 minutes
- Cook Time: 55 minutes
- Total Time: 1 hour 15 minutes
- Yield: 6 servings 1x
- Category: Dessert
- Method: Baking
- Cuisine: Japanese-Inspired
- Diet: Vegetarian
Description
A light and airy yogurt-based soufflé cheesecake with a delicate tang, a fluffy texture, and a soft golden top. This easy homemade dessert uses Greek yogurt for a simple shortcut that still delivers a beautifully elegant result.
Ingredients
- 1 cup Greek yogurt (240 grams)
- 4 large eggs, separated
- 1/2 cup granulated sugar (100 grams)
- 1/4 cup cornstarch (30 grams)
- 1 tablespoon lemon juice
- 1 teaspoon vanilla extract
- 1/4 teaspoon salt
- 1 tablespoon powdered sugar, optional for dusting
Instructions
- Preheat the oven to 320°F (160°C). Line the bottom and sides of an 8-inch round cake pan with parchment paper. Place the cake pan inside a larger roasting pan.
- In a medium bowl, whisk together the Greek yogurt, egg yolks, 2 tablespoons of the granulated sugar, cornstarch, lemon juice, vanilla extract, and salt until smooth.
- In a separate clean bowl, beat the egg whites until foamy. Gradually add the remaining sugar and continue beating until glossy medium peaks form.
- Fold one-third of the whipped egg whites into the yogurt mixture to lighten it. Gently fold in the remaining egg whites in two additions until the batter is airy and mostly uniform.
- Pour the batter into the prepared cake pan and smooth the top lightly.
- Place the roasting pan in the oven and carefully pour hot water into the outer pan until it reaches about halfway up the sides of the cake pan.
- Bake for 40 minutes, until the cake is puffed, lightly golden, and just set in the center with a slight wobble.
- Turn off the oven, crack the door slightly, and let the cake rest inside for 15 minutes.
- Remove the cake from the water bath and cool completely in the pan before unmolding.
- Dust with powdered sugar if desired, then slice and serve.
Notes
- Use room temperature eggs and yogurt for a smoother batter.
- Do not overwhip the egg whites, medium peaks work best for a soft, airy texture.
- The water bath helps the cake bake gently and prevents a dry texture.
- A little sinking after cooling is normal for this style of cheesecake.
- Chill before serving for cleaner slices.
Nutrition
- Serving Size: 1 slice
- Calories: 118
- Sugar: 11g
- Sodium: 138mg
- Fat: 3g
- Saturated Fat: 1g
- Unsaturated Fat: 2g
- Trans Fat: 0g
- Carbohydrates: 15g
- Fiber: 0g
- Protein: 7g
- Cholesterol: 126mg
Keywords: greek yogurt cheesecake, japanese cheesecake hack, fluffy yogurt cake, soufflé cheesecake, light cheesecake dessert, easy baked yogurt dessert