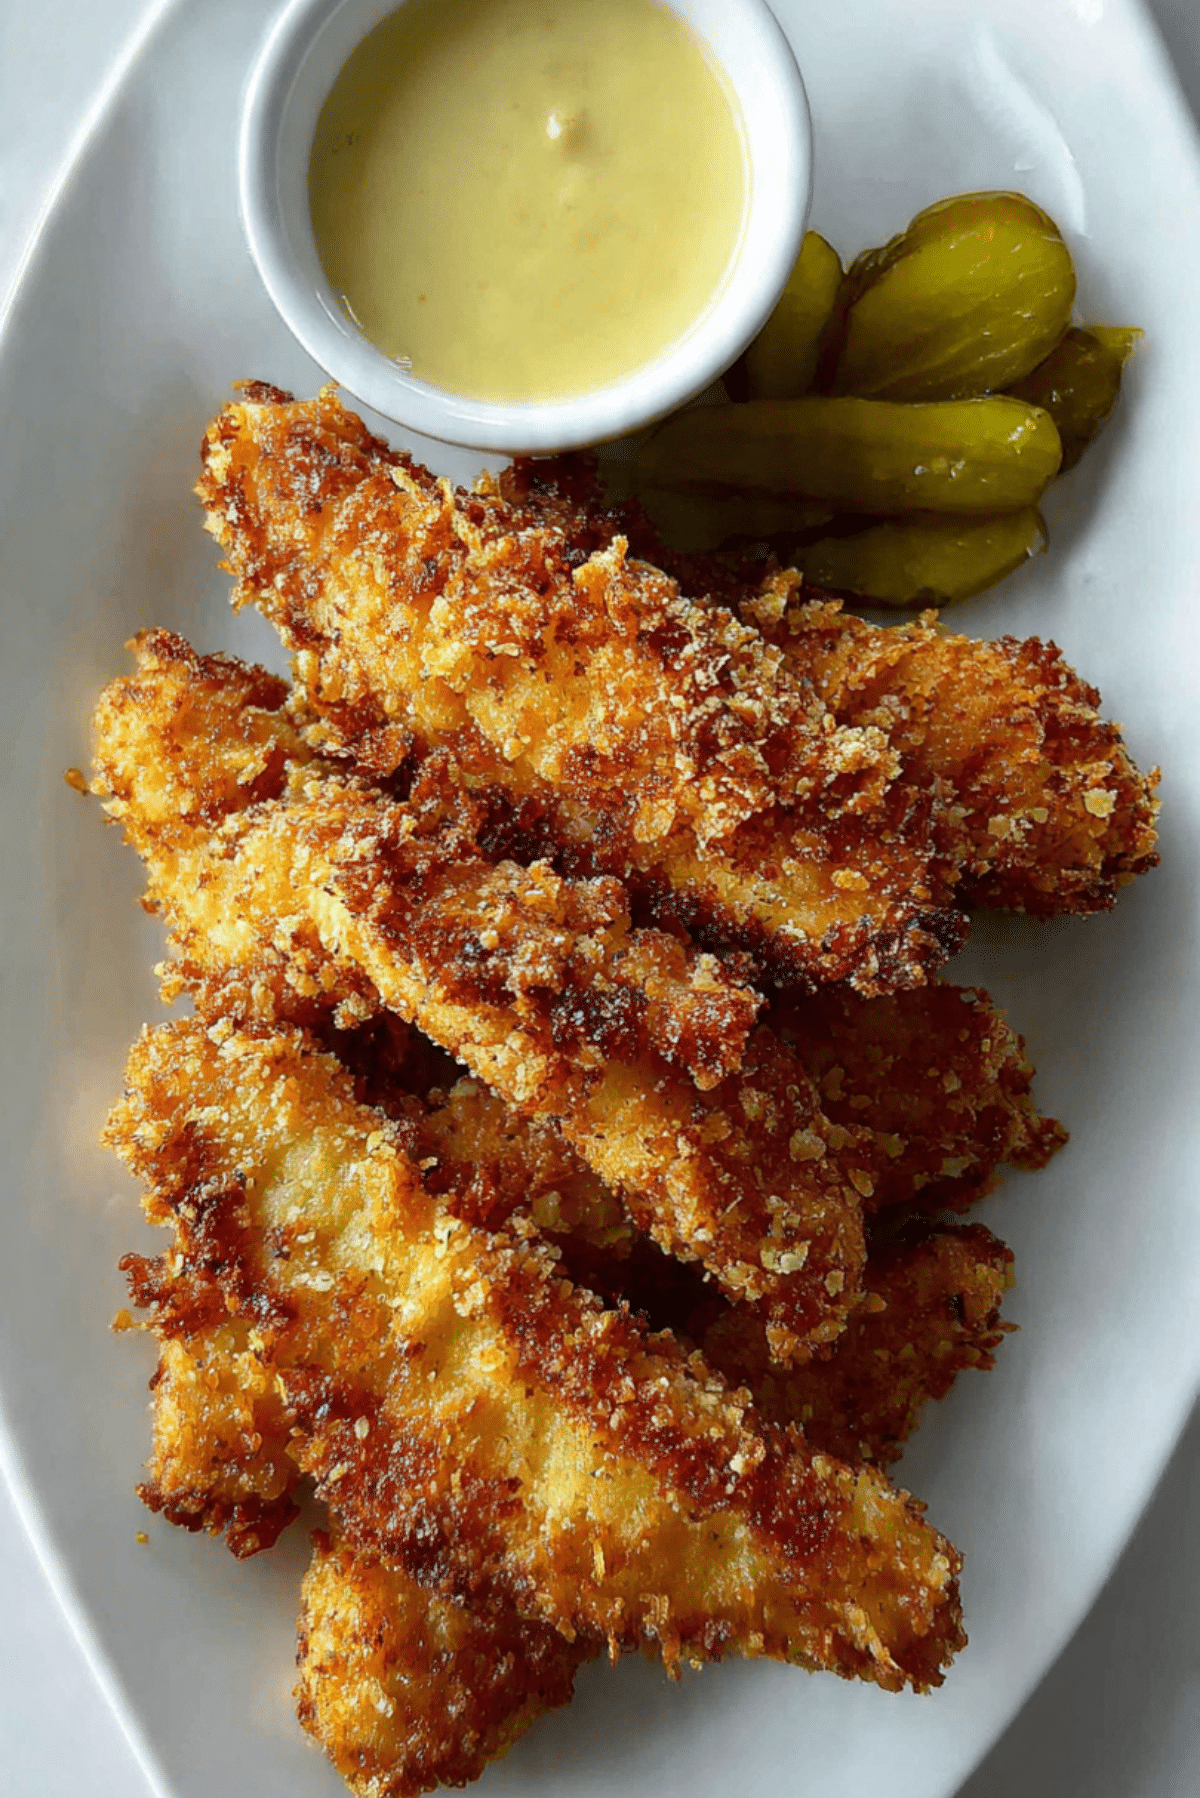
Crispy Fried Chicken Strips
There’s something deeply comforting about sinking your teeth into a perfectly crispy, golden chicken strip. That first crunch, followed by juicy tenderness inside, makes every bite unforgettable. Whether you’re serving them at a family gathering, setting up a fun dinner night, or just craving something crunchy and satisfying, these strips deliver every time. Let me walk you through exactly how to get them that irresistibly crispy on the outside and juicy on the inside.
The Crispy Goodness You’ll Keep Coming Back For
These chicken strips aren’t just another fried dish. They’re the kind of meal that makes everyone stop mid-bite and go, “Wow.” With their ultra-crunchy shell, tender inside, and well-seasoned bite, they hit all the right notes. They’re also easy enough for a weeknight yet impressive enough for guests.
Where These Strips Get Their Soul
While fried chicken is beloved across the globe, crispy chicken strips have carved their place as an American comfort classic. Often found in diners, school lunches, and game-day spreads, they were designed for dipping and sharing. But when made at home, you get the chance to elevate them with spices, better textures, and real ingredients, leaving the drive-thru versions in the dust.
Why You’ll Make These Over and Over Again
These strips don’t just deliver on taste — they fit into your life like a dream.
Versatile: Serve them as a snack, main course, in wraps, or even chopped on salad.
Budget-Friendly: Uses simple pantry staples and affordable cuts of chicken.
Quick and Easy: From fridge to plate in under 40 minutes.
Customizable: Spice them up or keep them mild, use gluten-free flour if needed.
Crowd-Pleasing: Perfect for parties, game nights, or family dinners.
Make-Ahead Friendly: Marinate early and fry later for max flavor.
Great for Leftovers: They reheat beautifully in the oven or air fryer.
Secrets to Next-Level Crispy Chicken
Want to make strips that taste like they came straight from a pro kitchen? Here are a few insider tricks.
- Double Dredge: Dip-flour-dip-flour builds a crunchier, more textured crust.
- Use Cornstarch: Adding it to flour gives you that extra crispy, almost shattering shell.
- Let Them Rest: After breading, let the chicken rest on a wire rack before frying so the coating sticks better.
- Hot Oil, Not Smoking: Maintain oil at around 350°F to fry evenly without burning.
- Don’t Overcrowd: Fry in batches so the oil temperature doesn’t drop too low.
Tools That’ll Make Your Life Easier
You don’t need much, but having the right gear helps everything run smoother.
Mixing Bowls: For marinating and dredging your chicken.
Tongs: For safe and easy flipping during frying.
Wire Rack: Helps the coating set and cool without getting soggy.
Heavy Skillet or Dutch Oven: Ensures even heat distribution while frying.
Thermometer: Keeps your oil at the perfect frying temp.
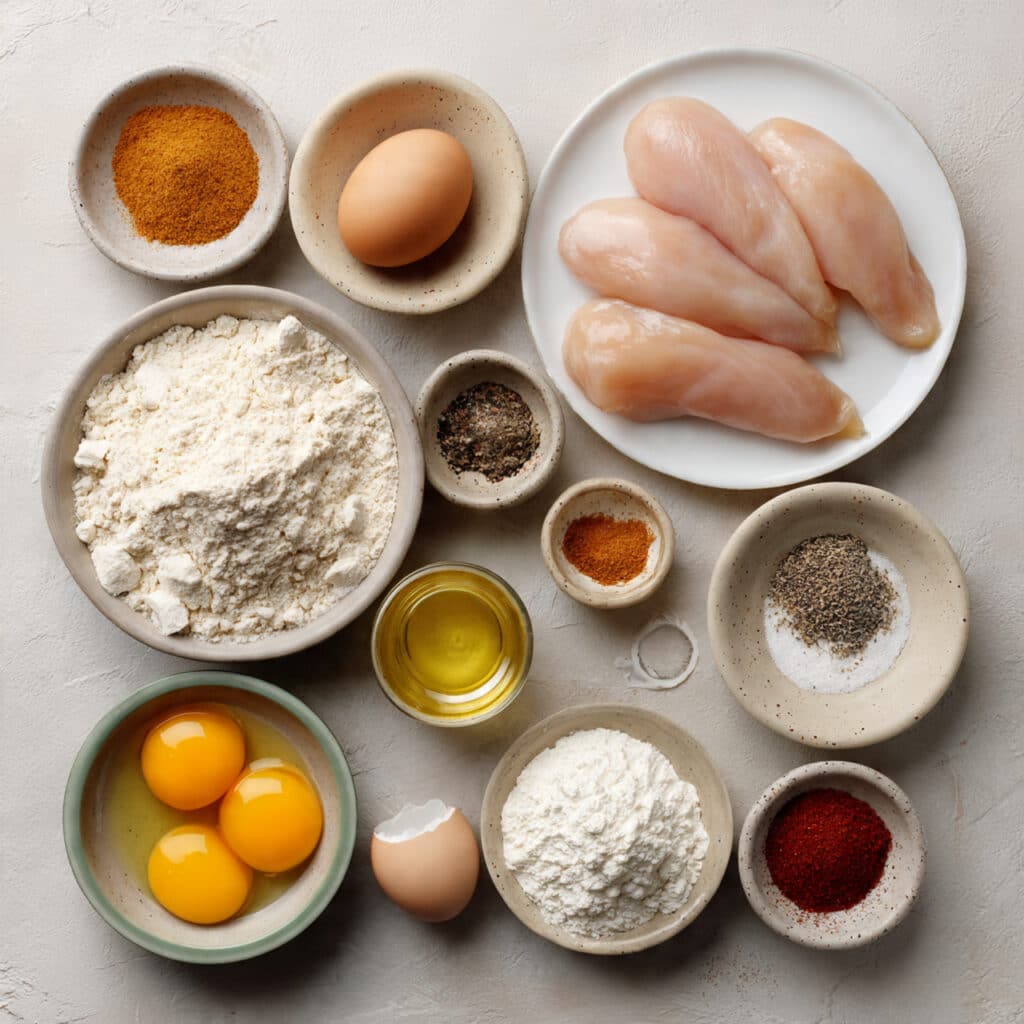
Ingredients You’ll Need for That Perfect Crunch
These ingredients come together like old friends, each playing a key role in making your chicken crisp, flavorful, and tender.
- Chicken Tenders: 1.5 pounds – The star of the show. Lean and tender, perfect for frying.
- Buttermilk: 1 cup – Adds tang and tenderizes the chicken while helping the coating stick.
- All-Purpose Flour: 1 ½ cups – Forms the base of that crunchy outer shell.
- Cornstarch: ½ cup – Lightens the flour and gives the strips their signature crispness.
- Garlic Powder: 1 teaspoon – Adds savory depth to the coating.
- Onion Powder: 1 teaspoon – Rounds out the flavor with a mild sweetness.
- Smoked Paprika: 1 teaspoon – Adds warmth and color.
- Black Pepper: ½ teaspoon – For a subtle kick.
- Salt: 1 teaspoon – Brings out the flavor in every bite.
- Eggs: 2 large – Helps bind the flour mixture to the chicken.
- Vegetable Oil: For frying – Neutral and ideal for high-heat frying.
Ingredient Swaps That Still Taste Incredible
Cooking with what you have? Totally fine. Here’s how to flex the recipe.
Buttermilk: Plain yogurt thinned with milk.
Cornstarch: Potato starch or rice flour.
Smoked Paprika: Regular paprika plus a pinch of cumin.
Vegetable Oil: Canola or peanut oil.
Chicken Tenders: Boneless chicken thighs cut into strips.
Spotlight Ingredients That Make the Magic
Buttermilk: This tangy dairy star not only softens the meat but also helps the coating cling and crisp beautifully.
Cornstarch: A secret weapon for light and crunchy results, it works magic in the frying pan.
Let’s Get Frying
Ready to turn those raw ingredients into a crispy masterpiece? Here’s how we’re doing it.
-
Preheat Your Equipment:
Heat vegetable oil in a deep skillet or Dutch oven to 350°F. Set a wire rack over a tray for cooling. -
Combine Ingredients:
In one bowl, whisk together the buttermilk and eggs. In another, mix flour, cornstarch, and all the spices. -
Prepare Your Cooking Vessel:
Ensure your oil maintains a steady heat using a thermometer. It should sizzle but not smoke. -
Assemble the Dish:
Dip each chicken strip into the buttermilk-egg mix, then dredge in the flour mix. Repeat once more for extra crunch. -
Cook to Perfection:
Fry chicken strips in batches, 3–4 minutes per side, until golden brown and cooked through. -
Finishing Touches:
Transfer to the wire rack and let rest 5 minutes for juices to settle and coating to stay crispy. -
Serve and Enjoy:
Serve hot with your favorite dipping sauce and a sprinkle of sea salt.
Crunchy Outside, Juicy Inside
The coating should be golden, bumpy, and audibly crispy. Inside, you’re rewarded with juicy, perfectly seasoned chicken. That contrast? Pure fried chicken magic.
Tips That’ll Save Your Sanity in the Kitchen
There’s no shame in using shortcuts or making adjustments. These tips keep things fun and stress-free.
- Use tongs for every step of breading to keep your hands clean.
- Freeze leftovers on a tray before bagging to avoid soggy breading.
- Try an air fryer for a lighter take with less mess.
Common Mistakes to Avoid
Even the best cooks can hit a snag. Here’s how to sidestep the usual pitfalls.
- Too-cold oil: Leads to soggy, greasy coating. Keep it around 350°F.
- Overcrowding the pan: Lowers oil temp and causes uneven cooking.
- Skipping the rest time: Results in breading falling off or softening too soon.
- Undersalting the coating: Makes even crispy chicken taste flat.
Nutrition Breakdown
Servings: 4
Calories per serving: 430
Note: These are approximate values.
Time You’ll Need
Prep Time: 20 minutes
Cook Time: 15 minutes
Total Time: 35 minutes
Prep and Storage Tips to Keep It Fresh
Marinate the chicken in buttermilk up to 24 hours ahead for deeper flavor. After cooking, leftovers can be stored in the fridge for up to 3 days. Reheat in a 375°F oven or air fryer for the best texture. You can also freeze the cooked strips for up to a month.
Best Ways to Serve Them Up
Pair with classic dipping sauces like ranch, honey mustard, or spicy mayo. Serve over waffles for a Southern twist, in wraps for lunch, or on a platter with fries and slaw for the ultimate comfort meal.
What to Do with Leftovers
Leftovers don’t have to be boring. Chop them up and:
- Toss in a salad for added crunch.
- Tuck into a sandwich with pickles and slaw.
- Wrap in a tortilla with hot sauce and cheese.
Extra Nuggets of Wisdom
- Let the oil fully reheat between batches for consistent results.
- Add a dash of hot sauce to the marinade for a little zing.
- Dust the finished strips with a pinch of cayenne for heat lovers.
Make It a Plate to Remember
Presentation can boost flavor in the mind. Serve these on a rustic wooden board, with a few lemon wedges, and tiny bowls of dip around. Sprinkle with a little chopped parsley for that pro finish.
Twist It Up: Fun Variations
- Spicy Strips: Add cayenne and chili flakes to the flour mix.
- Herbed Crust: Mix in dried thyme or oregano for extra aroma.
- Parmesan Crunch: Add grated parmesan to the flour mix.
- Asian-Inspired: Use five-spice and serve with sweet chili sauce.
- Gluten-Free: Use rice flour and gluten-free cornstarch blend.
FAQ’s
Q1: Can I bake these instead of frying?
Yes, but they won’t be quite as crispy. Bake at 425°F for 20–25 minutes, flipping halfway.
Q2: What’s the best dipping sauce?
Ranch, honey mustard, or a spicy mayo work beautifully.
Q3: Can I use chicken breasts?
Absolutely, just slice them into strips of even thickness.
Q4: Can I make these in an air fryer?
Yes, spray them with oil and cook at 400°F for 10–12 minutes, flipping halfway.
Q5: How do I know the oil is ready?
Drop a little flour in. If it sizzles, it’s ready.
Q6: Can I freeze them before cooking?
Yes, freeze after breading. Fry straight from frozen, adding a few extra minutes.
Q7: How do I keep them crispy for a party?
Place in a warm oven (200°F) on a wire rack to stay hot and crisp.
Q8: Can I marinate longer than a day?
Up to 24 hours is fine, but beyond that the texture may get mushy.
Q9: Is cornstarch really necessary?
It adds serious crunch. If you skip it, the coating will be a little heavier.
Q10: What oil is best?
Any neutral high-smoke-point oil like vegetable, canola, or peanut oil.
Conclusion
Whether you’re feeding a crowd or just treating yourself to something special, these crispy fried chicken strips are a surefire win. Crunchy, juicy, flavorful, and endlessly adaptable, they’re the kind of recipe you’ll reach for again and again. Trust me, you’re going to love this.
Print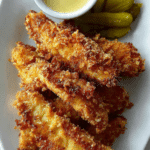
Crispy Fried Chicken Strips
- Prep Time: 20 minutes
- Cook Time: 15 minutes
- Total Time: 35 minutes
- Yield: 4 servings 1x
- Category: Main Course
- Method: Frying
- Cuisine: American
- Diet: Kosher
Description
These crispy fried chicken strips are golden, crunchy on the outside, and juicy on the inside. Perfect for dipping, snacking, or building into wraps and meals.
Ingredients
- 1.5 pounds chicken tenders
- 1 cup buttermilk
- 1 ½ cups all-purpose flour
- ½ cup cornstarch
- 1 teaspoon garlic powder
- 1 teaspoon onion powder
- 1 teaspoon smoked paprika
- ½ teaspoon black pepper
- 1 teaspoon salt
- 2 large eggs
- Vegetable oil, for frying
Instructions
- Heat vegetable oil in a deep skillet or Dutch oven to 350°F. Set a wire rack over a tray for cooling.
- In one bowl, whisk together the buttermilk and eggs. In another bowl, combine flour, cornstarch, garlic powder, onion powder, smoked paprika, black pepper, and salt.
- Dip each chicken strip into the buttermilk-egg mixture, then dredge in the flour mixture. Repeat once more for an extra crispy coating.
- Carefully fry chicken strips in batches for 3–4 minutes per side, until golden brown and cooked through.
- Transfer to the wire rack and rest for 5 minutes before serving.
Notes
- Double dredging ensures extra crunch.
- Maintain oil temperature at 350°F for best results.
- Let coated chicken rest before frying to help the crust stick.
- Reheat leftovers in the oven or air fryer to keep them crispy.
Nutrition
- Serving Size: 1/4 of recipe
- Calories: 430
- Sugar: 2g
- Sodium: 630mg
- Fat: 20g
- Saturated Fat: 3g
- Unsaturated Fat: 16g
- Trans Fat: 0g
- Carbohydrates: 28g
- Fiber: 1g
- Protein: 32g
- Cholesterol: 125mg
Keywords: crispy chicken strips, fried chicken tenders, crunchy chicken, homemade chicken strips, easy chicken snack