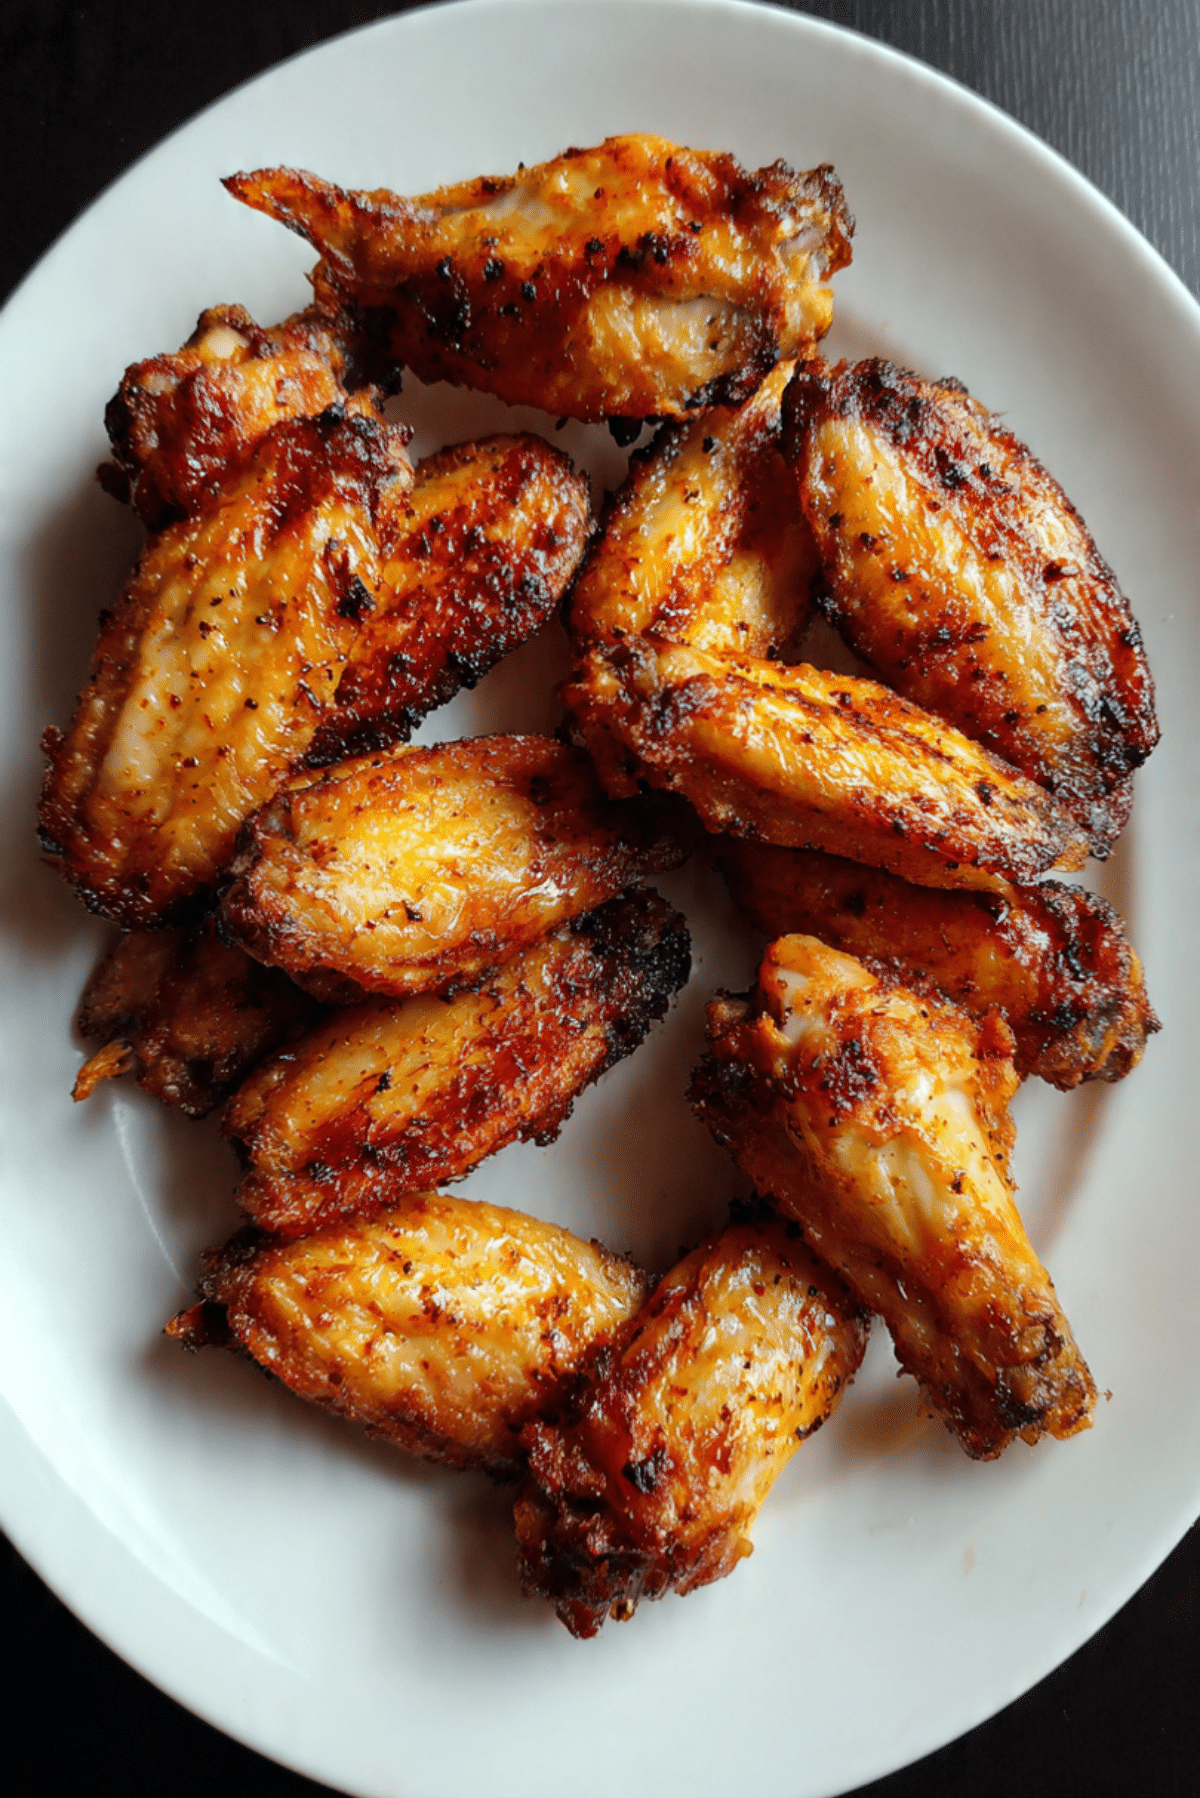
Crispy Baked Chicken Wings
There is something incredibly satisfying about biting into a perfectly crisp chicken wing, that golden skin crackling just slightly before giving way to juicy, flavorful meat inside. These wings bring that experience right into your kitchen without the need for deep frying. Trust me, you are going to love this, it is simple, comforting, and honestly a little addictive.
Why These Wings Always Steal the Show
There is a quiet magic in transforming simple ingredients into something that feels like a treat. These wings come out of the oven with that irresistible crunch, coated in bold seasoning, and they smell so good you will find yourself hovering near the oven door.
A Little Backstory Behind This Favorite
Chicken wings have long been a favorite across many cultures, but their rise to fame in casual dining really took off in the United States, especially with the iconic Buffalo-style wings. Over time, home cooks started experimenting with baking instead of frying, creating a lighter but equally delicious version. And now, this baked method has become a go-to for anyone craving that crispy texture without the extra oil.
Why You Can Count on This Recipe Every Time
Before we dive into the process, let me tell you why this one is worth saving.
Versatile: You can keep them simple or toss them in your favorite sauce, from spicy to sweet.
Budget-Friendly: Chicken wings are often affordable and feed a crowd easily.
Quick and Easy: Minimal prep and the oven does most of the work.
Customizable: Adjust the seasoning to match your taste perfectly.
Crowd-Pleasing: These disappear fast at gatherings, every single time.
Make-Ahead Friendly: You can prep them ahead and bake when ready.
Great for Leftovers: They reheat beautifully and still taste amazing.
Chef Tips to Get That Perfect Crisp
Now let’s lean into some insider knowledge that really makes a difference.
- Pat the wings completely dry before seasoning, this helps the skin crisp up.
- Use baking powder, not baking soda, it is the secret to that golden crunch.
- Space the wings out on the tray, overcrowding traps steam.
- Flip halfway through baking for even crispiness.
Kitchen Tools That Make It Easy
Before we start cooking, let’s gather what you need.
Baking Sheet: Holds the wings evenly during cooking.
Wire Rack: Helps air circulate around the wings for crisp results.
Mixing Bowl: For tossing the wings with seasoning.
Tongs: Makes flipping the wings easy and mess-free.
Ingredients That Bring It All Together
This is where everything begins, and each ingredient plays its part beautifully.
- Chicken Wings: 1 kg, the star of the dish, juicy and flavorful.
- Olive Oil: 2 tablespoons, helps the seasoning stick and promotes crisping.
- Baking Powder: 1 tablespoon, creates that crispy outer layer.
- Salt: 1 teaspoon, enhances all the flavors.
- Black Pepper: 1 teaspoon, adds a mild heat.
- Garlic Powder: 1 teaspoon, gives depth and savory aroma.
- Paprika: 1 teaspoon, adds color and a subtle smoky flavor.
Easy Ingredient Swaps You Can Try
Cooking should feel flexible, so here are some simple swaps.
Olive Oil: Use vegetable oil or melted butter.
Paprika: Try smoked paprika for a deeper flavor.
Garlic Powder: Substitute with onion powder for a different twist.
Spotlight on Key Ingredients
Let’s take a closer look at what really makes these wings shine.
Baking Powder: This is the real trick, it changes the skin texture and helps it crisp up beautifully in the oven.
Paprika: It not only adds color but brings a gentle warmth that ties everything together.

Let’s Get Cooking Together
Alright, now let’s dive into the process and bring these wings to life.
- Preheat Your Equipment: Set your oven to 220°C and line a baking sheet with a wire rack.
- Combine Ingredients: In a bowl, mix olive oil, baking powder, salt, black pepper, garlic powder, and paprika.
- Prepare Your Cooking Vessel: Place the rack over the baking sheet to allow airflow.
- Assemble the Dish: Toss the wings in the seasoning mixture until fully coated.
- Cook to Perfection: Arrange wings on the rack and bake for 40 minutes, flipping halfway through.
- Finishing Touches: Let them rest for a few minutes to lock in crispiness.
- Serve and Enjoy: Serve hot and enjoy every crunchy bite.
That Perfect Balance of Crunch and Juiciness
As the wings bake, the skin slowly tightens and crisps while the inside stays tender and juicy. The seasoning forms a flavorful crust, slightly smoky, a little garlicky, and just salty enough to keep you reaching for more.
Helpful Tips to Elevate Your Results
A few small adjustments can make a big difference.
- Use a rack for better airflow and crisp texture
- Do not skip drying the wings thoroughly
- Bake at high heat for best results
Common Mistakes to Avoid
Even simple recipes can go wrong, so keep these in mind.
- Skipping the baking powder will reduce crispiness
- Overcrowding the tray leads to steaming instead of baking
- Not flipping the wings results in uneven texture
Nutritional Snapshot
Servings: 4
Calories per serving: 320
Note: These are approximate values.
Time Breakdown
Prep Time: 10 minutes
Cook Time: 40 minutes
Total Time: 50 minutes
Make-Ahead and Storage Tips
If you are planning ahead, you can season the wings and keep them in the fridge for a few hours before baking. Leftovers can be stored in an airtight container for up to 3 days. Reheat in the oven to bring back that crisp texture. You can also freeze cooked wings and reheat them straight from frozen.
Serving Ideas That Work Every Time
Serve these wings with dipping sauces like garlic yogurt, spicy chili sauce, or even a simple squeeze of lemon. Pair them with fresh salad or crispy fries for a complete meal.
Turn Leftovers into Something New
Leftover wings can be shredded and added to wraps, tossed into salads, or even mixed into fried rice for a quick meal the next day.
Extra Tips for Even Better Flavor
Season generously but evenly, and do not rush the baking process. Let the oven do its job and allow the wings to crisp naturally.
Make Them Look as Good as They Taste
Arrange the wings on a clean white plate, sprinkle a little extra paprika on top, and serve immediately while they are still hot and crisp.
Fun Variations to Try
Try tossing the wings in buffalo sauce after baking for a classic twist. Add honey and chili flakes for a sweet and spicy version. You can also go for a lemon pepper variation for something bright and fresh.
FAQ’s
1. Can I use frozen wings?
Yes, just make sure they are fully thawed and dried before cooking.
2. Do I need a wire rack?
It helps with crispiness, but you can bake directly on a tray if needed.
3. Can I make them spicy?
Absolutely, just add chili powder or hot sauce.
4. Why use baking powder?
It helps dry the skin and creates a crisp texture.
5. Can I air fry instead?
Yes, cook at high heat and adjust time accordingly.
6. How do I keep them crispy?
Serve immediately and avoid covering them while hot.
7. Can I marinate them?
Yes, but pat them dry before baking for best results.
8. What sauces go well?
Buffalo, BBQ, honey garlic, or lemon pepper.
9. How long do leftovers last?
Up to 3 days in the fridge.
10. Can I double the recipe?
Yes, just avoid overcrowding the baking tray.
Conclusion
And just like that, you have a batch of crispy, golden wings that taste like they came straight from your favorite spot. This one is a total game-changer, simple, satisfying, and packed with flavor. Let me tell you, it is worth every bite.
Print
Crispy Baked Chicken Wings
- Prep Time: 10 minutes
- Cook Time: 40 minutes
- Total Time: 50 minutes
- Yield: 4 servings 1x
- Category: Appetizer
- Method: Baking
- Cuisine: American
Description
Perfectly crispy baked chicken wings with a golden, seasoned crust and juicy interior, made easily in the oven without frying.
Ingredients
- 1 kg chicken wings
- 2 tablespoons olive oil
- 1 tablespoon baking powder
- 1 teaspoon salt
- 1 teaspoon black pepper
- 1 teaspoon garlic powder
- 1 teaspoon paprika
Instructions
- Preheat your oven to 220°C and line a baking sheet with a wire rack.
- In a mixing bowl, combine olive oil, baking powder, salt, black pepper, garlic powder, and paprika.
- Pat the chicken wings dry thoroughly, then toss them in the seasoning mixture until fully coated.
- Arrange the wings evenly on the wire rack, making sure they are not overcrowded.
- Bake for 40 minutes, flipping the wings halfway through cooking.
- Remove from the oven and let them rest for a few minutes to maintain crispiness.
- Serve hot and enjoy.
Notes
- Make sure to dry the wings well before seasoning for maximum crispiness.
- Do not skip the baking powder, it helps create the crispy texture.
- Use a wire rack to allow air circulation around the wings.
- Reheat leftovers in the oven to keep them crispy.
Nutrition
- Serving Size: 1 portion
- Calories: 320
- Sugar: 0g
- Sodium: 480mg
- Fat: 22g
- Saturated Fat: 6g
- Unsaturated Fat: 14g
- Trans Fat: 0g
- Carbohydrates: 2g
- Fiber: 0g
- Protein: 26g
- Cholesterol: 95mg
Keywords: crispy baked chicken wings, oven baked wings, easy chicken wings, homemade wings, crispy chicken recipe