Cookie Monster Cookies
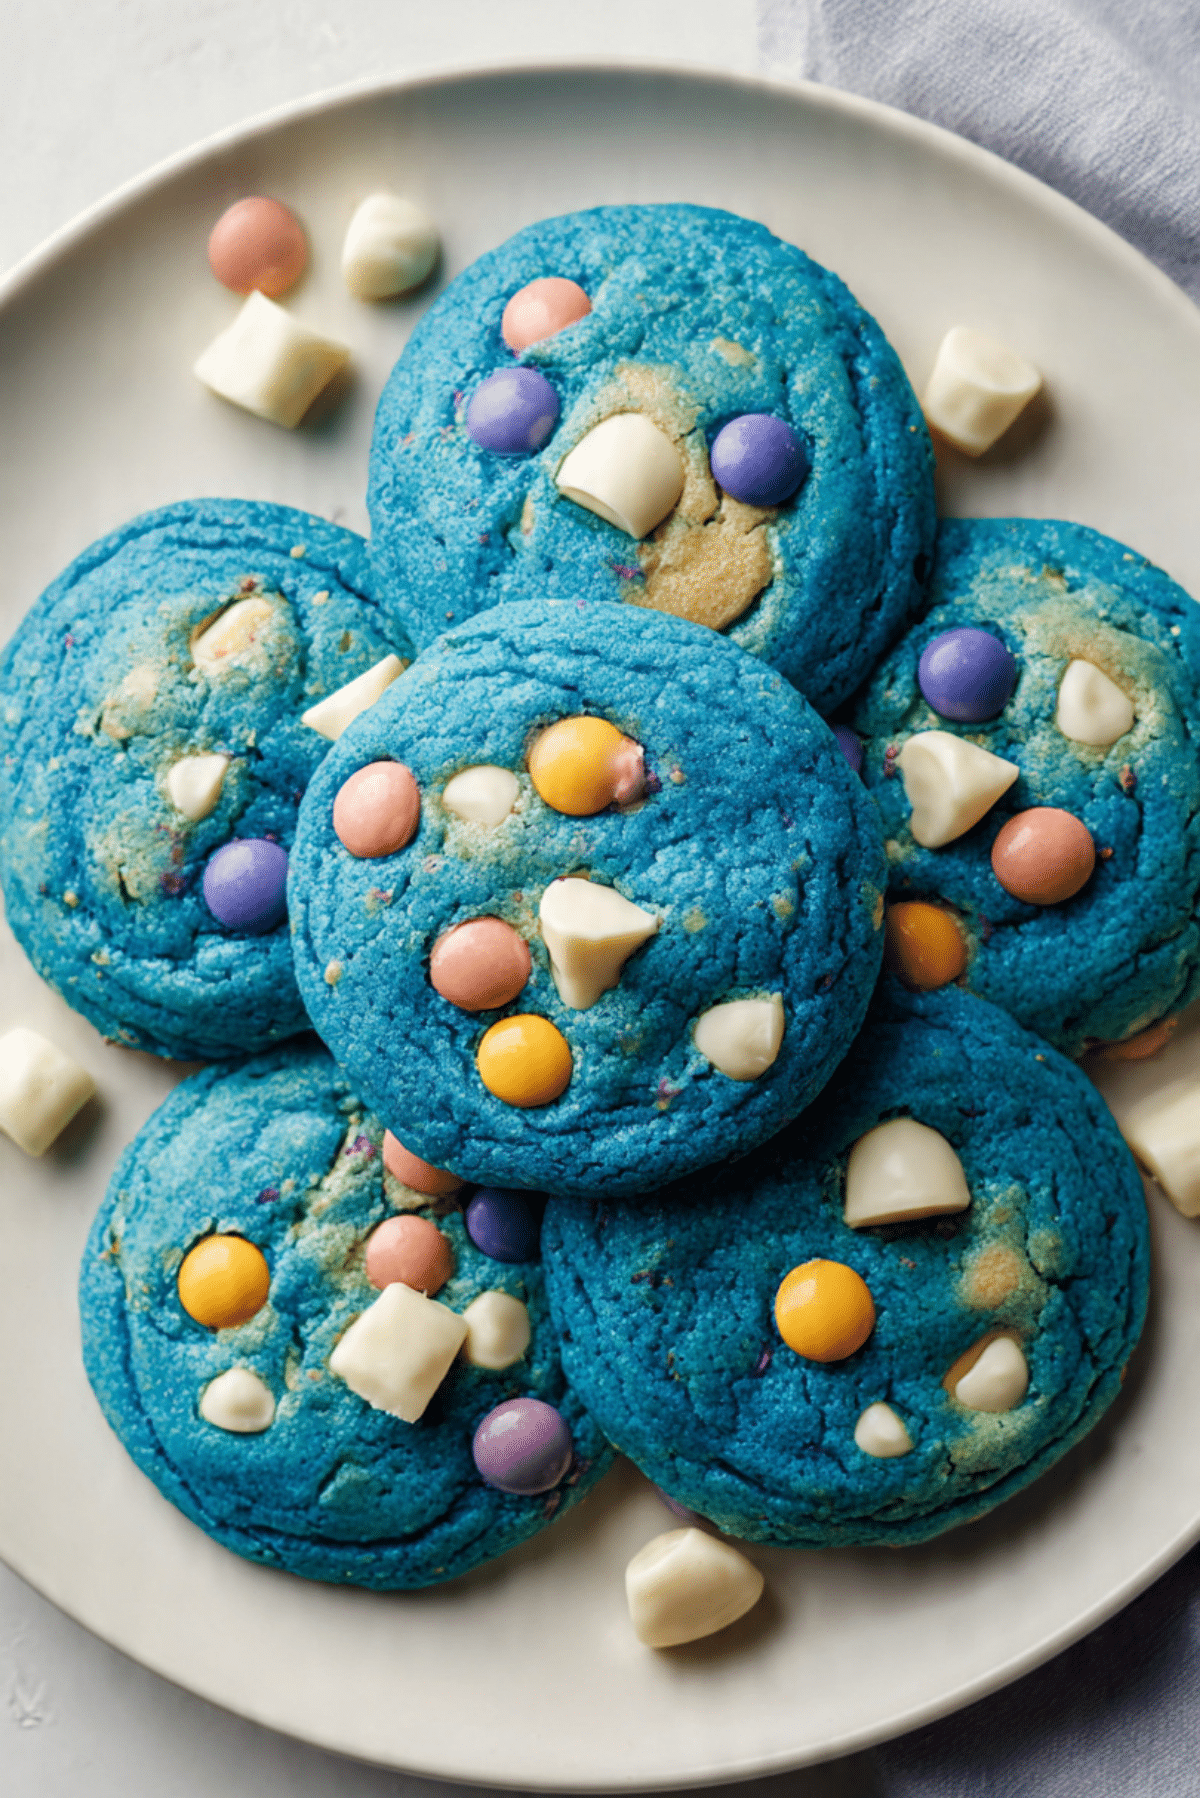
There is something about a bright blue cookie packed with chocolate that instantly makes you smile. The first time I pulled a tray of these Cookie Monster Cookies from the oven, the kitchen smelled like warm vanilla and melted chocolate, and I swear it felt like a bakery and a childhood memory all at once. They are thick, soft in the center, slightly crisp around the edges, and loaded with white chocolate chips and colorful candy pieces that melt into little pockets of sweetness. Trust me, you’re going to love this.
Why These Blue Chocolate Cookies Steal the Show
You know those treats that instantly grab attention on a dessert table? This is one of them. The vibrant blue color makes people curious, and the moment they take a bite, they are hooked. The outside has that gentle golden edge, while the inside stays soft and chewy, with creamy white chocolate melting into every bite. It feels playful, a little nostalgic, and completely indulgent.
They are the kind of cookies that make people ask for the recipe before they even finish chewing.
A Playful Nod to Childhood Nostalgia
These cookies are inspired by the beloved character from Sesame Street who famously adores cookies. While the idea is modern and social media friendly, the heart of it is classic American cookie culture. Soft drop cookies loaded with chocolate have been a staple in home kitchens for decades.
Over time, bakers started adding colorful twists, and the bright blue dough became a fun way to celebrate birthdays, themed parties, and bake sales. It is a sweet mix of tradition and creativity, which is probably why it feels so special every time you bake a batch.
What Makes This Recipe So Reliable and Loved
Before we dive into the details, let me tell you why this one is a total game-changer.
Versatile: These cookies work for birthday parties, bake sales, holidays, or just a cozy night at home. They fit almost any occasion.
Budget-Friendly: The ingredients are pantry staples like flour, sugar, butter, and eggs, with a few fun add-ins that are easy to find.
Quick and Easy: The dough comes together in about 15 minutes, and the baking time is short, so you get warm cookies fast.
Customizable: You can swap chocolate types or candy colors to match any theme.
Crowd-Pleasing: Kids love the bright color, and adults cannot resist the soft and chewy texture.
Make-Ahead Friendly: The dough can be chilled in advance or even frozen for later baking.
Great for Leftovers: They stay soft for days, and they freeze beautifully if you want to save a few for later.
Pro Baker Secrets for Perfect Texture
Now let’s talk about how to get that dreamy bakery-style texture.
- Use room temperature butter so it creams smoothly with the sugars.
- Do not overmix once you add the flour, which keeps the cookies tender.
- Chill the dough for at least 20 minutes if you want extra thick cookies.
- Slightly underbake them, because they continue to set as they cool.
Those little details make all the difference between a good cookie and an unforgettable one.
Essential Tools for Baking Success
Before we start mixing, let’s make sure you have what you need.
Mixing Bowls: One large bowl for wet ingredients and one medium bowl for dry ingredients.
Hand Mixer or Stand Mixer: Helps cream the butter and sugars until light and fluffy.
Baking Sheets: Use light colored sheets for even baking.
Parchment Paper: Prevents sticking and promotes even browning.
Cookie Scoop: Ensures evenly sized cookies that bake at the same rate.
Ingredients That Bring the Magic Together
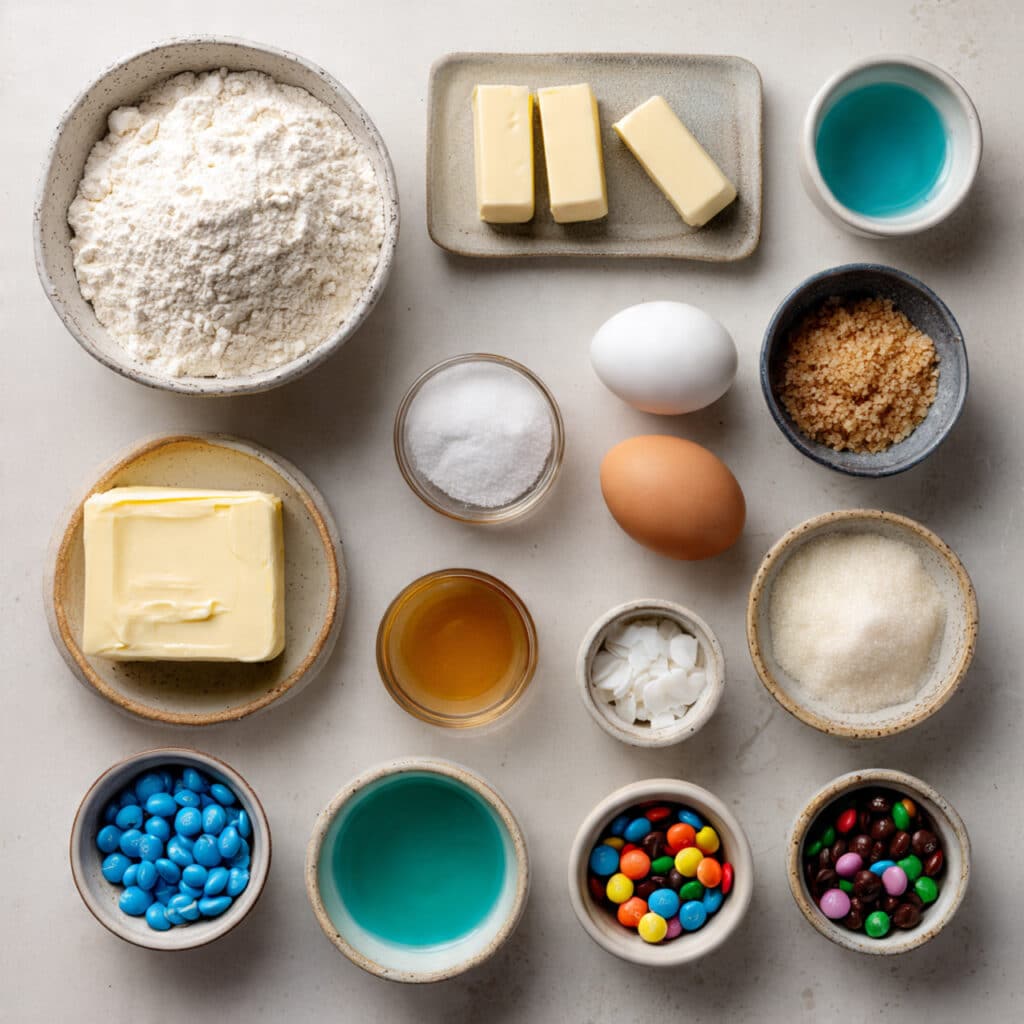
Every ingredient here plays an important role in building flavor and texture.
- All-Purpose Flour: 2 ½ cups, provides structure and keeps the cookies soft yet sturdy.
- Baking Soda: 1 teaspoon, helps the cookies rise and spread properly.
- Salt: ½ teaspoon, balances sweetness and enhances the chocolate flavor.
- Unsalted Butter: 1 cup, softened, adds richness and creates that tender crumb.
- Granulated Sugar: ¾ cup, gives sweetness and slight crisp edges.
- Light Brown Sugar: ¾ cup, packed, adds moisture and a subtle caramel note.
- Large Eggs: 2, bring moisture and bind the dough together.
- Vanilla Extract: 2 teaspoons, deepens the flavor and adds warmth.
- Blue Gel Food Coloring: 1 tablespoon, gives the signature vibrant color.
- White Chocolate Chips: 1 cup, melt into creamy pockets throughout.
- Colorful Chocolate Candy Pieces: 1 cup, add crunch and bursts of sweetness.
Simple Swaps If You Need Them
Sometimes you work with what you have, and that is perfectly fine.
White Chocolate Chips: Milk chocolate chips or semi sweet chips.
Light Brown Sugar: Dark brown sugar for a deeper caramel flavor.
Blue Gel Food Coloring: Natural plant-based blue coloring.
Colorful Chocolate Candy Pieces: Chocolate chunks or extra chips.
Spotlight on the Stars of the Dough
Let’s take a moment to appreciate the key players.
Unsalted Butter: This is the backbone of flavor and texture. When creamed properly, it creates air pockets that keep the cookies light and soft.
White Chocolate Chips: They melt differently than dark chocolate, giving creamy sweetness that pairs beautifully with the colorful candies.
Let’s Bake Together Step by Step
Alright, and now let’s dive into the fun part.
- Preheat Your Equipment: Preheat your oven to 350°F and line baking sheets with parchment paper.
- Combine Ingredients: In a medium bowl, whisk together flour, baking soda, and salt. In a large bowl, cream butter, granulated sugar, and brown sugar until light and fluffy. Add eggs one at a time, then mix in vanilla and blue gel food coloring until evenly combined. Gradually add the dry ingredients to the wet mixture. Fold in white chocolate chips and colorful candy pieces.
- Prepare Your Cooking Vessel: Scoop the dough into evenly sized balls and place them on the prepared baking sheets, leaving space between each.
- Assemble the Dish: Gently press a few extra candy pieces on top of each dough ball for a bakery style look.
- Cook to Perfection: Bake for 10 to 12 minutes, until the edges are lightly golden but the centers still look soft.
- Finishing Touches: Let the cookies cool on the baking sheet for 5 minutes before transferring to a wire rack.
- Serve and Enjoy: Enjoy warm for gooey centers, or let them cool completely for a soft and chewy bite.
The Texture and Flavor Experience
When you break one open, the inside is soft and almost creamy from the melted white chocolate. The edges give just enough structure to hold everything together. The sweetness is balanced by a hint of salt, and the vanilla aroma lingers beautifully. This one’s a total game-changer if you love thick, bakery-style cookies.
Helpful Baking Tips for Even Better Results
Here are a few extra tricks to keep in mind.
- Chill the dough for thicker cookies.
- Slightly underbake for soft centers.
- Use a cookie scoop for uniform size.
- Press extra chocolate on top before baking for a picture-perfect finish.
Common Mistakes and How to Avoid Them
Even simple cookies can go wrong if you rush.
- Overmixing the dough can make cookies tough, so mix just until combined.
- Using melted butter instead of softened butter can change the texture.
- Overbaking will dry them out, so watch the edges carefully.
- Skipping parchment paper may cause uneven browning.
Nutrition Breakdown at a Glance
Servings: 24 cookies
Calories per serving: 220
Note: These are approximate values.
Time Commitment Overview
Prep Time: 15 minutes
Cook Time: 12 minutes
Total Time: 27 minutes
Make-Ahead and Storage Tips
If you want to plan ahead, you can prepare the dough and refrigerate it for up to 48 hours. You can also freeze the dough balls for up to 3 months. Bake straight from frozen, just add a couple of extra minutes.
Store baked cookies in an airtight container at room temperature for up to 5 days. For longer storage, freeze them and reheat gently in the oven for a fresh baked feel.
Serving Ideas to Make Them Shine
Serve these with a cold glass of milk for the ultimate nostalgic treat. They also look fantastic stacked on a cake stand for birthday parties. You can even sandwich a scoop of vanilla ice cream between two cookies for an over the top dessert.
Transforming Leftovers Into Something New
If you have extras, crumble them over vanilla yogurt for a sweet crunch. Blend them into a milkshake for a cookies and cream style drink. Or chop them and fold into homemade ice cream for a colorful twist.
Extra Tips for Flavor and Freshness
Use high quality vanilla extract for deeper flavor. Sprinkle a tiny pinch of flaky salt on top before baking if you love sweet and salty combinations. Let me tell you, it’s worth every bite.
Turn Them Into a Dessert Centerpiece
For a showstopping look, stack them high on a white cake stand and scatter a few colorful candies around the base. Their bright blue color pops beautifully against simple serving dishes.
Fun Variations to Try
- Add mini marshmallows for a gooey surprise.
- Swap white chocolate for dark chocolate for a richer flavor.
- Add chopped nuts for crunch.
- Mix in chocolate chunks for extra indulgence.
- Make them extra thick by chilling the dough overnight.
FAQ’s
Q1: Can I make the dough ahead of time?
Yes, you can refrigerate it for up to 48 hours.
Q2: Can I freeze the baked cookies?
Absolutely, freeze in an airtight container for up to 3 months.
Q3: Why are my cookies flat?
Your butter may have been too warm or the dough was not chilled.
Q4: Can I reduce the sugar?
You can slightly reduce it, but texture may change.
Q5: Do I have to use gel food coloring?
Gel works best for vibrant color without thinning the dough.
Q6: Can I use salted butter?
Yes, just reduce the added salt slightly.
Q7: How do I keep them soft?
Store with a slice of bread in the container to retain moisture.
Q8: Can I make them gluten free?
Use a 1:1 gluten free flour blend.
Q9: Why press candies on top?
It gives a more colorful, bakery style finish.
Q10: Can I double the recipe?
Yes, it scales very well.
Conclusion
Baking a batch of Cookie Monster Cookies is more than just making dessert, it is creating something playful, colorful, and completely irresistible. From the soft center to the creamy chocolate pockets, every bite feels joyful. Trust me, once you make them, they will become a regular in your kitchen.
Print
Cookie Monster Cookies
- Prep Time: 15 minutes
- Cook Time: 12 minutes
- Total Time: 27 minutes
- Yield: 24 cookies 1x
- Category: Dessert
- Method: Baking
- Cuisine: American
- Diet: Vegetarian
Description
Thick, soft, and chewy blue cookies loaded with white chocolate chips and colorful chocolate candy pieces. These playful bakery-style treats are rich in vanilla flavor with crisp edges and gooey centers.
Ingredients
- 2 ½ cups all-purpose flour
- 1 teaspoon baking soda
- ½ teaspoon salt
- 1 cup unsalted butter, softened
- ¾ cup granulated sugar
- ¾ cup light brown sugar, packed
- 2 large eggs
- 2 teaspoons vanilla extract
- 1 tablespoon blue gel food coloring
- 1 cup white chocolate chips
- 1 cup colorful chocolate candy pieces
Instructions
- Preheat oven to 350°F and line baking sheets with parchment paper.
- In a medium bowl, whisk together flour, baking soda, and salt.
- In a large bowl, cream butter, granulated sugar, and brown sugar until light and fluffy.
- Add eggs one at a time, then mix in vanilla extract and blue gel food coloring until evenly combined.
- Gradually mix the dry ingredients into the wet ingredients until just combined.
- Fold in white chocolate chips and colorful chocolate candy pieces.
- Scoop dough into evenly sized balls and place on prepared baking sheets, leaving space between each.
- Press a few extra candy pieces onto the tops of each dough ball.
- Bake for 10 to 12 minutes, until edges are lightly golden and centers remain soft.
- Cool on baking sheet for 5 minutes before transferring to a wire rack. Serve and enjoy.
Notes
- Chill the dough for 20 minutes for thicker cookies.
- Slightly underbake for soft and chewy centers.
- Store in an airtight container for up to 5 days.
- Dough balls can be frozen for up to 3 months.
Nutrition
- Serving Size: 1 cookie
- Calories: 220
- Sugar: 18g
- Sodium: 120mg
- Fat: 11g
- Saturated Fat: 7g
- Unsaturated Fat: 3g
- Trans Fat: 0g
- Carbohydrates: 28g
- Fiber: 1g
- Protein: 2g
- Cholesterol: 35mg
Keywords: cookie monster cookies, blue chocolate chip cookies, white chocolate cookies, colorful candy cookies, bakery style cookies