Chocolate Mousse Brownie Bars
There’s something about the pairing of dense, fudgy brownie and silky smooth mousse that feels like pure dessert magic. Each bite of these chocolate mousse brownie bars is like a little celebration — rich, creamy, and just the right amount of indulgent. Whether you’re sharing them with friends or sneaking a piece from the fridge late at night, these bars are a chocolate lover’s dream come true.
Why These Bars Are the Best Thing You’ll Bake This Week
Imagine a treat that combines the chewy satisfaction of a brownie with the cloud-like luxury of chocolate mousse. That’s what you get here. These bars are the perfect marriage of two textures, tied together by deep chocolate flavor and a hint of vanilla warmth.
A Little Slice of Dessert History
While brownies themselves are a classic American invention dating back to the early 1900s, adding mousse as a topping is a newer, more decadent twist. Chocolate mousse, originally French, brings a touch of elegance and creaminess to the dense richness of brownies. This fusion feels like a celebration of comfort and sophistication in every square.
Here’s Why This Recipe Is a Total Keeper
This isn’t just another sweet treat. These bars are a secret weapon for impressing guests, curing chocolate cravings, or just celebrating life’s little moments.
Versatile: You can dress them up with berries or keep them simple and classic. They fit any occasion.
Budget-Friendly: Most ingredients are pantry staples, making this a luxurious dessert without the pricey tag.
Quick and Easy: A few bowls, a whisk, and some chill time — no complicated techniques required.
Customizable: Use dark chocolate chips, swirl in peanut butter, or even layer with caramel.
Crowd-Pleasing: Everyone loves a layered dessert, especially when it’s this rich and indulgent.
Make-Ahead Friendly: The mousse sets beautifully in the fridge, making this ideal for prepping the night before.
Great for Leftovers: Store them chilled and they’re just as delicious days later, if they last that long.
Pro Tips for Nailing This Recipe
To really bring this dessert to life, here are a few tips from one baker to another:
- Let the brownie layer cool completely before adding the mousse, so the layers stay distinct.
- Use high-quality chocolate chips for a deeper, smoother flavor.
- Chill the bars at least 2 hours before slicing to get clean, beautiful layers.
- Warm your knife under hot water before cutting — it makes all the difference.
- Use parchment paper in the pan for easy removal and perfect presentation.
Kitchen Tools You’ll Need to Get Started
No fancy gadgets required here — just a few essentials.
Mixing Bowls: For separating dry and wet ingredients and whisking up that mousse.
8×8 Baking Pan: The perfect size for thick, satisfying layers.
Whisk: Helps achieve that smooth, lump-free mousse.
Electric Mixer: To whip the cream until it’s light and fluffy.
Rubber Spatula: For folding ingredients together gently and scraping bowls clean.
Parchment Paper: Makes lifting out the bars super easy and keeps cleanup stress-free.
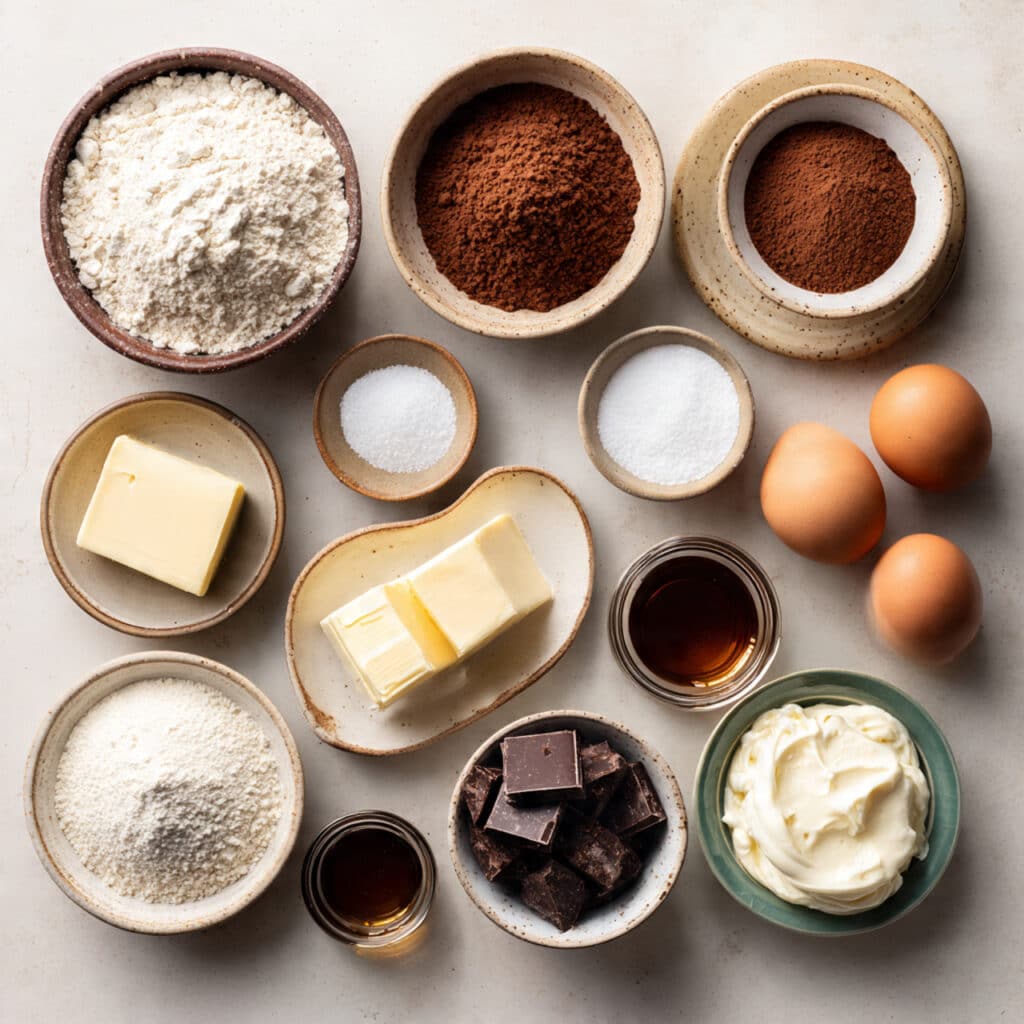
Ingredients You’ll Need For the Perfect Bars
These ingredients work together in harmony, creating layers of texture and chocolate goodness.
- All-Purpose Flour: 3/4 cup — Provides structure to the brownie base.
- Granulated Sugar: 1 cup — Sweetens the brownies and balances the cocoa.
- Unsweetened Cocoa Powder: 1/2 cup — Adds deep chocolate flavor without extra sweetness.
- Baking Powder: 1/2 teaspoon — Gives the brownies a slight lift.
- Salt: 1/4 teaspoon — Enhances the overall flavor and balances sweetness.
- Large Eggs: 2 — Bind the ingredients together and add richness.
- Unsalted Butter: 1/2 cup (melted) — Adds moisture and that classic buttery taste.
- Vanilla Extract: 1 teaspoon — Brings warmth and depth to the chocolate.
- Semi-Sweet Chocolate Chips: 1/2 cup — Melted into the brownie batter for added richness.
- Heavy Cream: 1 cup — Whipped to create the mousse layer.
- Powdered Sugar: 1/4 cup — Sweetens and stabilizes the mousse.
- Cream Cheese: 4 oz — Adds tang and structure to the mousse.
Easy Ingredient Swaps That Still Taste Amazing
Running low on something? Here’s how to keep the flavor going strong.
All-Purpose Flour: Gluten-free flour blend.
Semi-Sweet Chocolate Chips: Dark chocolate or milk chocolate chips.
Heavy Cream: Coconut cream (chilled and whipped).
Cream Cheese: Mascarpone or a dairy-free cream cheese.
Granulated Sugar: Coconut sugar for a deeper, caramel note.
Key Ingredient Highlights
Cream Cheese: Adds a subtle tang and helps stabilize the mousse so it holds its shape beautifully.
Unsweetened Cocoa Powder: Brings intense, unfiltered chocolate flavor to the base without adding extra sweetness.
Let’s Bake These Chocolate Beauties
You’re just a few steps away from sinking your teeth into these luscious bars. Here’s how to make it happen:
-
Preheat Your Equipment:
Set your oven to 350°F (175°C) and line an 8×8 inch baking pan with parchment paper. -
Combine Ingredients:
In one bowl, mix flour, cocoa powder, baking powder, and salt. In another, whisk melted butter, sugar, eggs, and vanilla. Stir in melted chocolate chips, then fold in the dry mix until just combined. -
Prepare Your Cooking Vessel:
Pour the brownie batter into your lined pan, spreading evenly. -
Assemble the Dish:
Bake the brownie layer for 20–25 minutes until set. Let cool completely. -
Cook to Perfection:
Whip the heavy cream with powdered sugar until soft peaks form. In another bowl, beat cream cheese until smooth, then fold in whipped cream gently. -
Finishing Touches:
Spread the mousse over the cooled brownie layer. Smooth the top with a spatula. -
Serve and Enjoy:
Chill for at least 2 hours, then slice into squares and enjoy every creamy, chocolatey bite.
Texture and Flavor That Will Keep You Coming Back
The bottom brownie layer is rich and chewy with a deep cocoa kick, while the mousse on top is like a chocolate cloud — airy, silky, and just sweet enough. Together, they make for a contrast you’ll crave again and again.
Bonus Tips to Make It Even Better
Here’s how to level up your dessert game:
- Use room-temperature eggs for a smoother batter.
- Chill your mixing bowl before whipping cream — it’ll whip faster and fluffier.
- Top with a dusting of cocoa or chocolate shavings for a fancy finish.
What Could Go Wrong and How to Avoid It
Mistakes happen, but here’s how to dodge the common ones:
- Don’t skip cooling: Adding mousse to a warm brownie base will melt it into a mess.
- Overmixing the batter: Stir until just combined to keep the brownie tender.
- Undercooling mousse layer: Give it time to set fully so the slices come out clean.
Nutritional Snapshot
Servings: 9
Calories per serving: 310
Note: These are approximate values.
Time Investment Breakdown
Prep Time: 20 minutes
Cook Time: 25 minutes
Total Time: 45 minutes
Smart Make-Ahead and Storage Tips
You can absolutely prep these a day ahead. In fact, they taste even better after chilling overnight. Store in an airtight container in the fridge for up to 4 days. For longer storage, freeze them individually and thaw in the fridge before serving.
How to Plate and Pair Like a Pro
Serve these chilled with a sprinkle of cocoa powder or a few fresh berries for a pop of color. Pair with a cold glass of milk, a cup of espresso, or a scoop of vanilla bean ice cream if you’re feeling extra indulgent.
Leftovers? Let’s Get Creative
Transform leftover bars into dessert trifles with layers of whipped cream and crushed cookies, or chop them into chunks and mix into ice cream for a homemade sundae base.
A Few Extra Tricks to Keep in Your Pocket
- Add a tablespoon of espresso powder to the brownie batter to intensify the chocolate.
- Use an offset spatula to get a smooth mousse top.
- Line your baking pan with parchment that overhangs for easy lifting and clean cuts.
Want to Impress? Here’s How
Clean edges make all the difference. Chill well, use a hot knife, and wipe between each slice. For a visual wow, top each bar with a swirl of whipped cream or a delicate chocolate curl.
Switch Things Up With These Fun Variations
- Mint Mousse: Add a few drops of peppermint extract to the mousse layer.
- Peanut Butter Brownie Base: Swirl in a few tablespoons of peanut butter before baking.
- Nutty Crunch: Sprinkle chopped hazelnuts over the mousse for texture.
- Berry Surprise: Add a layer of raspberry jam between brownie and mousse.
- Mocha Twist: Add espresso powder to both layers for a coffee kick.
FAQ’s
Q1: Can I make this gluten-free?
Yes, just substitute a 1:1 gluten-free flour blend for the all-purpose flour.
Q2: Can I use boxed brownie mix instead?
Absolutely, just prepare the base as directed and continue with the mousse layer.
Q3: How long should I chill them before slicing?
At least 2 hours, but overnight is even better for clean cuts and firm texture.
Q4: Can I freeze these bars?
Yes, freeze in an airtight container for up to 2 months. Thaw in the fridge before serving.
Q5: Can I double the recipe?
Yes, use a 9×13 pan and double all ingredients. Add a few minutes to baking time.
Q6: Is there a dairy-free version?
Try using coconut cream and dairy-free cream cheese for the mousse, and a butter substitute for the brownies.
Q7: How do I know when the brownie is done?
It should feel set in the center and a toothpick should come out with a few moist crumbs.
Q8: Can I add toppings to the mousse?
Definitely! Try chocolate shavings, cocoa powder, or even a drizzle of ganache.
Q9: What’s the best way to cut these cleanly?
Use a sharp knife warmed under hot water and wipe between cuts.
Q10: Are these suitable for kids?
Yes, they’re sweet, soft, and fun to eat — kids will love them!
Conclusion
These chocolate mousse brownie bars are more than just dessert — they’re an experience. Each bite is a blend of bold chocolate and velvety cream, the kind of treat that makes you pause and savor. Trust me, you’re going to love this. Whether it’s for a party or just because, this one’s a total game-changer.
Print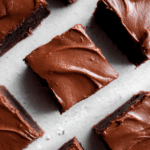
Chocolate Mousse Brownie Bars
- Prep Time: 20 minutes
- Cook Time: 25 minutes
- Total Time: 45 minutes
- Yield: 9 bars 1x
- Category: Dessert
- Method: Baking
- Cuisine: American
- Diet: Vegetarian
Description
These chocolate mousse brownie bars feature a rich, fudgy brownie base topped with airy, whipped chocolate mousse and a hint of tangy cream cheese. Perfect for make-ahead treats or indulgent sharing.
Ingredients
- 3/4 cup all-purpose flour
- 1 cup granulated sugar
- 1/2 cup unsweetened cocoa powder
- 1/2 teaspoon baking powder
- 1/4 teaspoon salt
- 2 large eggs
- 1/2 cup unsalted butter (melted)
- 1 teaspoon vanilla extract
- 1/2 cup semi-sweet chocolate chips (melted)
- 1 cup heavy cream
- 1/4 cup powdered sugar
- 4 oz cream cheese
Instructions
- Preheat oven to 350°F (175°C) and line an 8×8 inch baking pan with parchment paper.
- In a medium bowl, mix flour, cocoa powder, baking powder, and salt.
- In another bowl, whisk melted butter, sugar, eggs, and vanilla until smooth.
- Stir in melted chocolate chips to the wet mixture.
- Fold dry ingredients into the wet mixture until just combined.
- Pour batter into the lined pan and spread evenly.
- Bake for 20–25 minutes or until set. Let cool completely.
- In a bowl, whip heavy cream and powdered sugar to soft peaks.
- In another bowl, beat cream cheese until smooth.
- Fold whipped cream into the cream cheese gently until combined.
- Spread mousse evenly over the cooled brownie layer.
- Chill for at least 2 hours, then slice and serve.
Notes
- Use high-quality chocolate chips for best flavor.
- Let brownies cool completely before adding mousse to prevent melting.
- Warm your knife before slicing for clean edges.
Nutrition
- Serving Size: 1 bar
- Calories: 310
- Sugar: 25g
- Sodium: 100mg
- Fat: 19g
- Saturated Fat: 11g
- Unsaturated Fat: 6g
- Trans Fat: 0g
- Carbohydrates: 34g
- Fiber: 2g
- Protein: 4g
- Cholesterol: 55mg
Keywords: chocolate mousse brownie bars, layered chocolate dessert, fudgy brownies, easy dessert bars, mousse topping