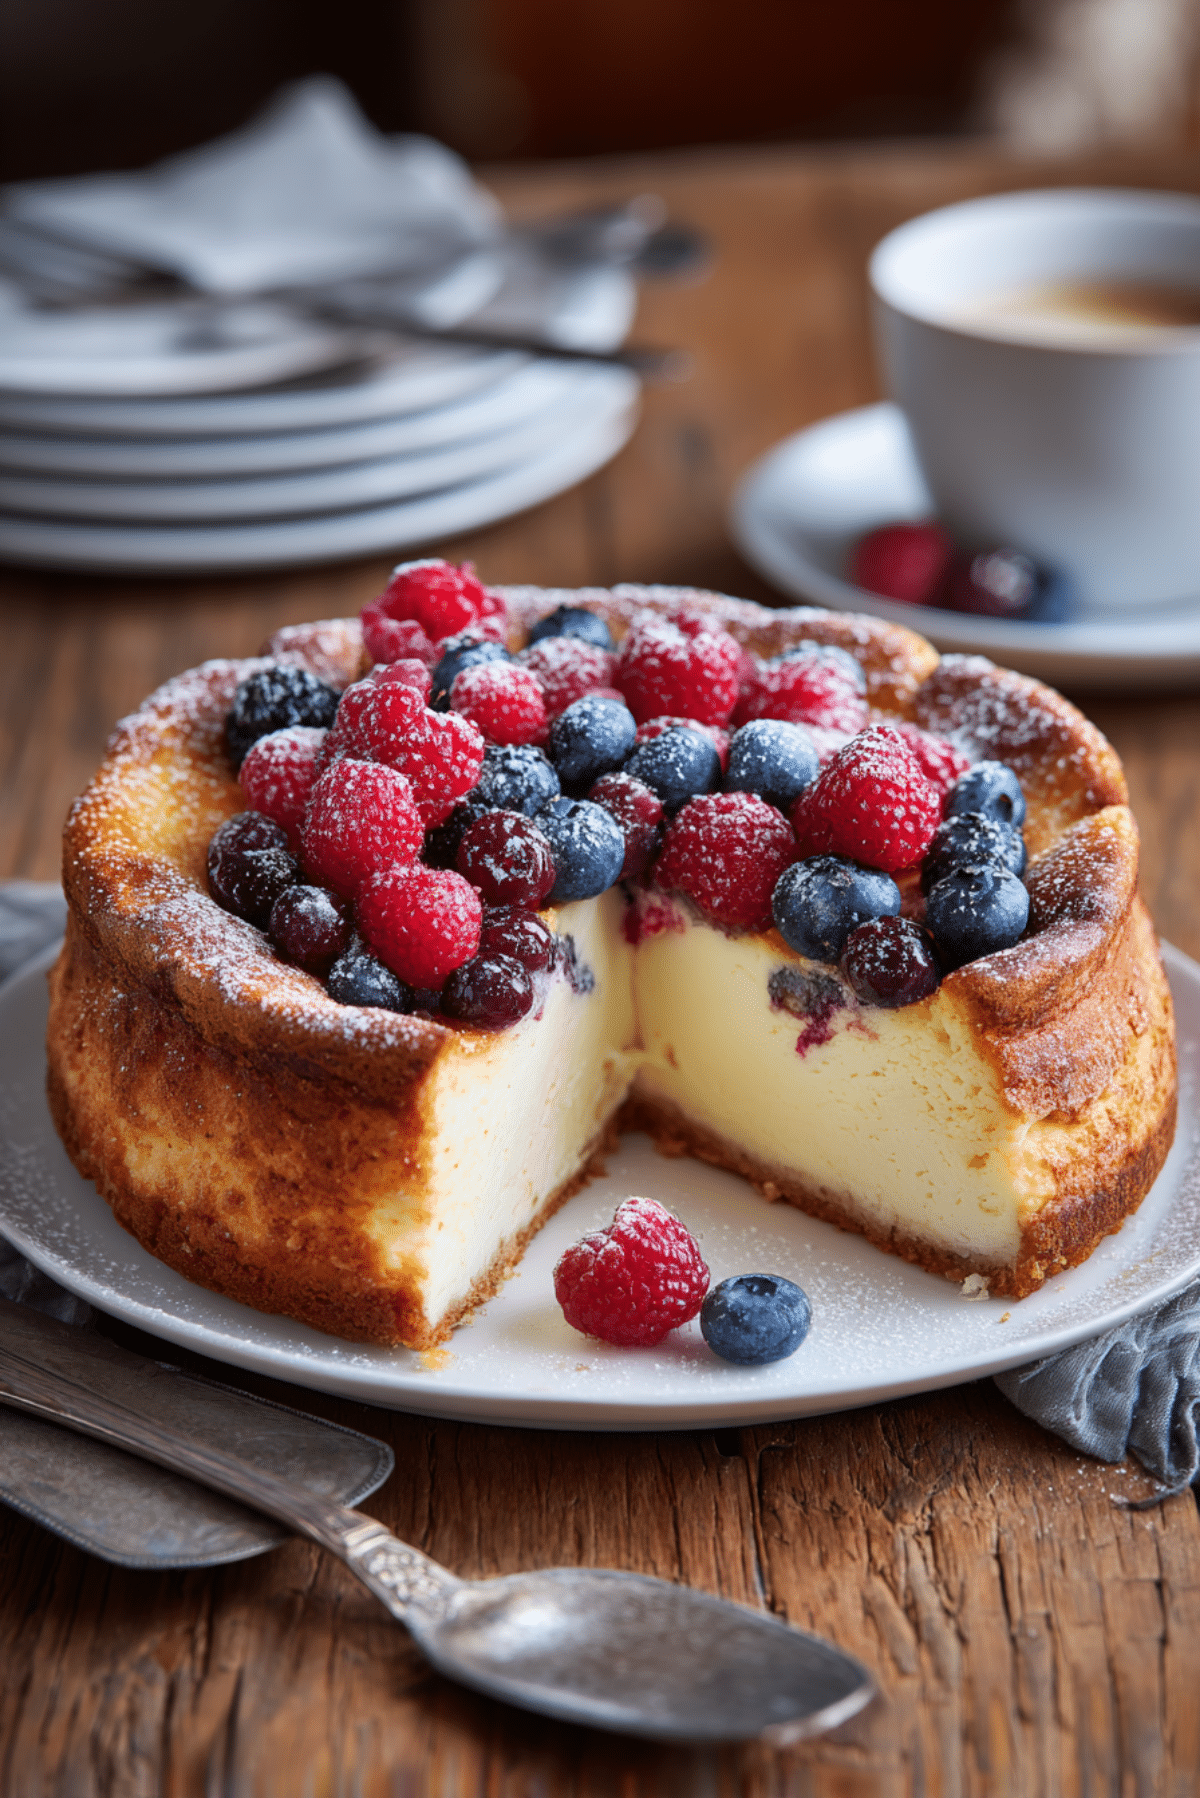
Classic Baked Cheesecake
There’s something undeniably magical about a classic baked cheesecake. The buttery crunch of the crust, the silky-smooth cream cheese filling, and that first bite that melts slowly on your tongue like a sweet little secret. Whether you’re celebrating a special moment or simply treating yourself after a long week, this cheesecake brings comfort and joy with every slice.
Behind the Recipe
I still remember the first time I made this cheesecake. I was in my tiny apartment kitchen, flipping through my grandmother’s old recipe book, chasing the same dreamy texture I remembered from Sunday dinners. What came out of that oven was a masterpiece that instantly transported me back to those warm family gatherings. Over the years, I’ve refined it to perfection — still true to the original, just a little more foolproof.
Recipe Origin or Trivia
Did you know cheesecakes date back to ancient Greece? That’s right, the first recorded cheesecake was served to athletes during the first Olympic Games in 776 BC. Over time, it made its way through Europe and eventually landed in New York, where cream cheese became the secret to its signature richness. Our version is a nod to the classic New York-style cheesecake, but with a homier touch.
Why You’ll Love Classic Baked Cheesecake
Let me tell you, this one’s a total game-changer. Here’s why:
Versatile: Pairs perfectly with fresh fruit, chocolate sauce, or just plain and proud.
Budget-Friendly: Uses pantry staples like sugar, eggs, and cream cheese.
Quick and Easy: Simple steps and minimal hands-on time.
Customizable: Add a swirl of fruit puree or top with caramel for a twist.
Crowd-Pleasing: Everyone loves a creamy, rich cheesecake — it’s always a hit.
Make-Ahead Friendly: Even better after chilling overnight.
Great for Leftovers: Stores well for a few days without losing flavor or texture.
Chef’s Pro Tips for Perfect Results
If you want to make sure your cheesecake comes out flawless every single time, keep these in mind:
- Bring all your ingredients to room temperature before starting.
- Don’t overmix the batter — you want it smooth, not airy.
- Use a water bath to avoid cracks on the surface.
- Let it cool gradually in the oven with the door ajar.
- Chill it overnight for the best texture and flavor.
Kitchen Tools You’ll Need
To keep your baking smooth and stress-free, gather these tools:
Springform Pan: Essential for easy release and perfect shape.
Mixing Bowls: For combining crust and filling ingredients.
Electric Mixer: Helps achieve a creamy, lump-free filling.
Measuring Cups & Spoons: Accuracy is key for perfect texture.
Rubber Spatula: Great for scraping down the sides of the bowl.
Roasting Pan: Needed for the water bath to prevent cracks.
Ingredients in Classic Baked Cheesecake
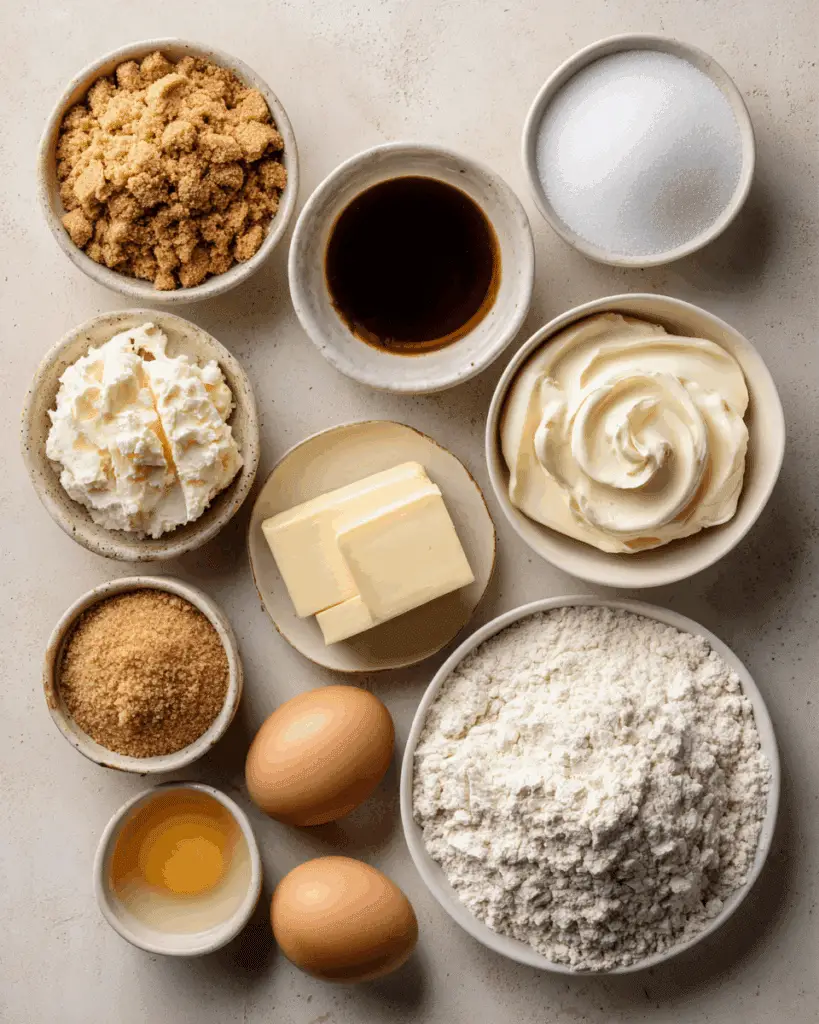
This cheesecake brings together ingredients that create a smooth, dreamy harmony of texture and flavor. Here’s what you’ll need:
- Graham Cracker Crumbs: 1 ½ cups, for that golden, crumbly crust.
- Granulated Sugar: 1 cup, adds sweetness and balances the tang of cream cheese.
- Unsalted Butter: ½ cup, melted, binds the crust together.
- Cream Cheese: 4 (8 oz) packages, softened, the rich and creamy base.
- Sour Cream: 1 cup, adds tanginess and smooth texture.
- Vanilla Extract: 1 teaspoon, for a warm, aromatic flavor.
- Eggs: 4 large, room temperature, help bind and set the filling.
- All-Purpose Flour: 2 tablespoons, helps with structure.
- Salt: ¼ teaspoon, enhances all the sweet flavors.
Ingredient Substitutions
Swaps you can make if needed:
Graham Cracker Crumbs: Crushed digestive biscuits.
Sour Cream: Greek yogurt works beautifully.
Cream Cheese: Mascarpone for a silkier version.
Butter: Coconut oil for a dairy-free option.
Ingredient Spotlight
Cream Cheese: The heart of any cheesecake. It provides the rich, dense texture and slightly tangy flavor that defines this dessert.
Graham Crackers: Their subtle sweetness and texture balance out the creamy filling perfectly.
Instructions for Making Classic Baked Cheesecake
Let’s get baking! Follow these steps to cheesecake bliss:
- Preheat Your Equipment:
Preheat your oven to 325°F (160°C). Wrap the outside of a 9-inch springform pan with aluminum foil to prepare for the water bath. - Combine Ingredients:
Mix graham cracker crumbs, melted butter, and ¼ cup sugar in a bowl. Press firmly into the bottom of the pan. In a large bowl, beat cream cheese until smooth. Add remaining sugar, flour, and salt. Beat in eggs one at a time, then mix in sour cream and vanilla. - Prepare Your Cooking Vessel:
Pour filling over crust in springform pan. Tap gently to release air bubbles. Place the springform pan in a larger roasting pan. - Assemble the Dish:
Pour hot water into the roasting pan, halfway up the side of the springform. This water bath keeps the cake moist and crack-free. - Cook to Perfection:
Bake for 60–70 minutes until edges are set and center slightly jiggles. Turn off oven, crack the door, and let cheesecake cool inside for 1 hour. - Finishing Touches:
Remove from oven, cool completely, then refrigerate for at least 6 hours or overnight. - Serve and Enjoy:
Top with fresh berries, whipped cream, or leave it plain. Slice with a warm knife for clean cuts. Enjoy each luxurious bite.
Texture & Flavor Secrets
The contrast of a buttery, slightly crunchy crust with the dense yet airy filling is pure bliss. As it chills, the cheesecake sets into a silky texture while the tang of the cream cheese mingles with vanilla and a whisper of sweetness, creating an unforgettable flavor profile.
Cooking Tips & Tricks
Little things make a big difference:
- Let the cheesecake cool slowly to prevent cracks.
- Don’t skip the water bath — it’s a game-changer.
- Slice using a knife dipped in warm water for clean cuts.
What to Avoid
Mistakes can happen, but here’s how to dodge the most common ones:
- Overmixing the batter can create air bubbles that lead to cracks.
- Skipping the foil wrap can let water seep into the crust.
- Cutting too soon — give it time to chill completely before serving.
Nutrition Facts
Servings: 12
Calories per serving: 450
Note: These are approximate values.
Preparation Time
Prep Time: 20 minutes
Cook Time: 1 hour 10 minutes
Total Time: 7 hours (including chilling)
Make-Ahead and Storage Tips
This cheesecake is your make-ahead hero. Bake it a day in advance and chill overnight for best results. Leftovers can be stored in an airtight container in the fridge for up to 5 days. You can also freeze individual slices wrapped tightly for up to a month. Just thaw in the fridge before serving.
How to Serve Classic Baked Cheesecake
Serve it cold, straight from the fridge, with a handful of fresh berries, a drizzle of chocolate, or a dusting of powdered sugar. Pair it with hot coffee or a glass of milk for the full comfort-food experience.
Creative Leftover Transformations
Turn extra slices into cheesecake parfaits layered with fruit and granola. Crumble and fold into whipped cream for a no-bake mousse. Or just sneak a forkful every time you pass the fridge — no judgment here.
Additional Tips
- Use parchment paper on the bottom of the pan for easier release.
- Add a teaspoon of lemon zest to brighten the flavor.
- Chill the knife between slices for perfect edges.
Make It a Showstopper
Top your cheesecake with fresh berries, edible flowers, or a shimmering glaze. A drizzle of raspberry coulis or chocolate ganache makes it magazine-cover worthy. Present it on a cake stand with soft candlelight and you’ve got a dessert to impress.
Variations to Try
- Chocolate Swirl Cheesecake: Add melted dark chocolate and swirl before baking.
- Lemon Cheesecake: Use lemon juice and zest for a citrus twist.
- Berry-Topped Cheesecake: Add a thick layer of mixed berries and glaze.
- Mini Cheesecakes: Use muffin tins for individual portions.
- Pumpkin Cheesecake: Add canned pumpkin and spices for a fall version.
FAQ’s
Q1: Can I make this cheesecake without a water bath?
A1: You can, but it increases the risk of cracking. The water bath keeps it moist and helps bake evenly.
Q2: Can I freeze baked cheesecake?
A2: Absolutely. Wrap slices in plastic wrap and freeze for up to a month. Thaw in the fridge before eating.
Q3: Why did my cheesecake crack?
A3: Cracks often happen due to overbaking or skipping the water bath. Cooling too quickly can also cause it.
Q4: How long should I chill the cheesecake?
A4: At least 6 hours, but overnight is best for the perfect texture.
Q5: Can I use a different crust?
A5: Yes. Try digestive biscuits, chocolate cookies, or even a nut-based crust.
Q6: How do I know it’s fully baked?
A6: The edges should be set and the center should jiggle slightly. It will set more as it cools.
Q7: Is it better to bake or chill a cheesecake?
A7: Baked cheesecakes have a denser, richer texture. No-bake ones are lighter but lack the depth of flavor.
Q8: Can I use low-fat cream cheese?
A8: You can, but the texture and flavor may not be as rich. Full-fat gives the best results.
Q9: What toppings go well with cheesecake?
A9: Fresh berries, caramel, chocolate ganache, whipped cream, or fruit compote.
Q10: How do I store leftovers?
A10: In an airtight container in the fridge for up to 5 days. Or freeze slices individually.
Conclusion
This Classic Baked Cheesecake is more than just dessert — it’s a memory in the making. Creamy, dreamy, and so satisfying, it’s a recipe you’ll turn to time and again. Trust me, it’s worth every bite.
Print
Classic Baked Cheesecake
- Prep Time: 20 minutes
- Cook Time: 1 hour 10 minutes
- Total Time: 7 hours (including chilling)
- Yield: 12 servings 1x
- Category: Dessert
- Method: Baking
- Cuisine: American
- Diet: Vegetarian
Description
Rich, creamy, and irresistibly smooth, this classic baked cheesecake features a buttery graham cracker crust and a luscious cream cheese filling — perfect for any celebration or indulgent moment.
Ingredients
- 1 ½ cups Graham Cracker Crumbs
- 1 cup Granulated Sugar
- ½ cup Unsalted Butter, melted
- 4 (8 oz) packages Cream Cheese, softened
- 1 cup Sour Cream
- 1 teaspoon Vanilla Extract
- 4 large Eggs, room temperature
- 2 tablespoons All-Purpose Flour
- ¼ teaspoon Salt
Instructions
- Preheat your oven to 325°F (160°C). Wrap the outside of a 9-inch springform pan with aluminum foil.
- Mix graham cracker crumbs, melted butter, and ¼ cup sugar in a bowl. Press firmly into the bottom of the pan.
- In a large bowl, beat cream cheese until smooth. Add remaining sugar, flour, and salt. Beat in eggs one at a time, then mix in sour cream and vanilla.
- Pour filling over crust in springform pan. Tap gently to release air bubbles. Place the springform pan in a larger roasting pan.
- Pour hot water into the roasting pan, halfway up the side of the springform.
- Bake for 60–70 minutes until edges are set and center slightly jiggles. Turn off oven, crack the door, and let cheesecake cool inside for 1 hour.
- Remove from oven, cool completely, then refrigerate for at least 6 hours or overnight.
- Top with fresh berries or whipped cream before serving. Slice with a warm knife for clean cuts.
Notes
- Always bring ingredients to room temperature before mixing.
- Do not overmix the batter to avoid incorporating too much air.
- Use a water bath for the smoothest texture and to prevent cracks.
- Chill overnight for the best flavor and consistency.
Nutrition
- Serving Size: 1 slice
- Calories: 450
- Sugar: 28g
- Sodium: 320mg
- Fat: 32g
- Saturated Fat: 18g
- Unsaturated Fat: 11g
- Trans Fat: 0g
- Carbohydrates: 35g
- Fiber: 0g
- Protein: 7g
- Cholesterol: 110mg
Keywords: Classic Cheesecake, Baked Cheesecake, Creamy Cheesecake, Graham Cracker Crust, Easy Cheesecake Recipe