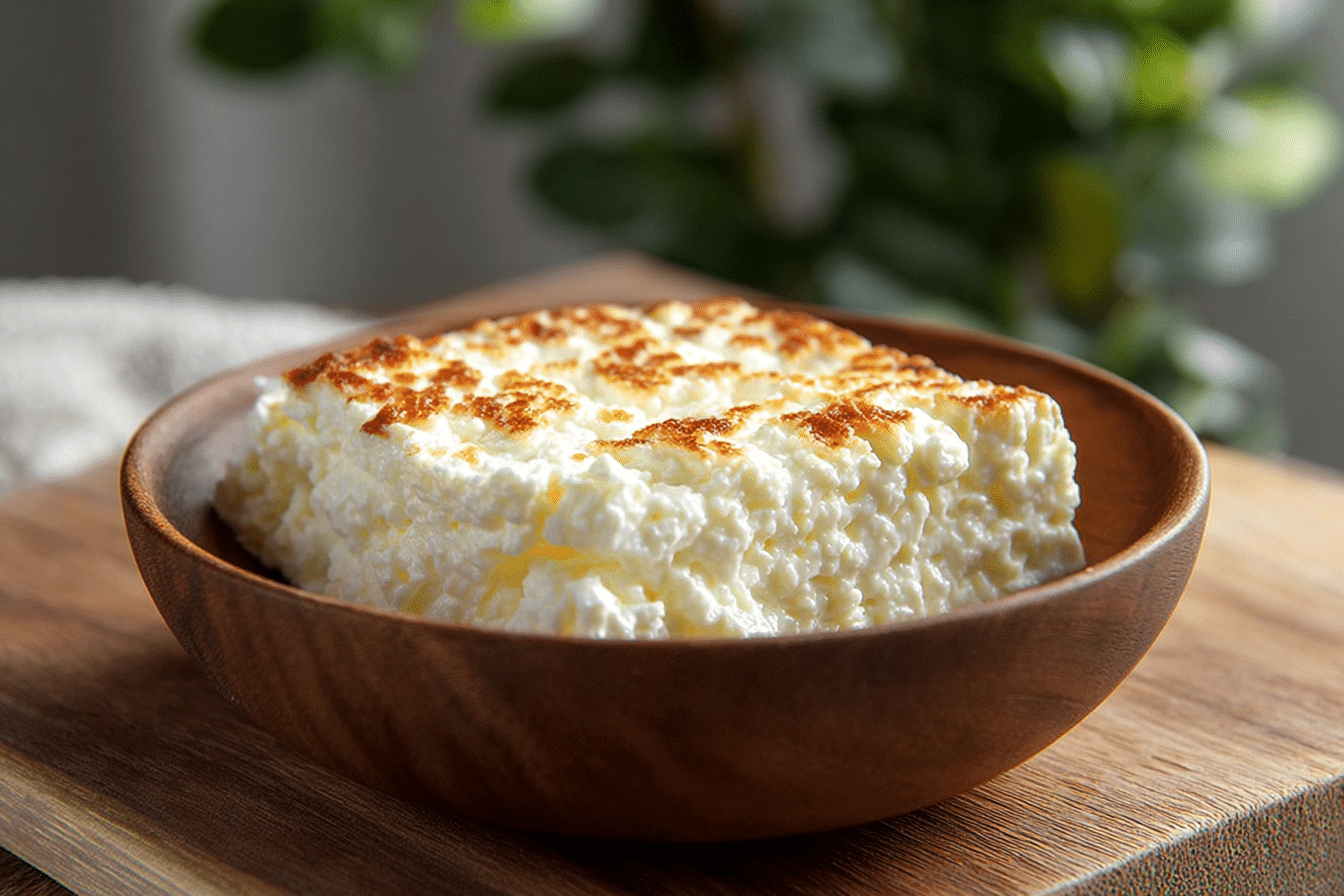
Homemade Cottage Cheese
There’s something magical about making your own cottage cheese. The moment those soft, milky curds begin to form, you know you’re about to taste something simple yet deeply satisfying. It’s a gentle, wholesome process that fills your kitchen with warmth and that unmistakable scent of fresh dairy. Whether you enjoy it by the spoonful or spread onto toast with a drizzle of honey, homemade cottage cheese brings comfort in every bite.
Behind the Recipe
I first made cottage cheese on a rainy Sunday, more out of curiosity than necessity. I had a jug of milk that needed using and a little time on my hands. What started as an experiment quickly became a favorite ritual. Watching milk transform with just lemon juice and a bit of patience was a small kitchen miracle. That experience taught me that some of the most nourishing recipes are also the simplest.
Recipe Origin or Trivia
Cottage cheese has been a staple across many cultures for centuries. Its name comes from early European cottages where people made soft cheeses at home from leftover milk after butter-making. In India, a similar version called paneer is widely used, while in Russia, it’s known as tvorog. This humble curd has traveled through history and kitchens alike, celebrated for its versatility and gentle flavor.
Why You’ll Love Homemade Cottage Cheese
Making your own cottage cheese is not just a recipe, it’s a little moment of calm and joy. Here’s why this one’s a total game-changer:
Versatile: Enjoy it sweet or savory, in salads, on toast, or blended into spreads.
Budget-Friendly: Made with basic ingredients, it’s far cheaper than store-bought.
Quick and Easy: Just a few simple steps and less than 30 minutes.
Customizable: Adjust the salt, curd size, or creaminess to your taste.
Crowd-Pleasing: Loved by kids and adults alike, especially when fresh.
Make-Ahead Friendly: Keeps well in the fridge for several days.
Great for Leftovers: Stir it into scrambled eggs or use in baked dishes.
Chef’s Pro Tips for Perfect Results
Want to get it just right? Here’s what I’ve learned from making this countless times:
- Use whole milk for the creamiest curds.
- Fresh lemon juice gives the best, clean flavor.
- Don’t over-stir after curds begin to form, or they’ll break down.
- Let it sit after curdling for firmer texture.
- Rinse the curds under cold water for a milder, cleaner taste.
Kitchen Tools You’ll Need
You won’t need anything fancy, just a few basics you likely already have.
Heavy-bottomed pot: Prevents the milk from scorching as it heats.
Thermometer: Helps you track the temperature for perfect curdling.
Wooden spoon: Gentle enough to stir without breaking the curds.
Cheesecloth or fine mesh strainer: To separate the curds from the whey.
Bowl: To collect the whey if you want to save it.
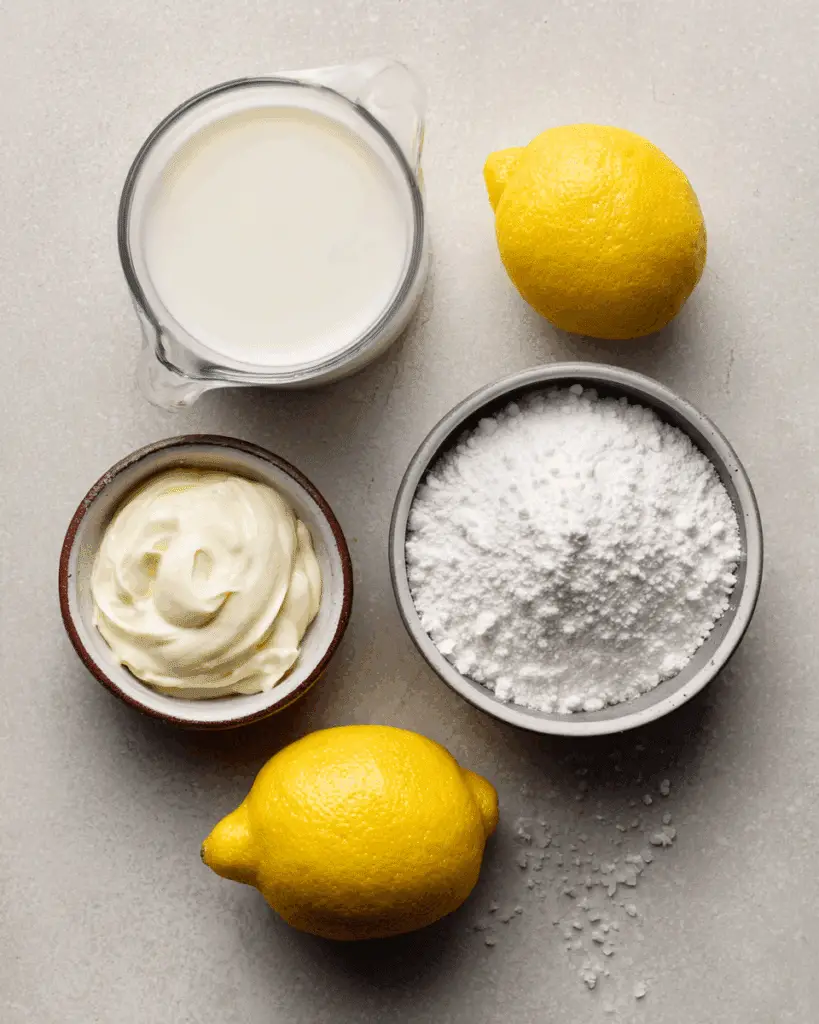
Ingredients in Homemade Cottage Cheese
There’s beauty in the simplicity of this recipe. Just a few humble ingredients come together to create something truly delightful.
- Whole Milk: 1 gallon
This is the base of your cottage cheese, providing the rich, creamy texture. - Lemon Juice or White Vinegar: 1/4 cup
This is what curdles the milk and forms the cheese. - Salt: 1 teaspoon
Enhances flavor and brings out the creamy goodness of the curds. - Heavy Cream (optional): 1/4 cup
Stir in after straining if you like it extra creamy and luxurious.
Ingredient Substitutions
No need to panic if you’re missing something. Here’s how to swap wisely:
Whole Milk: Use 2% milk, but expect slightly less creamy results.
Lemon Juice: White vinegar works just as well.
Heavy Cream: Add a splash of milk instead for a lighter finish.
Salt: Try sea salt or kosher salt for a slightly different flavor.
Ingredient Spotlight
Whole Milk: The higher fat content is what makes the curds rich and flavorful, giving you that authentic homemade taste.
Lemon Juice: Its acidity is gentle and natural, producing delicate curds and a fresh flavor profile.
Instructions for Making Homemade Cottage Cheese
Making this cottage cheese is as comforting as eating it. Here are the steps you’ll follow:
- Preheat Your Equipment:
Place your pot on the stove and get your thermometer ready. - Combine Ingredients:
Pour the milk into your pot and slowly heat it over medium heat to 190°F, stirring occasionally to prevent burning. - Prepare Your Cooking Vessel:
Once the milk reaches 190°F, turn off the heat. Slowly stir in the lemon juice or vinegar, then stop stirring. - Assemble the Dish:
Let the mixture sit undisturbed for 10 minutes. You’ll see the curds separate from the whey. - Cook to Perfection:
Gently scoop the curds into a cheesecloth-lined strainer and rinse them under cool water. Let drain for 5 to 10 minutes. - Finishing Touches:
Sprinkle in the salt and gently stir. Add the cream if using. - Serve and Enjoy:
Spoon into a bowl, chill if desired, and enjoy it fresh!
Texture & Flavor Secrets
Homemade cottage cheese has a soft, tender texture that’s both lumpy and creamy, just the way it should be. The curds are mild and slightly tangy, with a clean, fresh dairy flavor. Adding cream gives it that luscious, silky finish that coats your spoon.
Cooking Tips & Tricks
Here are a few helpful ideas to get the best outcome every time:
- Let the curds sit undisturbed after adding the acid to fully form.
- Don’t skip the rinse unless you want a more tangy flavor.
- Adjust salt after tasting, especially if adding cream.
What to Avoid
Even simple recipes can go sideways. Here’s what to watch out for:
- Overheating the milk, which leads to rubbery curds.
- Stirring too much after adding the acid, breaking curds apart.
- Not letting it rest long enough to separate fully.
- Skipping the rinse if you’re sensitive to acidity.
Nutrition Facts
Servings: 8
Calories per serving: 100
Note: These are approximate values.
Preparation Time
Prep Time: 5 minutes
Cook Time: 20 minutes
Total Time: 25 minutes
Make-Ahead and Storage Tips
You can make your cottage cheese up to 3 days in advance. Just store it in an airtight container in the fridge. Want to prep ahead? Strain the curds and keep the cream separate until ready to serve. This dish doesn’t freeze well, but it’s easy enough to make fresh whenever you need it. Reheat gently if using in warm recipes.
How to Serve Homemade Cottage Cheese
There are endless ways to enjoy it. Spread it on toast with a sprinkle of pepper, serve it alongside fruit and honey for breakfast, or mix it into savory pasta dishes. It pairs beautifully with fresh herbs, tomatoes, or even a spoonful of jam.
Creative Leftover Transformations
Got leftovers? Don’t let them sit idle.
- Blend into a creamy dip with herbs and garlic.
- Stir into pancake or waffle batter for a protein boost.
- Fold into scrambled eggs or omelets.
- Use in lasagna or stuffed shells as a ricotta alternative.
Additional Tips
- For firmer curds, let the mixture rest longer before straining.
- Try adding chopped chives or dill for a herby twist.
- Always use fresh milk for the cleanest flavor.
Make It a Showstopper
Serve it in a rustic ceramic bowl with a drizzle of olive oil and sprinkle of pink salt or paprika. Add edible flowers or fresh herbs for a pop of color. Trust me, it’ll turn heads.
Variations to Try
- Herbed Cottage Cheese: Stir in chopped parsley, chives, and thyme.
- Sweet Cottage Cheese: Add honey, vanilla, and a pinch of cinnamon.
- Spicy Kick: Mix in crushed red pepper or diced jalapeños.
- Garlic and Dill: Blend with minced garlic and fresh dill for a savory punch.
- Citrus Zest: Add lemon or orange zest for a bright, fresh twist.
FAQ’s
Q1: Can I use low-fat milk?
A1: Yes, but the curds will be smaller and less creamy.
Q2: How long does it last in the fridge?
A2: Up to 3 to 4 days if stored in an airtight container.
Q3: Is cottage cheese the same as ricotta?
A3: Not quite. Ricotta is smoother and finer, while cottage cheese has curds.
Q4: Can I freeze cottage cheese?
A4: It’s not recommended, as it alters the texture significantly.
Q5: Can I flavor it while cooking?
A5: It’s best to flavor after straining so the add-ins don’t interfere with curdling.
Q6: What’s the best milk to use?
A6: Whole milk gives the creamiest result, but 2% can work too.
Q7: What should I do with leftover whey?
A7: Use it in smoothies, baking, or soups for added protein and flavor.
Q8: Can I make it without a thermometer?
A8: Yes, just heat the milk until it steams and forms small bubbles around the edge.
Q9: Is lemon juice better than vinegar?
A9: Lemon juice gives a fresher taste, but both work well.
Q10: Can I make it vegan?
A10: Traditional cottage cheese is dairy-based, but tofu-based alternatives exist.
Conclusion
Homemade cottage cheese is one of those quietly rewarding recipes. It doesn’t shout or dazzle, but it wraps you in comfort and satisfaction. Each spoonful tells a story of patience and simplicity. So, next time you have a little milk and a little time, give it a try. Trust me, you’re going to love this.
Print
Homemade Cottage Cheese
- Prep Time: 5 minutes
- Cook Time: 20 minutes
- Total Time: 25 minutes
- Yield: 8 servings
- Category: Dairy
- Method: Stovetop
- Cuisine: Global
- Diet: Vegetarian
Description
Creamy, fresh, and delightfully simple, this Homemade Cottage Cheese is a wholesome dairy treat that’s perfect for sweet or savory dishes. With just a few ingredients and minimal effort, you’ll have a batch ready in under 30 minutes.
Ingredients
- Whole Milk: 1 gallon – Provides a rich and creamy base for the curds.
- Lemon Juice or White Vinegar: 1/4 cup – Acts as the acid to separate the curds from the whey.
- Salt: 1 teaspoon – Enhances the natural flavor of the cheese.
- Heavy Cream (optional): 1/4 cup – Adds a luxurious creaminess when stirred in after straining.
Instructions
- Preheat Your Equipment: Place a heavy-bottomed pot on the stove and get your thermometer ready.
- Combine Ingredients: Pour milk into the pot and heat slowly to 190°F, stirring occasionally.
- Prepare Your Cooking Vessel: Once at temperature, turn off the heat and gently stir in lemon juice or vinegar, then stop stirring.
- Assemble the Dish: Let it sit for 10 minutes to allow curds to form and separate from the whey.
- Cook to Perfection: Scoop curds into a cheesecloth-lined strainer and rinse under cold water, then drain for 5 to 10 minutes.
- Finishing Touches: Sprinkle with salt and stir gently. Add cream if using.
- Serve and Enjoy: Chill if desired and enjoy fresh.
Notes
- For firmer curds, allow longer resting time before straining.
- Adjust salt to taste, especially when adding cream.
- Use fresh milk for best results and flavor.
Nutrition
- Serving Size: 1/2 cup
- Calories: 100
- Sugar: 3g
- Sodium: 200mg
- Fat: 5g
- Saturated Fat: 3g
- Unsaturated Fat: 2g
- Trans Fat: 0g
- Carbohydrates: 4g
- Fiber: 0g
- Protein: 11g
- Cholesterol: 20mg
Keywords: homemade cottage cheese, fresh cheese, easy cheese recipe, dairy, creamy curds