The Only Mac and Cheese
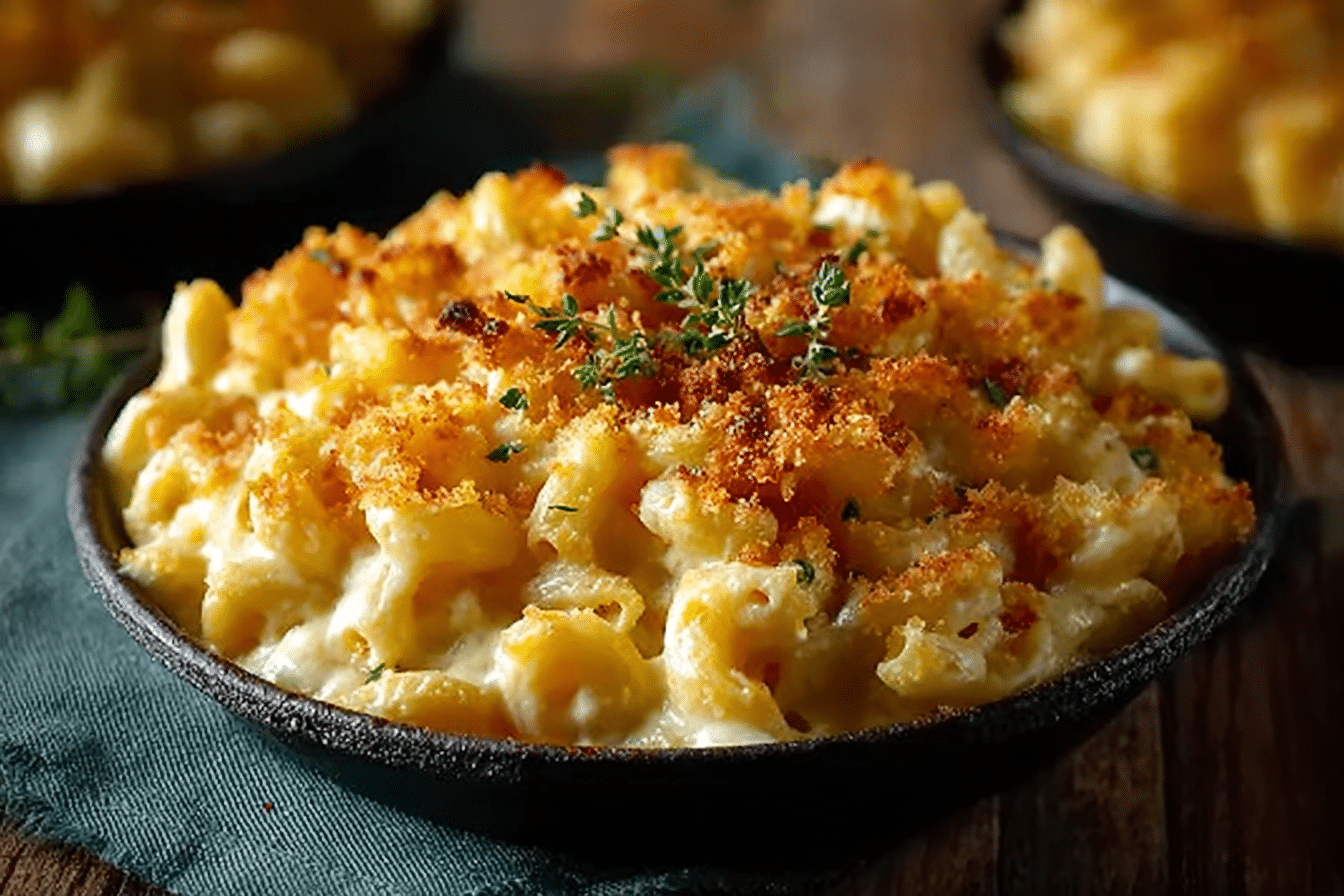
There’s something undeniably comforting about a bowl of mac and cheese — the way the creamy, velvety cheese sauce wraps around every tender bite of pasta, the golden crust forming just the right amount of crunch on top. Imagine pulling a bubbling dish straight from the oven, that first spoonful steaming, strings of gooey cheese stretching from the plate. Trust me, you’re going to love this. This one’s a total game-changer.
Behind the Recipe
Mac and cheese was the very first dish I ever learned to make from scratch. I remember being barely tall enough to see over the stove, my grandmother guiding my hands as we stirred the roux together. It became more than a recipe — it was a rite of passage, a dish I made through college cravings, first apartments, and now, for family gatherings. This version is my forever favorite, crafted over years with little tweaks and big love.
Recipe Origin or Trivia
Let’s take a step back into history for a moment. Mac and cheese has roots stretching back to 13th-century Italy, where pasta and cheese were paired in baked casseroles. In the United States, it was popularized by Thomas Jefferson after he encountered the dish in Paris and brought a pasta machine home. Eventually, it found its way into American kitchens, becoming a beloved staple during the Great Depression and evolving with every generation since.
Why You’ll Love The Only Mac and Cheese
There are plenty of mac and cheese recipes out there, but here’s why this one stands out:
Versatile: You can serve it as a side or make it the star of the meal with a salad or roasted veggies.
Budget-Friendly: Made with pantry staples and common cheeses, it’s a luxurious comfort that won’t break the bank.
Quick and Easy: No fancy tools, no complex techniques. Just good old-fashioned cooking.
Customizable: Add-ins like sautéed mushrooms, caramelized onions, or roasted garlic? Go for it.
Crowd-Pleasing: Whether it’s a potluck or a quiet night in, this dish always disappears fast.
Make-Ahead Friendly: Prepare the night before and bake just before serving for stress-free hosting.
Great for Leftovers: Reheats beautifully with a splash of milk or cream, making it just as delicious the next day.
Chef’s Pro Tips for Perfect Results
Making perfect mac and cheese is easier than you think with these insider secrets:
- Shred Your Own Cheese: Pre-shredded cheese contains anti-caking agents that can affect melting. Freshly shredded melts smoother and tastes richer.
- Don’t Skip the Roux: Cooking flour and butter together is the base of a stable, creamy sauce.
- Use Milk and Cream: A mix of whole milk and heavy cream gives the perfect balance of richness and silkiness.
- Season Every Layer: Salt your pasta water, season your roux, and taste your cheese sauce before baking.
- Let It Rest: After baking, let the dish sit for 5 minutes before serving. It helps everything set just right.
Kitchen Tools You’ll Need
Before we get cooking, here’s what you’ll want ready in your kitchen:
Large Pot: For boiling pasta.
Medium Saucepan: To make the cheese sauce.
Whisk: Essential for a smooth, lump-free roux.
9×13 Baking Dish: Ideal for even baking and that golden top.
Box Grater: For freshly shredding your cheese.
Measuring Cups and Spoons: Precision matters when building flavor.
Ingredients in The Only Mac and Cheese
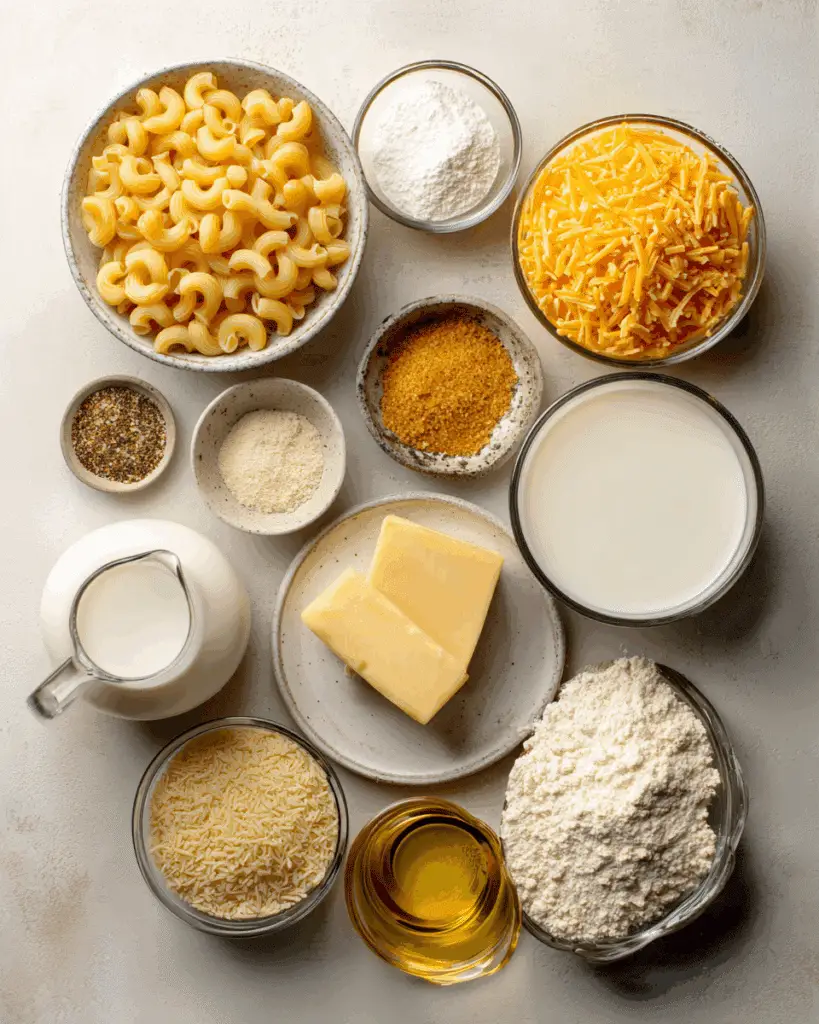
Every ingredient in this recipe plays a key role in building its signature flavor and texture. Here’s what you’ll need:
- Elbow Macaroni: 1 pound – the classic choice for holding all that creamy cheese in every curve.
- Butter: 6 tablespoons – the base for our roux, adding richness and depth.
- All-Purpose Flour: 1/4 cup – thickens the sauce to that perfect creamy consistency.
- Whole Milk: 2 cups – brings smoothness and helps carry the cheese flavor.
- Heavy Cream: 1 cup – adds luscious body and richness to the sauce.
- Sharp Cheddar Cheese: 3 cups, shredded – the star of the show with bold flavor and excellent melt.
- Gruyère Cheese: 1 cup, shredded – offers a nutty, complex note that deepens the sauce.
- Salt: 1 teaspoon – balances the richness and enhances all flavors.
- Black Pepper: 1/2 teaspoon – gives just a touch of warmth.
- Garlic Powder: 1/2 teaspoon – adds a subtle savory undertone.
- Mustard Powder: 1/2 teaspoon – brightens and sharpens the cheesy profile.
- Panko Breadcrumbs: 3/4 cup – for a crunchy topping contrast.
- Olive Oil or Melted Butter: 2 tablespoons – tossed with breadcrumbs to help them crisp up beautifully.
Ingredient Substitutions
Sometimes you’ve got to work with what you’ve got. Here are a few easy swaps:
Elbow Macaroni: Shells or cavatappi.
Gruyère Cheese: Fontina or Monterey Jack.
Heavy Cream: Use half-and-half or just more whole milk.
Panko Breadcrumbs: Crushed crackers or regular breadcrumbs.
Mustard Powder: A teaspoon of Dijon mustard.
Ingredient Spotlight
Sharp Cheddar Cheese: This is the core flavor base. Its sharpness cuts through the richness for a bold, satisfying bite.
Gruyère Cheese: Adds a mellow nuttiness and luxurious melt that takes this dish from good to unforgettable.
Instructions for Making The Only Mac and Cheese
Get ready for a creamy, cheesy masterpiece! Here’s exactly how to make it happen:
- Preheat Your Equipment:
Preheat your oven to 375°F (190°C). Grease your baking dish with a bit of butter or nonstick spray. - Combine Ingredients:
In a large pot, cook the pasta in salted boiling water until just shy of al dente. Drain and set aside. - Prepare Your Cooking Vessel:
While the pasta cooks, melt butter in a saucepan over medium heat. Whisk in flour and cook, whisking constantly, for 1-2 minutes. - Assemble the Dish:
Slowly whisk in milk and cream. Let the mixture simmer until thickened, then stir in the seasonings. Remove from heat and fold in shredded cheeses until melted. Combine with pasta and stir to coat evenly. - Cook to Perfection:
Pour the mac and cheese into the baking dish. Mix breadcrumbs with olive oil and sprinkle evenly on top. - Finishing Touches:
Bake uncovered for 20–25 minutes until the top is golden and bubbling. - Serve and Enjoy:
Let it sit for 5 minutes before serving. Watch the cheese pull as you scoop — worth every bite.
Texture & Flavor Secrets
What makes this version unforgettable is its balance. The sauce is creamy yet structured, coating each noodle without becoming soupy. Sharp cheddar gives it a tangy bite, while Gruyère lends a velvety melt. The contrast between the silky sauce and the crispy topping creates a bite that’s as exciting as it is comforting.
Cooking Tips & Tricks
Here’s how to ensure your mac and cheese always shines:
- Use room temperature milk and cream to prevent curdling.
- Stir cheese in off-heat to avoid graininess.
- Add a dash of hot sauce or paprika for subtle heat.
- Mix pasta and sauce while still hot for the best coating.
What to Avoid
Even the best intentions can go sideways — here’s how to stay on track:
- Avoid overcooking pasta: It will keep cooking in the oven.
- Don’t rush the roux: Let it cook long enough to lose the raw flour taste.
- Skip pre-shredded cheese: It melts unevenly and can clump.
- Don’t under-season: Cheese needs salt and spice to shine.
Nutrition Facts
Servings: 8
Calories per serving: 520
Note: These are approximate values.
Preparation Time
Prep Time: 20 minutes
Cook Time: 25 minutes
Total Time: 45 minutes
Make-Ahead and Storage Tips
You can prep this dish the night before — just assemble everything except the topping and store covered in the fridge. When ready to bake, let it sit at room temperature while the oven preheats, then add breadcrumbs and bake. Leftovers keep well in the fridge for 3 days and freeze for up to 2 months. Reheat gently with a splash of milk to revive creaminess.
How to Serve The Only Mac and Cheese
Serve it as the main event with a crisp green salad and roasted broccoli, or let it shine beside baked chicken or BBQ tofu. It also makes an indulgent brunch dish with a poached egg on top.
Creative Leftover Transformations
Turn yesterday’s mac into today’s star:
- Mac and Cheese Bites: Form into balls, coat in breadcrumbs, and air-fry or bake until crisp.
- Cheesy Casserole Base: Layer with sautéed veggies and bake for a new twist.
- Stuffed Peppers: Fill bell peppers and bake until tender.
Additional Tips
- Let cheese come to room temperature for smoother melting.
- For extra golden crust, broil the top for 1–2 minutes after baking.
- Add a pinch of nutmeg for a subtle warm note.
Make It a Showstopper
Garnish with chopped chives or parsley for color. Serve in a cast-iron skillet for rustic charm or ramekins for individual servings. A drizzle of truffle oil before serving elevates the flavor to gourmet status.
Variations to Try
- Smoky Version: Use smoked gouda in place of Gruyère.
- Spicy Kick: Add diced jalapeños or a teaspoon of cayenne.
- Herb-Infused: Mix in fresh thyme or rosemary with the cheese sauce.
- Loaded Veggie: Stir in roasted cauliflower or sautéed spinach.
- Crunch Supreme: Mix crushed garlic croutons into your topping.
FAQ’s
Q1: Can I make this gluten-free?
Yes, use gluten-free pasta and substitute flour with a 1:1 gluten-free blend.
Q2: Can I use non-dairy milk?
Yes, but choose creamy options like oat or cashew for best texture.
Q3: Do I have to bake it?
No, it’s delicious straight from the stovetop too.
Q4: Can I add protein?
Absolutely — try cooked lentils or grilled chicken for a full meal.
Q5: Why is my cheese sauce grainy?
It’s likely overheated or the cheese was added on high heat. Stir off-heat for best results.
Q6: What pasta shape works best?
Elbow, shells, or cavatappi — anything with curves to catch the sauce.
Q7: Can I use low-fat milk?
You can, but the sauce won’t be as rich and creamy.
Q8: How can I make it spicier?
Add cayenne, paprika, or a splash of hot sauce to the cheese sauce.
Q9: Is it freezer-friendly?
Yes, freeze before baking or store leftovers in an airtight container.
Q10: Can I make it ahead?
Definitely. Assemble and refrigerate, then bake fresh the next day.
Conclusion
There’s mac and cheese, and then there’s The Only Mac and Cheese. Creamy, crispy, nostalgic, and endlessly comforting — it’s a dish that wraps you in warmth with every bite. Whether you’re cooking for guests or indulging in a cozy night in, this recipe is your new forever favorite. Let me tell you, it’s worth every bite.
Print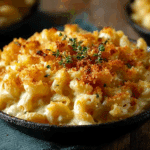
The Only Mac and Cheese
- Prep Time: 20 minutes
- Cook Time: 25 minutes
- Total Time: 45 minutes
- Yield: 8 servings 1x
- Category: Main Dish
- Method: Baking
- Cuisine: American
- Diet: Vegetarian
Description
Creamy, cheesy, and topped with a golden crunch, The Only Mac and Cheese is your go-to comfort dish that’s as satisfying as it is simple to make.
Ingredients
- 1 pound Elbow Macaroni
- 6 tablespoons Butter
- 1/4 cup All-Purpose Flour
- 2 cups Whole Milk
- 1 cup Heavy Cream
- 3 cups Sharp Cheddar Cheese, shredded
- 1 cup Gruyère Cheese, shredded
- 1 teaspoon Salt
- 1/2 teaspoon Black Pepper
- 1/2 teaspoon Garlic Powder
- 1/2 teaspoon Mustard Powder
- 3/4 cup Panko Breadcrumbs
- 2 tablespoons Olive Oil or Melted Butter
Instructions
- Preheat your oven to 375°F (190°C). Grease a 9×13 baking dish with butter or nonstick spray.
- Cook pasta in salted boiling water until just shy of al dente. Drain and set aside.
- Melt butter in a saucepan over medium heat. Whisk in flour and cook for 1–2 minutes.
- Gradually whisk in milk and cream. Let simmer until thickened. Stir in salt, pepper, garlic powder, and mustard powder.
- Remove from heat and mix in shredded cheddar and Gruyère until melted.
- Combine cheese sauce with cooked pasta. Stir to coat evenly.
- Pour into baking dish. Toss breadcrumbs with olive oil and sprinkle on top.
- Bake uncovered for 20–25 minutes until golden and bubbling. Let sit for 5 minutes before serving.
Notes
- Shred your own cheese for best melt.
- Add a splash of milk when reheating leftovers.
- Customize with spices, herbs, or veggie mix-ins.
- Broil for 1–2 minutes for an extra crispy top.
Nutrition
- Serving Size: 1 serving
- Calories: 520
- Sugar: 4g
- Sodium: 520mg
- Fat: 30g
- Saturated Fat: 17g
- Unsaturated Fat: 11g
- Trans Fat: 0g
- Carbohydrates: 43g
- Fiber: 2g
- Protein: 18g
- Cholesterol: 85mg
Keywords: mac and cheese, baked mac and cheese, comfort food, cheese pasta, easy mac and cheese

