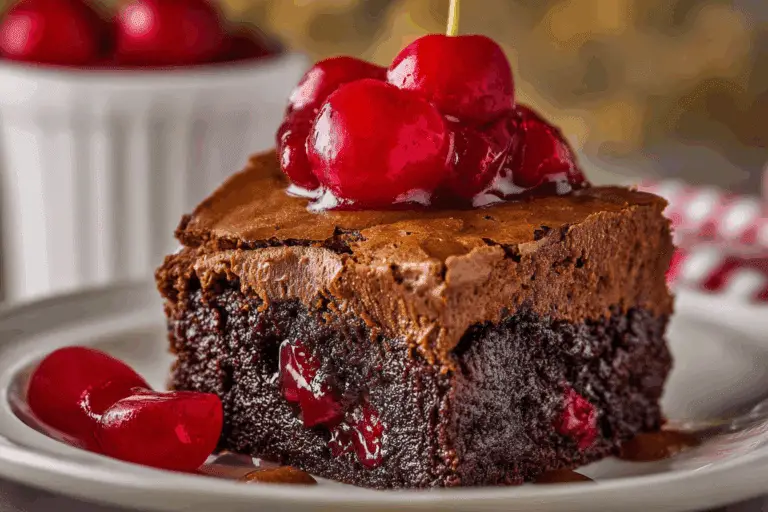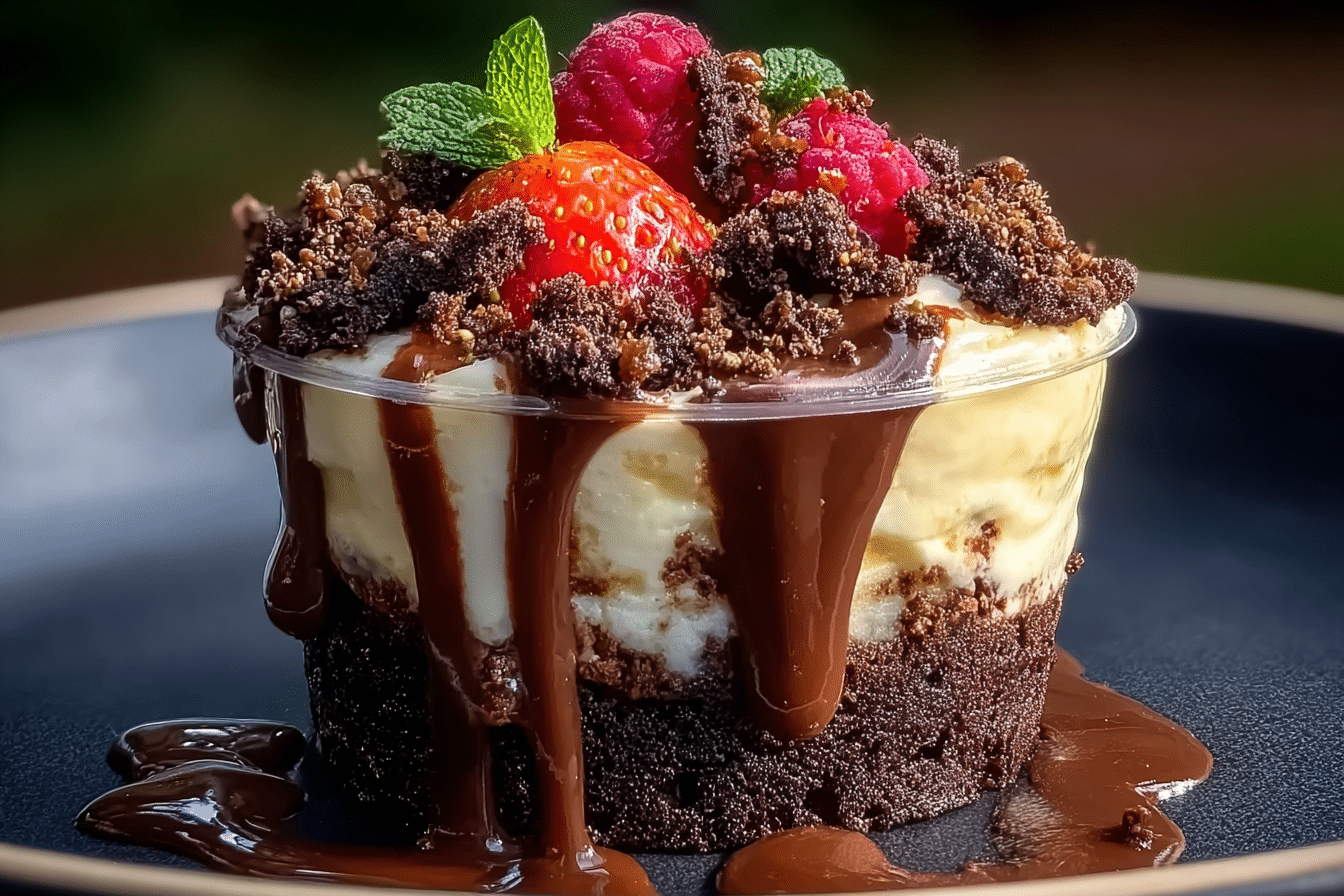
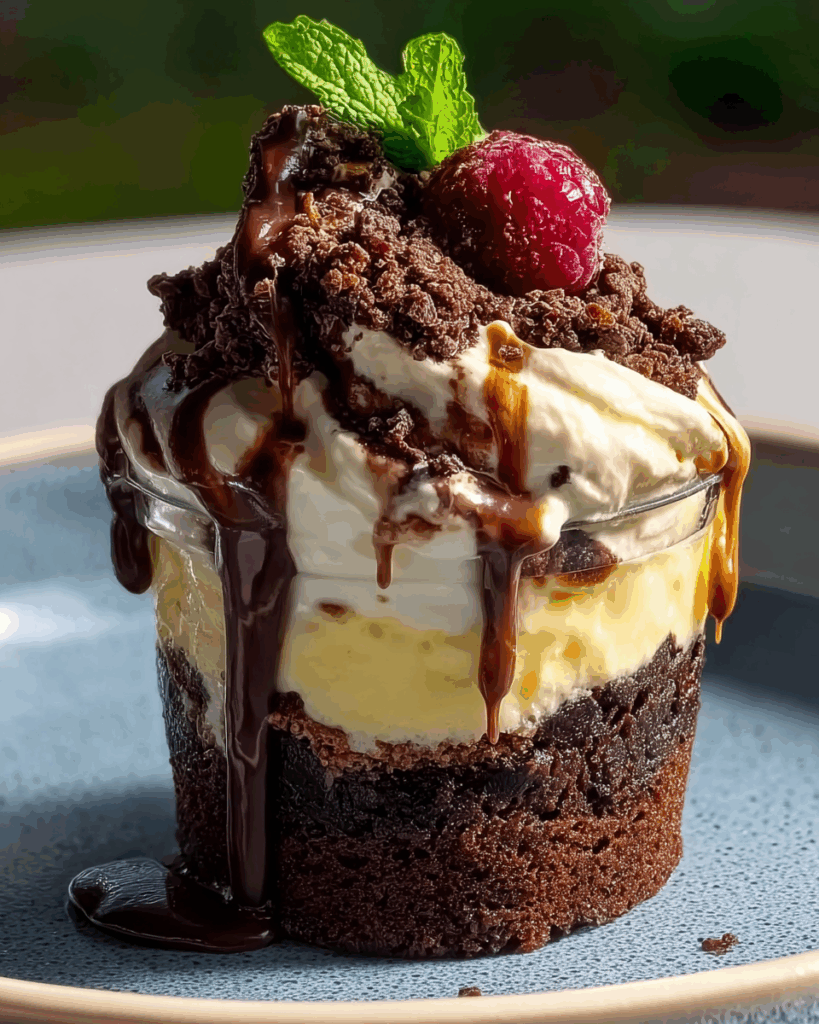
Loaded Brownie Cheesecake Cup
Get ready to fall head over spoon for the dessert that does it all. The Loaded Brownie Cheesecake Cup is what happens when fudgy brownie, creamy cheesecake, and irresistible toppings come together in one decadent, over-the-top treat. We’re talking layers of gooey, rich chocolate paired with silky smooth cheesecake, all nestled into a perfect personal-sized cup. It’s indulgent, it’s satisfying, and it’s everything your sweet tooth could ever ask for. Trust me, this one’s a keeper like “hide the extras in the back of the fridge” good.
Why You’ll Love Loaded Brownie Cheesecake Cup
This recipe isn’t just about the ingredients it’s about creating moments. Whether you’re cooking for a casual family dinner, hosting a get-together with friends, or simply indulging in some comforting flavors for yourself, this dish is versatile enough to fit the occasion. Here’s why it’s a favorite:
Versatile: Works for birthday parties, date nights, or just those “treat yourself” moments.
Budget-Friendly: Made with common pantry ingredients and no fancy equipment needed.
Quick and Easy: Minimal prep time and baked in individual portions perfect for stress-free serving.
Customizable: Switch up the toppings or brownie base to suit your cravings.
Crowd-Pleasing: A guaranteed hit with both kids and adults. It’s always a win when a single dish can satisfy everyone at the table. This recipe strikes the perfect balance of flavor and comfort, making it a universal favorite.
Ingredients in Loaded Brownie Cheesecake Cup
There’s a whole lot of magic packed into these cups, and it all starts with the layers. Here’s what goes into each unforgettable bite:
Brownie Base: Fudgy, chewy, and deeply chocolatey this is the solid foundation of the cup.
Cream Cheese: The heart of the cheesecake layer, bringing smoothness and a slight tang to balance the sweetness.
Sugar: To sweeten both the brownie and cheesecake layers just right.
Egg: Helps bind the cheesecake mixture and create that silky texture.
Vanilla Extract: Adds a warm, cozy flavor to both layers.
Chocolate Chips: Melted into the brownie or sprinkled on top for extra gooey goodness.
Whipped Cream: Optional, but highly recommended for serving.
Toppings: Think crushed cookies, chocolate drizzle, caramel sauce, or even a cherry on top go wild!
(Note: the full ingredients list, including measurements, is provided in the recipe card directly below.)
Instructions
Let’s dive into the steps to create this flavorful masterpiece:
Preheat Your Equipment: Preheat your oven to 350°F (175°C) and line a muffin pan with cupcake liners for easy removal and cleanup.
Combine Ingredients: Prepare your brownie batter and cheesecake mixture separately. Mix brownie ingredients until smooth, and whisk together cream cheese, sugar, egg, and vanilla until creamy.
Prepare Your Cooking Vessel: Line or grease the muffin tin. This helps the cups release easily and keeps everything tidy.
Assemble the Dish: Spoon a layer of brownie batter into each cup, followed by a layer of the cheesecake mixture. Swirl lightly if you want a marbled effect or keep them layered.
Cook to Perfection: Bake for 20–25 minutes, or until the cheesecake is set and the brownie edges are slightly firm. A gentle jiggle in the center is okay it’ll set as it cools.
Finishing Touches: Let the cups cool in the pan, then transfer to the fridge for at least 1–2 hours to chill and set fully.
Serve and Enjoy: Top with whipped cream, chocolate sauce, crushed cookies, or whatever makes your heart happy, then dig in!
Nutrition Facts
Servings: 12
Calories per serving: 320
(put them as notes)
Preparation Time
Prep Time: 15 minutes
Cook Time: 25 minutes
Total Time: 40 minutes
How to Serve Loaded Brownie Cheesecake Cup
This dish pairs wonderfully with various sides and accompaniments. Here are a few serving suggestions to enhance your dining experience:
Serve chilled straight from the fridge with a tall glass of milk or an espresso shot.
Add a scoop of vanilla or cookie dough ice cream for the ultimate dessert mash-up.
Top with fresh berries or a drizzle of raspberry sauce for a fruity twist.
Pack them into a dessert box as edible gifts they travel beautifully!
Additional Tips
Here are some extra tips to help you get the most out of this recipe:
Use room temperature cream cheese for the smoothest cheesecake texture.
Don’t overbake slightly jiggly centers mean creamy cheesecake!
Let the cups chill completely before removing from liners for the cleanest presentation.
Try using a brownie mix for a time-saving shortcut.
Add espresso powder to the brownie layer to intensify the chocolate flavor.
Want a gluten-free version? Just use a gluten-free brownie base!
Use silicone muffin cups for easy release and perfect shape every time.
Double the batch and freeze leftovers they thaw beautifully.
Sprinkle sea salt on top before baking for a sweet-salty twist.
Get creative with toppings: chopped candy bars, toffee bits, or mini marshmallows are all fair game.
FAQs
1. Can I make these ahead of time?
Absolutely! These cups are even better after chilling. Make them a day in advance and store in the fridge.
2. Can I freeze them?
Yes! Wrap each cup tightly and freeze for up to 2 months. Thaw overnight in the fridge before serving.
3. Do I have to use a brownie mix?
Nope. You can use your favorite homemade brownie recipe or a box mix whatever works for you.
4. Can I add fruit to the cheesecake layer?
Sure! A swirl of raspberry jam or chopped strawberries adds a nice fruity contrast.
5. How do I know when they’re done baking?
The edges should be set and the centers slightly jiggly. They’ll firm up as they cool.
6. Can I use a mini muffin tin instead?
Yes! Just reduce the bake time by about 5–7 minutes and keep an eye on them.
7. What’s the best way to get smooth cheesecake filling?
Use softened cream cheese and mix until completely smooth with no lumps.
8. Can I make this in a pan instead of cups?
Definitely. Use an 8×8-inch pan and layer the brownie and cheesecake as directed. Slice into bars after chilling.
9. What kind of toppings work best?
Crushed Oreos, chocolate ganache, caramel drizzle, or chopped nuts are all delicious options.
10. How long will they keep in the fridge?
Up to 5 days in an airtight container if they last that long!
Conclusion
Loaded Brownie Cheesecake Cups are a triple threat of dessert glory: rich, creamy, and totally crave-worthy. Whether you’re looking to impress guests or just want to treat yourself to something special, these little cups pack big flavor in every bite. And the best part? They’re super easy to whip up with endless ways to make them your own. So go ahead grab a spoon, dive in, and get ready for your new favorite dessert obsession.
Print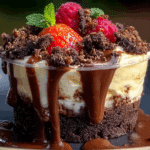
Loaded Brownie Cheesecake Cup
- Prep Time: 15 minutes
- Cook Time: 25 minutes
- Total Time: 40 minutes plus chilling
- Yield: 12 cups 1x
- Category: Dessert
- Method: Baking
- Cuisine: American
- Diet: Vegetarian
Description
Loaded Brownie Cheesecake Cups are the ultimate indulgent treat! Featuring a fudgy brownie base, a rich and creamy cheesecake layer, and a topping of chocolate chips, caramel, and crushed cookies—these single-serve desserts are perfect for parties, holidays, or whenever you’re craving something extra decadent.
Ingredients
- 1 box brownie mix (plus ingredients listed on box)
- 8 oz cream cheese, softened
- 1/4 cup granulated sugar
- 1 large egg
- 1/2 tsp vanilla extract
- 1/4 cup mini chocolate chips
- 2 tbsp caramel sauce
- 2 tbsp crushed Oreo cookies or chocolate sandwich cookies
- Butter or nonstick spray for greasing
Instructions
- Preheat oven to 350°F (175°C). Grease a muffin tin or line with cupcake liners.
- Prepare brownie batter according to box instructions.
- Scoop 1 to 2 tablespoons of brownie batter into each muffin cup, filling them about halfway.
- In a separate bowl, beat cream cheese, sugar, egg, and vanilla until smooth and creamy.
- Spoon a dollop of cheesecake mixture over the brownie layer in each cup.
- Top each with a sprinkle of mini chocolate chips, a drizzle of caramel sauce, and crushed cookies.
- Bake for 20–25 minutes, or until the cheesecake is set and edges are slightly golden.
- Let cool completely in the pan, then chill in the refrigerator for at least 1 hour before serving.
Notes
- Use a mini muffin tin for bite-sized treats or a standard one for larger portions.
- Customize toppings with chopped nuts, toffee bits, or sprinkles.
- Best served chilled, but also delicious slightly warm with ice cream.
Nutrition
- Serving Size: 1 cup
- Calories: 320
- Sugar: 25g
- Sodium: 190mg
- Fat: 18g
- Saturated Fat: 10g
- Unsaturated Fat: 6g
- Trans Fat: 0g
- Carbohydrates: 36g
- Fiber: 1g
- Protein: 4g
- Cholesterol: 45mg
Keywords: brownie cheesecake cup, loaded dessert cup, mini brownie cheesecake, single-serve cheesecake, party dessert